¶ Brief Overview
Bridging is the process of printing a horizontal span of filament across an open gap between two points without the use of support material. Mastering this technique is essential for printing complex models efficiently, as it reduces material waste and post-processing time. This guide details how to identify and solve common bridging problems to achieve clean, straight bridges with your Vision Miner 22IDEX.
¶ Common Bridging Problems and Solutions
Even with a high-performance printer, achieving perfect bridges requires fine-tuning. Here are the most common issues and how to resolve them.
¶ 1. Sagging or Drooping Strands
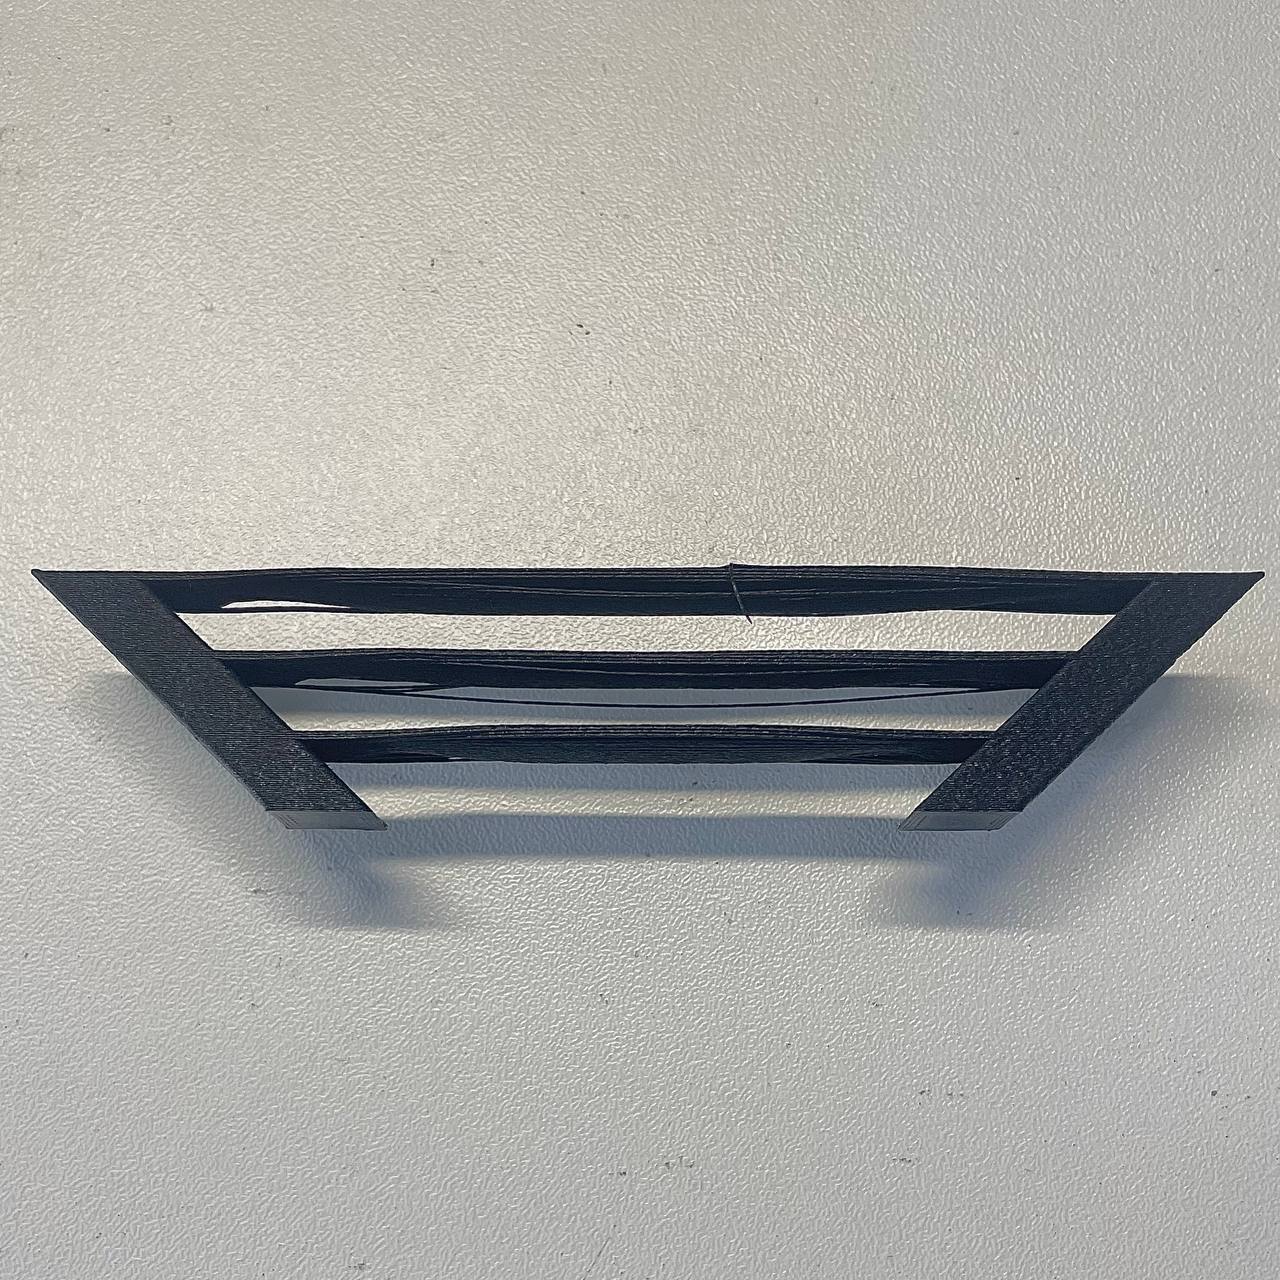
This is the most frequent bridging issue, where the extruded lines hang downwards instead of forming a straight path.
- Cause: The filament is not cooling fast enough, remaining too molten to hold its shape under gravity. This can be due to excessive printing temperature, insufficient fan speed, or printing too slowly.
- Solution:
- Increase Cooling: Ensure the "Bridging Fan Speed" in your slicer is set to
100%. Proper cooling is the single most important factor for good bridges. - Lower Nozzle Temperature: Reduce the printing temperature in
5°Cincrements. A cooler filament will solidify much faster. Find the lowest temperature your material can reliably extrude at. - Adjust Print Speed: While counterintuitive, sometimes a faster bridging speed can help by stretching the filament taut across the gap. Conversely, if the filament breaks, a slower speed may be needed. This parameter often requires experimentation.
- Increase Cooling: Ensure the "Bridging Fan Speed" in your slicer is set to
¶ 2. Broken or Incomplete Bridge Layers
The initial bridge lines fail to connect, resulting in a broken or non-existent surface.
- Cause: The filament is being stretched too thin, often due to a low extrusion rate (flow) or a bridging speed that is too high for the material to adhere properly.
- Solution:
- Calibrate Bridging Flow: Increase the "Bridging Flow" or "Extrusion Multiplier" setting slightly. This will push out more material, creating a thicker, more robust strand.
- Reduce Bridging Speed: Slowing down gives the filament more time to anchor itself on both sides of the gap before the print head moves across.
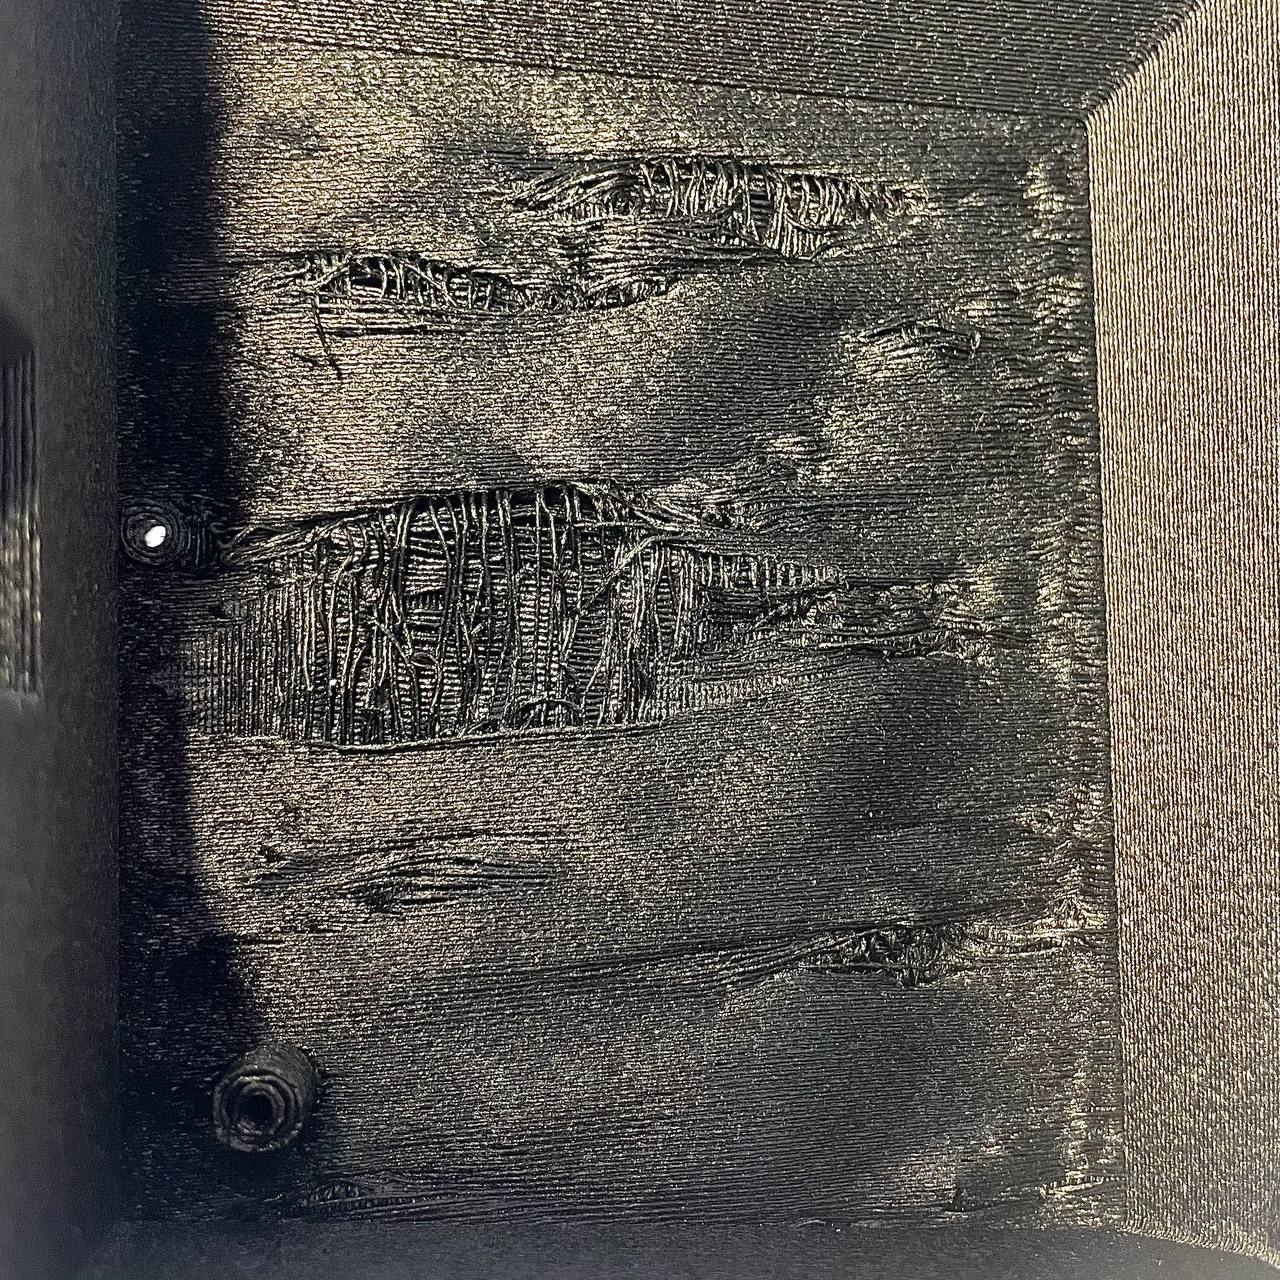
¶ 3. Rough Surface on Top of Bridges
The layers printed on top of the initial bridge layer are messy or uneven.
- Cause: The foundation layer of the bridge was not solid enough, providing a poor base for subsequent layers.
- Solution: Most modern slicers have a setting for "Thick Bridges" or allow you to specify several layers of dense bridging infill. Enabling this creates a more solid foundation before the printer resumes its normal infill pattern.
¶ Key Slicer Settings for Optimal Bridging
Fine-tune these parameters in your slicer software for the best results. The exact names may vary between slicers (e.g., PrusaSlicer, Cura, Simplify3D).
| Parameter | Recommended | Value Purpose |
|---|---|---|
| Bridge Fan Speed | 100% |
Maximizes cooling to solidify the filament instantly. |
| Bridge Print Speed | 20-50 mm/s (Varies) |
Controls how fast the nozzle moves across the gap. Requires testing. |
| Bridge Flow Ratio | 0.5-1.0 (Varies) |
Adjusts the amount of filament extruded for bridges. |
| Thick Bridges | Enabled or 2-3 layers |
Prints multiple dense layers for a solid bridge surface. |
| Bridge Anchor | 2-5 mm (If available) |
Sets the amount the bridge overlaps with the "shore" for better adhesion. |
Warning: While
100%fan speed is ideal for bridging with materials like PLA and PETG, it can cause layer adhesion issues or warping with materials like ABS or ASA. For these materials, use the highest fan speed possible without compromising the overall print integrity.
¶ Testing and Calibration
The best way to dial in your settings is to use a dedicated calibration print. These models allow you to test bridges of varying lengths quickly.
- Download a Test Model: Search for "bridging test" on platforms like Printables or Thingiverse.
- Slice and Print: Use your baseline settings and print the test model.
- Analyze the Results: Observe which bridge lengths succeed and which fail. Look for sagging, clean lines, and solid surfaces.
- Adjust and Repeat: Tweak one setting at a time (e.g., lower the temperature by
5°C) and reprint the test. Repeat this process until you achieve clean bridges across the desired lengths.
¶ Conclusion & Additional Resources
Perfecting bridging is a process of balancing temperature, speed, and cooling. By methodically testing and adjusting your slicer settings, you can print complex models with sharp, clean horizontal features, saving both time and material.
If you continue to experience issues after following these steps, please contact our support team for further assistance.