¶ Brief Overview
This guide provides step-by-step instructions for replacing the bed heater element on your Vision Miner 22IDEX 3D printer. The bed heater is essential for print adhesion and successfully printing various materials. This procedure involves working with electrical components and requires careful handling of the print bed assembly.
¶ Introduction
The print bed heater ensures the build surface reaches and maintains the optimal temperature required for different filaments, promoting first layer adhesion and reducing warping. If your bed heater fails, heats unevenly, or is damaged, it will need replacement. This guide will walk you through the process safely.
Safety is paramount for this procedure due to electrical connections. Ensure the printer is completely powered off and disconnected from the mains supply before starting.
¶ Tools & Materials
- Replacement Bed Heater
- PH2 Phillips Screwdriver
- 5.5 mm Wrench
- Flathead Screwdriver (For electrical terminal screws)
- Small Flathead Screwdriver (or a thin, non-conductive prying tool for releasing cable chain tabs)
- Wire Cutters
- New Zip Ties
- Protective Gloves (Especially for handling insulation and the bed assembly)
¶ Safety & Pre-checks
DANGER - Electrical Hazard: ALWAYS power OFF the printer and physically UNPLUG it from the mains power outlet before accessing any wiring or starting disassembly. Failure to do so can result in severe electrical shock or damage.
Warning: Allow the print bed and any associated components to cool down completely to room temperature before handling them to avoid burns.
Caution: Before disconnecting any electrical wires, carefully note their exact positions on the terminals (Relay, Distribution Block). Taking clear photographs of the connections is highly recommended. Incorrect re-wiring can lead to component damage or safety hazards.
Caution: The print bed assembly can be somewhat heavy and awkward to handle. Plan its removal and have a safe place to set it down if removing it completely from the printer.
- Confirm the printer is powered off and unplugged.
- Ensure the print bed is completely cool.
- Wear protective gloves, especially when handling the mineral wool insulation and the bed assembly.
- Gather all necessary tools and the new replacement bed heater.
¶ Step-by-Step Instructions
¶ 1. Preparation
- Position Bed for Access: Using the printer's controls, move the print bed to its highest Z position. This provides better initial access to the wiring and cable chains underneath.
- Cool Down: Confirm the print bed is at room temperature.
- Verify Power Off: Ensure the printer is switched off AND unplugged from the mains power source.
- Gather Supplies: Have all your tools, the new bed heater, new zip ties, and protective gloves ready.
¶ 2. Disconnecting the Old Bed Heater
¶ 2.1 Electrical Disconnection
- Access the printer's rear electrical compartment where the bed heater wires connect.
- Using Wire Cutters, carefully snip any zip ties that are bundling or securing the bed heater's power cables.

- Identify and Document Connections: Locate the bed heater power cables. Trace them to the Solid State Relay (SSR) and the Power Distribution Block/Terminal Block. (CRITICAL STEP) Take clear photographs or draw a detailed diagram of exactly which terminals these wires are connected to. Note any wire colors or markings.
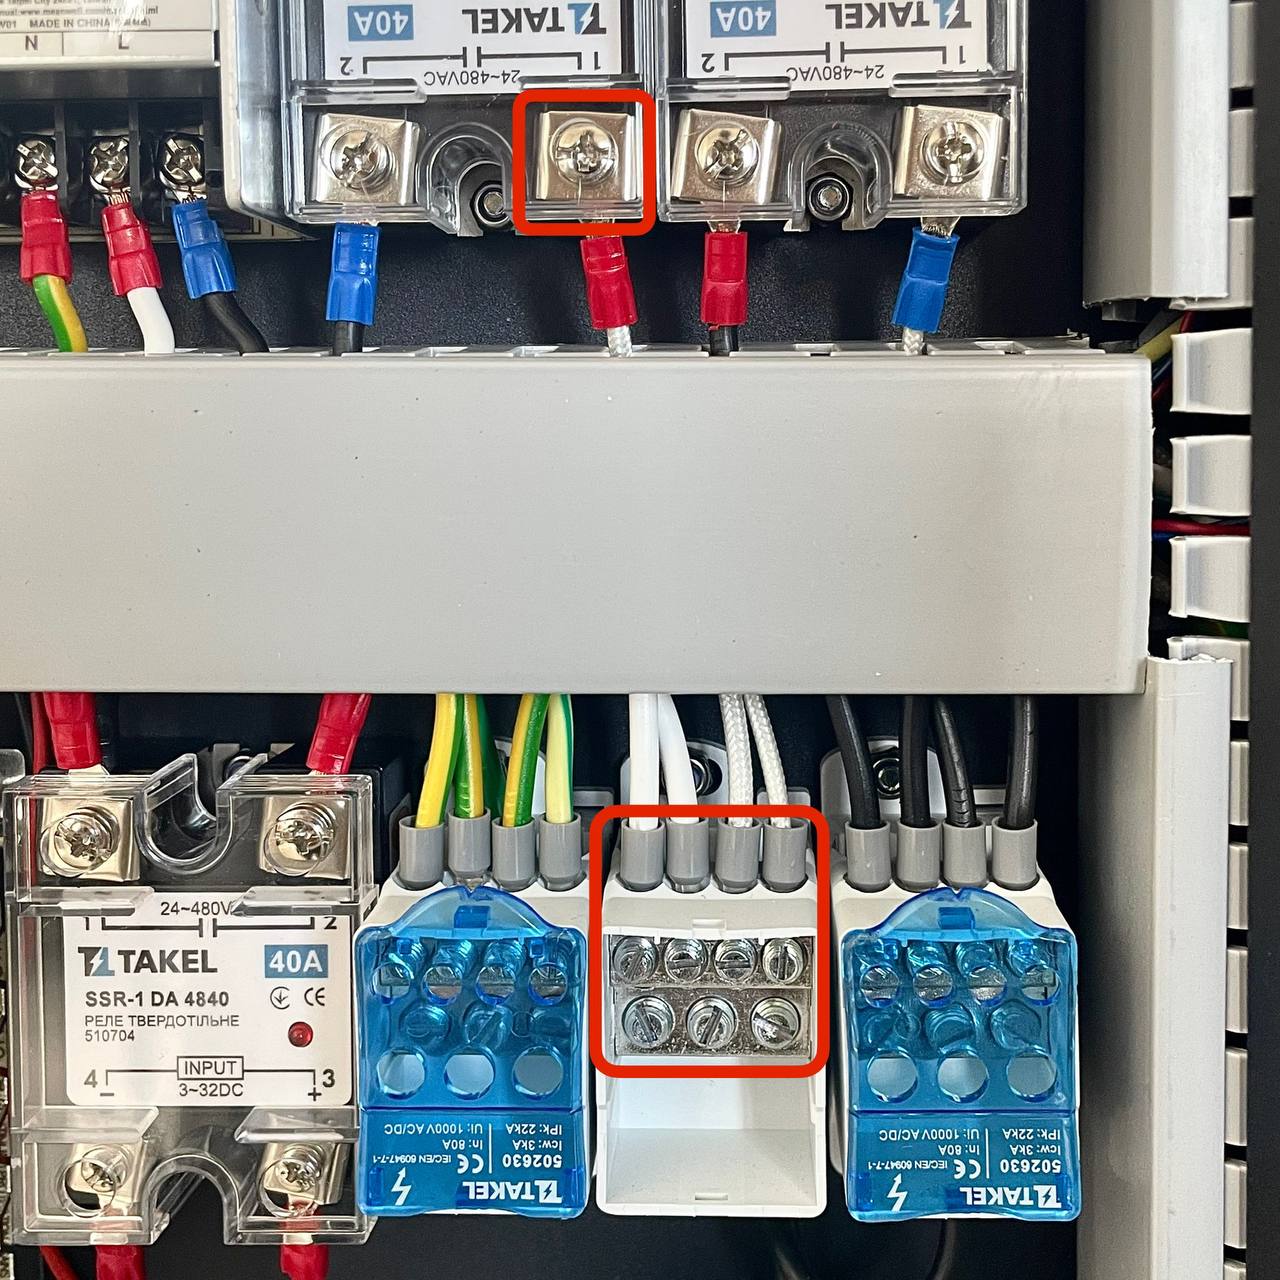
- Using the appropriate Flathead Screwdriver, carefully loosen the terminal screws and disconnect the bed heater wires from both the Relay and the Distribution Block.
¶ 2.2 Cable Chain and Wire Removal
- Locate the flexible cable chain that guide the bed heater wires from the bed to the printer frame.
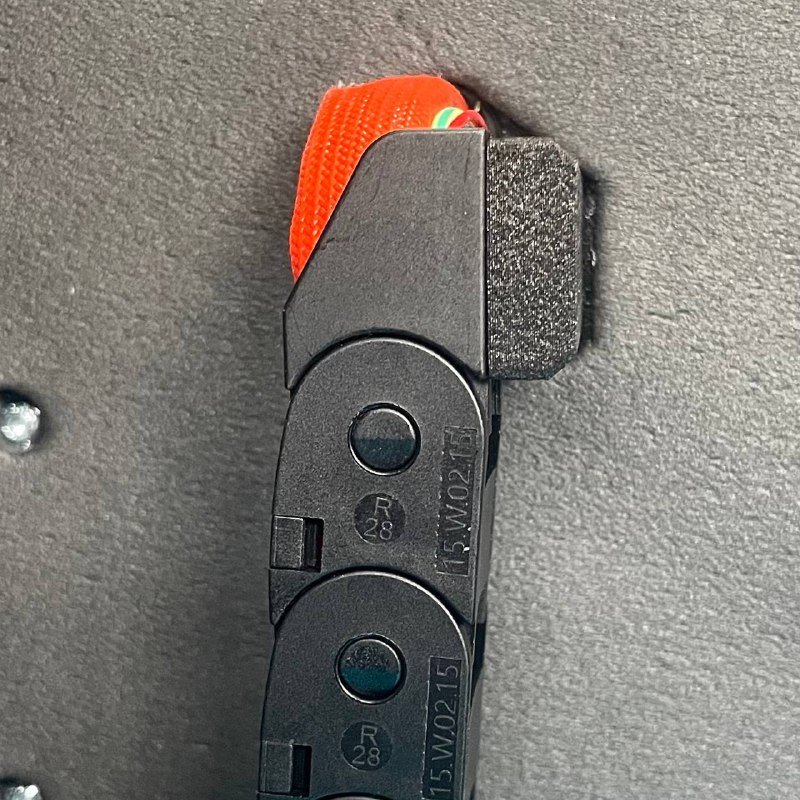
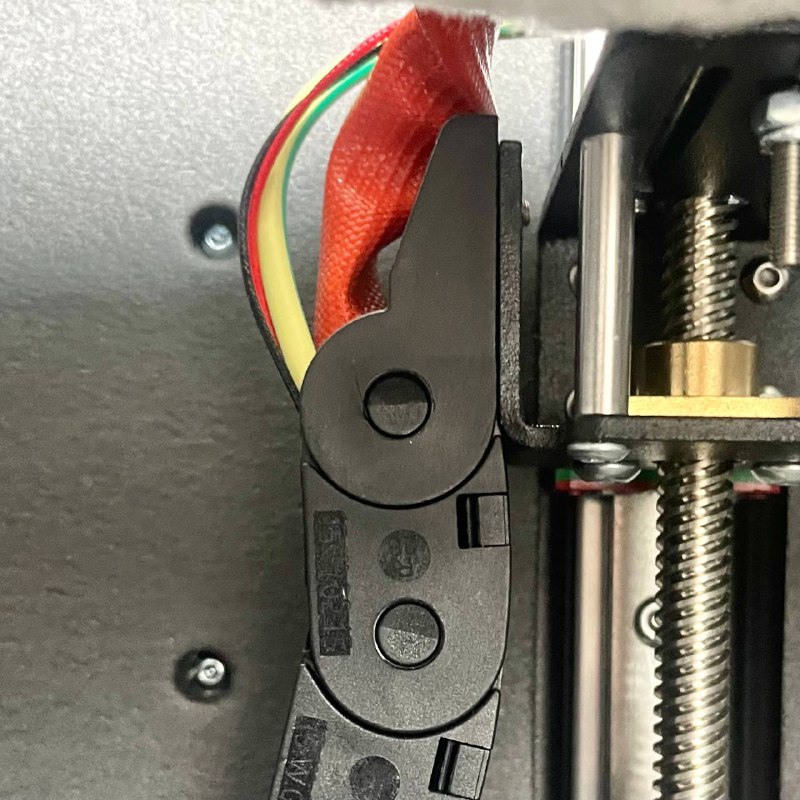
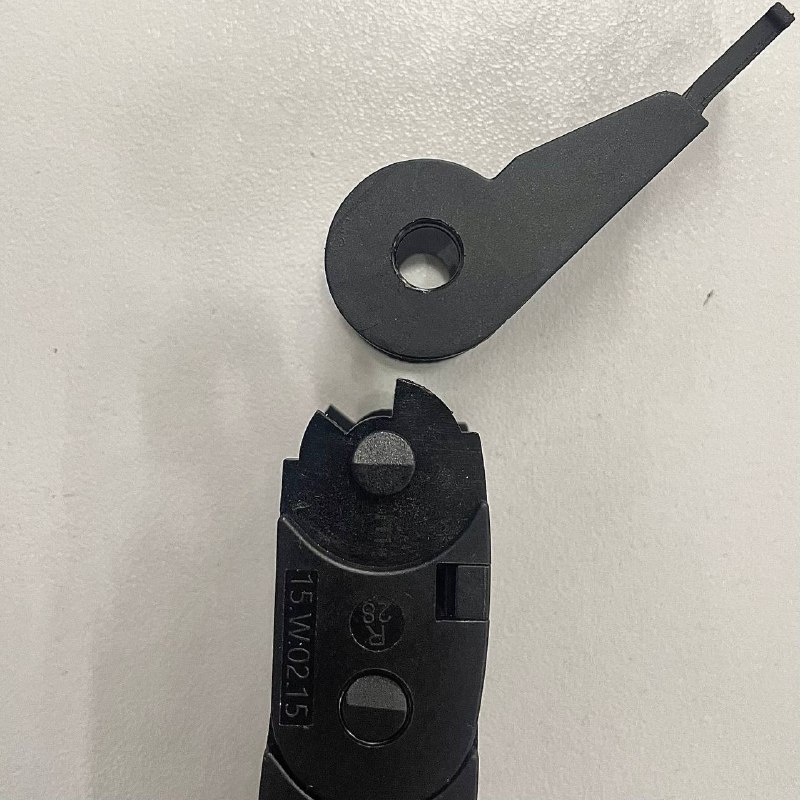
- To free the wires, you'll need to detach a section of the cable chain. Using a small Flathead Screwdriver or a similar thin, non-conductive prying tool:
- Carefully lift or release the retaining tab(s) on the end-connectors of the cable chain where it attaches to the printer frame or bed carriage.This may need to be done at both ends of the cable chain section that moves with the bed to allow the cable to be fully extracted.
- Carefully lift or release the retaining tab(s) on the end-connectors of the cable chain where it attaches to the printer frame or bed carriage.This may need to be done at both ends of the cable chain section that moves with the bed to allow the cable to be fully extracted.
- Once the chain section is detached, carefully pull the bed heater cables completely out, guiding them from the electrical compartment, through the cable chain, and away from the bed assembly.
¶ 2.3 Bed Assembly Removal
- Gently and carefully, manually lower the print bed to approximately the middle of its Z-axis travel range. This provides a more stable and accessible position for removal.
- Support the bed assembly firmly from underneath with one hand or have an assistant help. It will become loose once the mounting screws are removed.
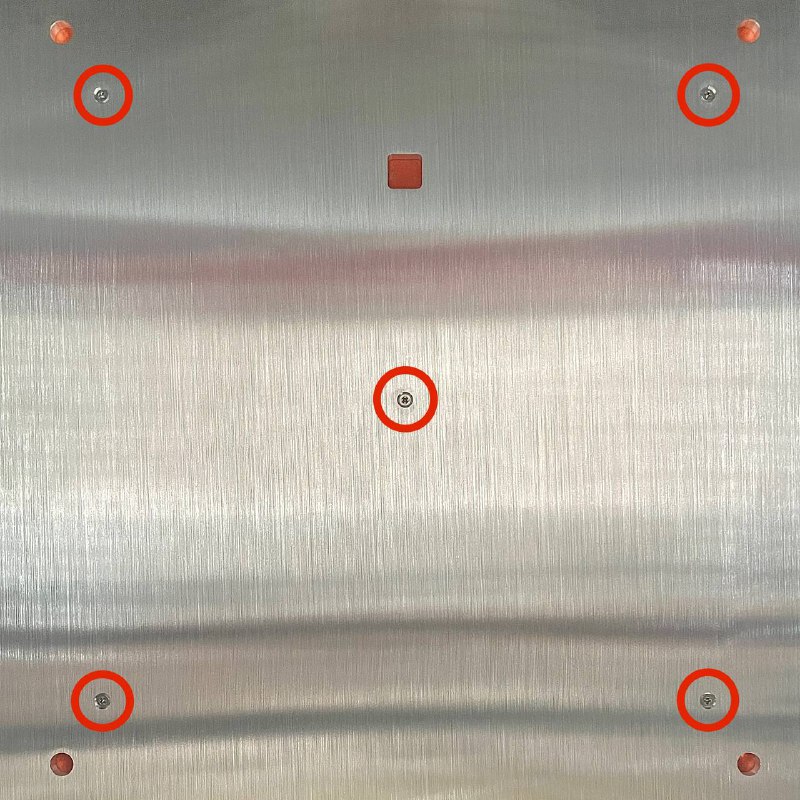
- Using the PH2 Phillips Screwdriver and 5.5 mm Wrench, remove the five screws that secure the entire bed assembly. Keep these screws in a safe place.
- With all screws removed and the bed supported, carefully level down the entire bed assembly out of the printer. Alternatively, if space permits and it's safer, gently lower it onto a protected surface inside the printer's base.
¶ 2.4 Old Heater Element Removal
- Ensure Protective Gloves are on.
- Position the removed bed assembly on a stable, protected work surface.
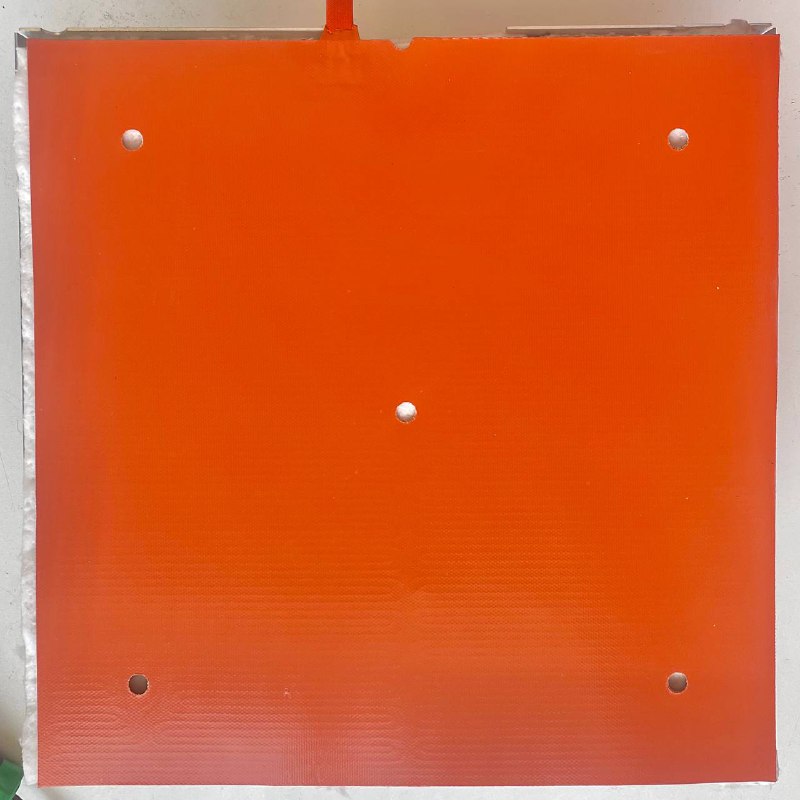
- You will see the bed heater element, a silicone pad, situated on a layer of mineral wool thermal insulation.
- Carefully lift the old heater element out from its position on the insulation. Note its orientation and how its wires were routed.
¶ 3. Installing the New Bed Heater
¶ 3.1 New Heater Element Placement
- Continue wearing Protective Gloves.
- Take the new Bed Heater element. Confirm it's the correct model and oriented correctly.
- Carefully place the new heater into the recess within the mineral wool insulation, mirroring the position and orientation of the old heater. Ensure it sits flat and is securely positioned.
¶ 3.2 Bed Assembly Reinstallation
- Carefully lift the bed assembly (now with the new heater and insulation in place).
- Align it with its mounting points back on the printer.
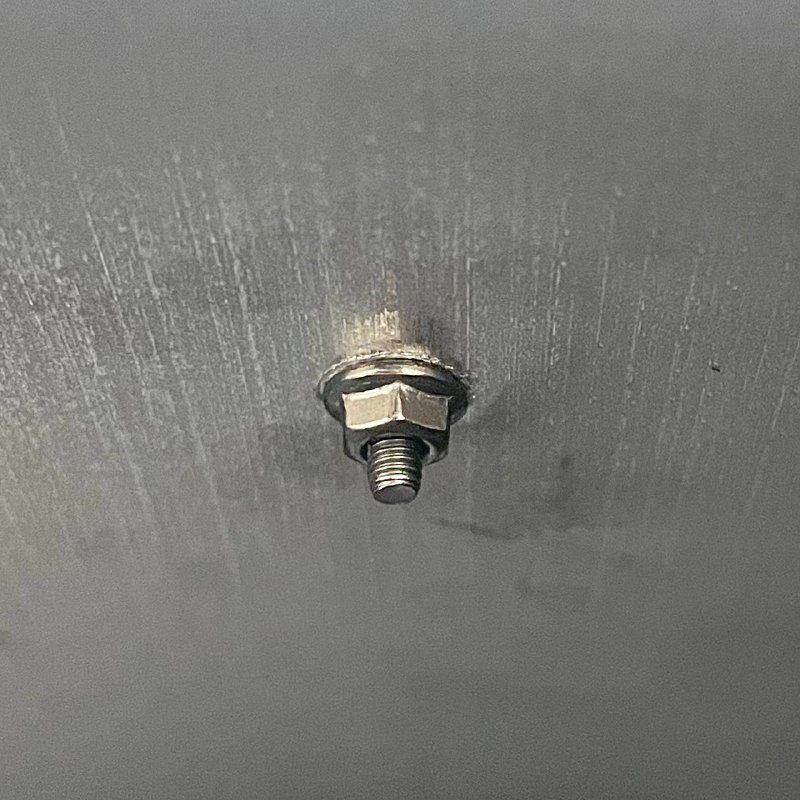
- While supporting the bed, reinsert the five mounting screws and tighten them progressively in a crisscross pattern using the PH2 Phillips Screwdriver and 5.5 mm Wrench. Do not overtighten - the screw should stick out a couple of millimiters past the nut.
¶ 3.3 Cable Routing and Connection
- Carefully feed the new bed heater cables from the bed assembly, through the flexible cable chain and then push them through the designated opening in the printer frame.
- Reconnect the cable chain by snapping the links or end-connectors back into place. Ensure they are secure and allow for the full range of bed motion without straining the cables.
- Route the heater cables neatly within the electrical compartment towards the Relay and Distribution Block.
- CRITICAL WIRING: Referring to your photographs or diagrams taken in Step 2.1.3, connect the new bed heater wires to the exact same, original terminals on the Solid State Relay (SSR) and the Power Distribution Block.
- Secure the wires firmly under the terminal screws using the Flathead Screwdriver. Double-check that the connections are tight and that there are no stray wire strands that could cause a short.
- Use New Zip Ties to neatly bundle and secure the bed heater cables with other wiring in the electrical compartment. Ensure there is adequate slack for the full range of bed movement without pulling on the wires or connections.
¶ 4. Final Checks and Testing
- Thoroughly double-check all electrical connections for correctness and security.
- Ensure the bed assembly is securely mounted and can move freely along its entire Z-axis without the cables snagging or being pulled taut.
- Verify that the cable chain are properly closed, secured, and move freely.
- Close any access panels to the electrical compartment.
- Plug the printer power cord back into the mains outlet and turn the printer on.
- Test the Bed Heater: Navigate to the printer's heating controls on the interface. Set the bed to a moderate target temperature (e.g.,
60°C).- Monitor: Observe the displayed bed temperature. It should start to rise steadily towards the set point.
- Verify: Confirm that the bed heater reaches and maintains the target temperature correctly and that the temperature reading is stable.
¶ Troubleshooting & FAQs
- Q: The bed is not heating up after replacement.
- A: Power off and unplug immediately. Carefully re-verify all electrical connections at the Relay and Distribution Block against your notes/photos. Ensure terminal screws are tight. Check if any printer fuses may have blown (consult printer documentation).
- Q: The bed heating is uneven or only heats in some areas.
- A: Ensure the new heater element is positioned correctly and sits flat within its insulation against the bed plate. It's possible, though rare, for a new heater to be faulty.
- Q: The printer shows a "Bed Heating Failed," "Thermal Runaway," or other bed-related error message.
- A: Note the specific error message. Power off and unplug. Re-check all wiring for the bed heater and also the bed thermistor (ensure the thermistor wasn't accidentally disturbed or its wiring damaged during the process). Consult the printer's troubleshooting guide or contact Vision Miner support with the error details.
- Q: I saw a spark or smelled burning plastic when I powered the printer on.
- A: Power off and unplug immediately. This indicates a serious wiring error or a short circuit. Do not attempt to power the printer on again until the issue is identified and resolved. Contact Vision Miner support for assistance.
¶ Conclusion & Additional Resources
Replacing the bed heater requires careful attention to detail, especially regarding electrical connections and safety. By following these steps methodically, you can safely restore your printer's bed heating functionality. Always prioritize safety and double-check your work.