Welcome to the 22 IDEX 3D printer network configuration and troubleshooting manual. In this guide, you will learn how to set up and manage your printer’s network settings using Duet Web Control (DWC). Since the printer does not have a built-in screen, all network management is done through the web interface.
¶ Introduction
The 22 IDEX V3 supports various network modes. Configuring these modes allows you to access the printer via a web interface for uploading files, monitoring prints, and changing settings. The available modes are:
-
Wi-Fi Access Point (AP) Mode
The printer creates its own Wi-Fi network named22 IDEXallowing direct connection from your computer or mobile device. Used when no router is available or as a backup. -
Wi-Fi Client Mode
The printer connects to your existing 2.4 GHz Wi-Fi network, obtaining an IP address from your router. -
Ethernet Mode
The printer connects via a wired Ethernet cable if you prefer or require a direct LAN connection.
In this manual, we explain each mode, show you how to switch between them, and provide step-by-step instructions for using the macros in the Duet Web Control.
¶ Macros and Their Functions
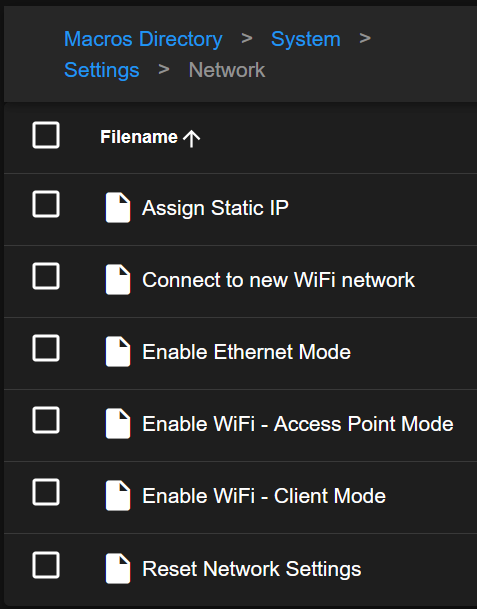
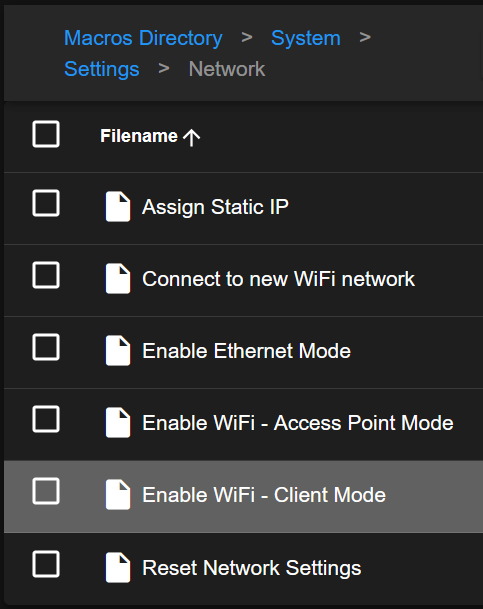
In Duet Web Control, you will find a Macros section under System > Settings > Network. Each macro automates the process of switching network modes:
-
Connect to new WiFi network
- Prompts you for a new SSID and password (2.4 GHz only), attempts to connect, and restarts the printer’s Wi-Fi interface.
-
Enable Ethernet Mode
- Guides you through enabling a wired connection, tests it, and then either reverts to AP mode if it fails or remains in Ethernet mode if it succeeds.
-
Enable WiFi - Access Point Mode
- Switches the Duet to broadcast its own Wi-Fi network named
22 IDEX(default password:1234567890).
- Switches the Duet to broadcast its own Wi-Fi network named
-
Enable WiFi - Client Mode
- Switches from AP or Ethernet mode to connect to your known 2.4 GHz Wi-Fi network. Credentials must be previously stored.
-
Reset Network Settings
- Erases all known SSIDs and parameters, reverting to the default AP mode (SSID
22 IDEXpassword1234567890).
- Erases all known SSIDs and parameters, reverting to the default AP mode (SSID
¶ Connect to a New Wi-Fi Network
¶ Video Guide
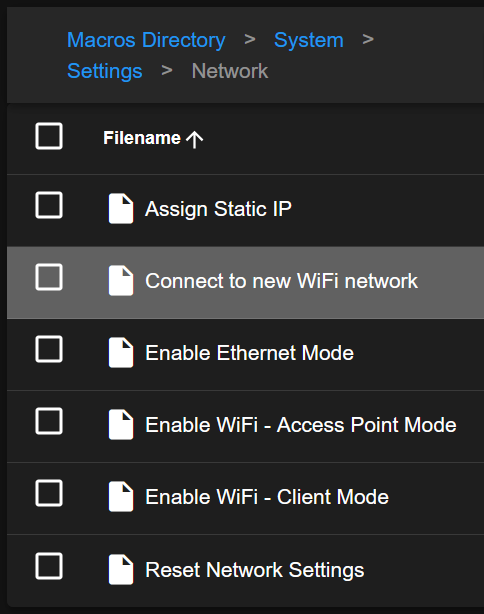
Macro Location: System > Settings > Network > Connect to new WiFi network
-
Access Duet Web Control (DWC).
- If already in AP mode, connect your device to the
22 IDEXnetwork (192.168.0.1). - If on Ethernet or another Wi-Fi network, open DWC using the printer’s current IP address.
- If already in AP mode, connect your device to the
-
Run the Macro.
- In DWC, select
Macros > System > Settings > Network. - Click
Connect to new WiFi network.
- In DWC, select
-
Enter SSID and Password.
- Follow the on-screen prompts to provide your Wi-Fi SSID and password (both case-sensitive).
- Note: Only 2.4 GHz Wi-Fi is supported.
-
Wait for the Printer to Restart.
- The macro restarts the Wi-Fi interface.
- Watch the LEDs:
- Green if connection succeeds.
- Red if connection fails.
-
Reconnect via Access Point Mode.
- Once the LED color changes (green or red), the printer will revert to Access Point mode, broadcasting the 22 IDEX Wi‑Fi network.
- Connect to the 22 IDEX network (or use 22idex.local or the provided IP address) on your device.
- Open your web browser to access Duet Web Control. You will then be prompted with a message indicating the connection status.
- If the connection is successful, the message will display the new IP address you can use to access the printer.
-
Confirm and Switch to Wi‑Fi Client Mode.
- If the prompt displays a successful message with the new IP address, copy the IP address and click OK.
- After clicking OK, the machine will switch to Wi‑Fi Client Mode and will remain in this mode on every restart unless changed.
- The printer will stop broadcasting the Access Point and immediately connect to the specified Wi‑Fi network.
- To reconnect, use the new IP address or navigate to 22idex.local in your browser while connected to your Wi‑Fi network.
¶ Enable Ethernet Mode
¶ Video Guide
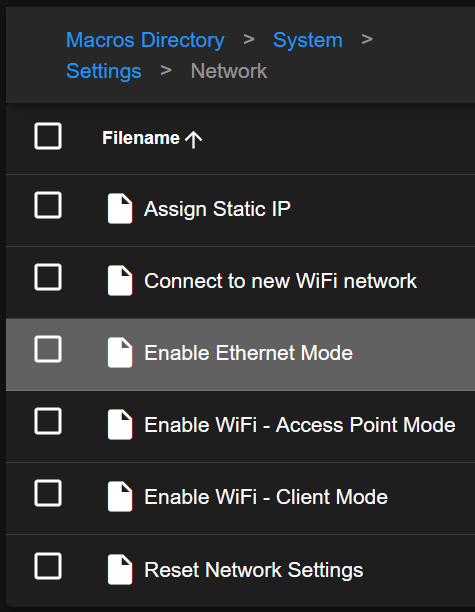
Macro Location: System > Settings > Network > Enable Ethernet Mode
-
Plug in an Ethernet Cable.
- Connect one end of the cable to the Duet board and the other end to your router or network switch.
-
Run the Macro.
- In Duet Web Control (DWC), navigate to
System > Settings > Network > Enable Ethernet Mode. - Click
Enable Ethernet Mode.
- In Duet Web Control (DWC), navigate to
-
Follow the Prompts.
- The macro will first prompt you to connect the Ethernet cable and press
OK. - Next, you will be asked to choose between
Test ConnectionandSkip Test and Change Mode.- If you select
Test Connection, the machine will check for a valid IP address. - If you select
Skip Test and Change Mode, the machine will switch to Ethernet mode immediately.
- If you select
- The macro will first prompt you to connect the Ethernet cable and press
-
Wait for IP Assignment.
- The Duet requests an IP address via DHCP (unless your network is configured differently).
- The machine will perform a self-check and use LEDs to indicate the result:
- GREEN if the connection is successfully established.
- RED if the connection fails.
-
Reconnect via Access Point Mode.
- Once the LED changes (green or red), the printer reverts to Access Point mode, broadcasting the 22 IDEX Wi‑Fi network.
- Connect to the 22 IDEX network (or use
22idex.localor the provided IP address) on your device and open your web browser. - A prompt will appear showing the connection status. If successful, it will display the new IP address that you can use to access the printer.
-
Confirm and Switch to Ethernet Mode.
- If the prompt shows a successful connection with the new IP address, copy the IP address and click
OK. - After clicking
OK, the machine will switch to Ethernet mode and remain in this mode on every restart unless changed. - The printer will stop broadcasting the Access Point and immediately connect to your Ethernet network.
- To reconnect, use the new
IP addressor navigate to22idex.localin your browser while connected to the same network.
- If the prompt shows a successful connection with the new IP address, copy the IP address and click
¶ Enable Wi-Fi Access Point (AP) Mode
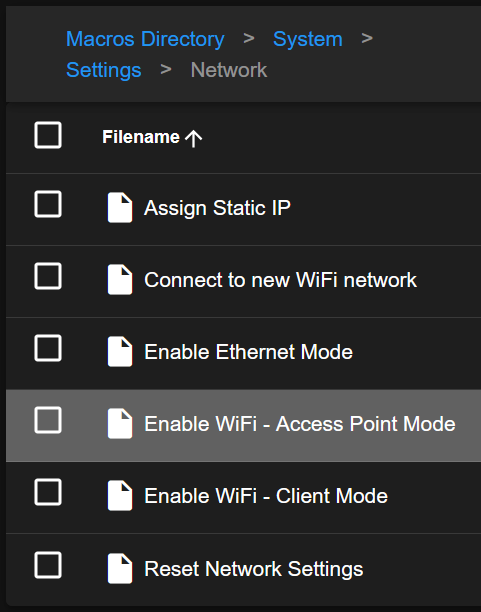
Macro Location: System > Settings > Network > Enable WiFi - Access Point Mode
-
Run the Macro.
- In DWC, select
Macros > System > Settings > Network. - Click
Enable WiFi - Access Point Mode.
- In DWC, select
-
Confirm the Operation.
- You can switch now or later. Switching now immediately starts the
AP mode.
- You can switch now or later. Switching now immediately starts the
-
Reconnect to
22 IDEX.- After switching, the Duet broadcasts the SSID
22 IDEXwith the default password1234567890. - Connect your computer or device to this SSID, and open your web browser to navigate to
192.168.0.1.
- After switching, the Duet broadcasts the SSID
When to Use AP Mode:
- When you do not have a router or the printer fails to connect to your existing Wi-Fi.
- For quick demos or direct device-to-printer connections.
¶ Enable Wi-Fi Client Mode
Macro Location: Macros > System > Settings > Network > Enable WiFi - Client Mode
-
Run the Macro.
- In DWC, expand
Macros > System > Settings > Network. - Click
Enable WiFi - Client Mode.
- In DWC, expand
-
Choose to Switch Immediately or Later.
- If you switch now, the macro disconnects from the current mode (AP or Ethernet) and attempts to connect using stored credentials.
- If you select later, it saves the command without immediately switching.
-
Reconnect via the New IP.
- If your credentials are valid, the printer obtains an IP from your router.
- The macro displays the IP address; use it in your browser to continue using DWC.
¶ Reset Network Settings
Macro Location: System > Settings > Network > Reset Network Settings

-
Run the Macro.
- In DWC, open
Macros > System > Settings > Network. - Click
Reset Network Settings.
- In DWC, open
-
Confirm Erase.
- A prompt ensures you really want to delete all stored networks.
- Select
Yes, Eraseto proceed.
-
Revert to AP Mode.
- This macro clears all Wi-Fi settings with
M588 S"*". - It then reconfigures the AP mode with SSID
22 IDEX(default password:1234567890). - Connect to
192.168.0.1to access DWC again.
- This macro clears all Wi-Fi settings with
¶ Network Self Test
This script (networktest.g) runs automatically each time the printer restarts. It checks and manages the network connection by following these steps:
¶ 1. Check the Selected Network Mode
- At startup, the printer waits briefly for either Wi‑Fi or Ethernet to acquire an IP address.
- Note: If a network connection is already active before the test begins, the script logs the IP (in
0:/IP_address.txt) and skips further testing. - In most cases, the printer connects almost immediately, so you may not notice any delay.
¶ 2. Switch to Another Network Mode if Needed
- If no connection is detected within a set period (approximately 30 seconds), the script determines which network interface (WiFi or Ethernet) is active.
- It first tests the selected mode for a valid IP address. If this test fails (after a brief wait), the printer automatically switches to the alternate network mode.
- During this switch, the printer signals the user by turning on yellow LEDs. If you see yellow LEDs after about 30 seconds, try connecting to the printer using
22idex.localin your browser, as the IP address may have changed. - If you still cannot access the printer, retrieve the current IP address from the
0:/IP_address.txtfile on the SD card to confirm the printer’s IP. Verify that the connection was successful and ensure that this IP address is on the same network as the device you are using to connect. Additionally, check that your computer is on the same network (in client mode) or that the Ethernet cable is properly connected.
¶ 3. Fallback to AP Mode if All Else Fails
- If neither network mode connects after the allotted attempts, the script disables both interfaces and configures the printer to run in Wi‑Fi Access Point (AP) mode.
- The printer will display red LEDs to indicate that it has switched to AP mode.
- In AP mode, connect to the
22 IDEXWi‑Fi network (password:1234567890), and use22idex.localor192.168.0.1in your browser to access the machine.
¶ 4. Write IP Address to 0:/IP_address.txt
- When a connection is successfully established (whether in client or AP mode), the script writes the current IP address to
0:/IP_address.txt. - Use this file to check the last known IP address, which is especially useful if you suspect the IP has changed or if yellow LEDs indicate a mode switch.
¶ Troubleshooting Tips & FAQs
-
Printer Won’t Connect to My Wi‑Fi
- 2.4 GHz Only: Ensure your router’s SSID is 2.4 GHz.
- Spelling: Double-check SSID/password spelling (case-sensitive).
- Reset: If unsure about stored credentials, use Reset Network Settings and start fresh.
-
No IP Address Assigned
- If using Ethernet, confirm that the cable and router port are functional.
- If using Wi‑Fi client mode, verify that the router’s DHCP service is enabled.
- Check if
networktest.gforced AP mode (red LED or prompt) by reviewing0:/IP_address.txt.
-
AP Mode vs. Client Mode
- AP Mode: The printer broadcasts the
22 IDEXWi‑Fi network with IP192.168.0.1. - Client Mode: The printer joins your home/office Wi‑Fi and is assigned an IP by your router.
- AP Mode: The printer broadcasts the
-
LED Status
- Green: Connection successfully established.
- Yellow: The printer switched network modes during testing.
- Red: Connection attempts failed; the printer is now in AP mode.
-
Verifying Current Mode
- The file
0:/user/networkmode.gshows the last set mode (AP, Client, or Ethernet). - The file
0:/IP_address.txtcontains the last known IP from the network test script.
- The file
¶ Conclusion & Additional Resources
By following these instructions, you can:
- Connect your 22 IDEX printer to a new 2.4 GHz Wi-Fi network.
- Switch among Wi-Fi (AP), Wi-Fi (Client), and Ethernet modes, depending on your needs.
- Reset network configurations entirely if troubleshooting is needed.
- Rely on the Automatic Network Test to help the printer find the best available connection on startup or revert to AP mode when all else fails.
Thank you for choosing the 22 IDEX. We are committed to ensuring you have the best possible experience. If you have any quest