¶ Introduction
This guide walks you through the steps to connect your 3D printer directly to a computer via USB using Pronterface. Once connected, you can send G-code commands directly to the printer for configuration or troubleshooting. This manual consolidates information from technical notes and a phone support session, ensuring a clear and safe procedure.
¶ Tools & Materials
- Computer (Windows, macOS, or Linux)
- USB Cable (provided with your 3D printer)
- Pronterface Software (download link provided below)
- Access to 2.4 GHz Wi-Fi router (optional, only if configuring Wi-Fi)
¶ Safety & Pre-checks
- Power Considerations: The printer’s mainboard is supplied with a 24V power source.
- Electronics Enclosure:
- Left-hand side door: This is where you can safely access the mainboard USB port. Open it carefully to avoid contact with high-voltage or sensitive components.
- Right-hand side door: Do NOT open this door when the printer is powered on. It may contain high-voltage components that could lead to electric shock.
¶ Step-by-Step Instructions
¶ 1. Download and Install Pronterface
- Visit the official Pronterface download page.
- Choose the correct version for your operating system (Windows, macOS, or Linux).
- Run the installer and follow the on-screen prompts to complete installation.
¶ 2. Connect Your Printer via USB
- Power off your printer before handling any cables or opening access panels.
- Carefully open the left-hand side electronics compartment door.
- Plug one end of the USB cable into the USB port on the printer’s mainboard.
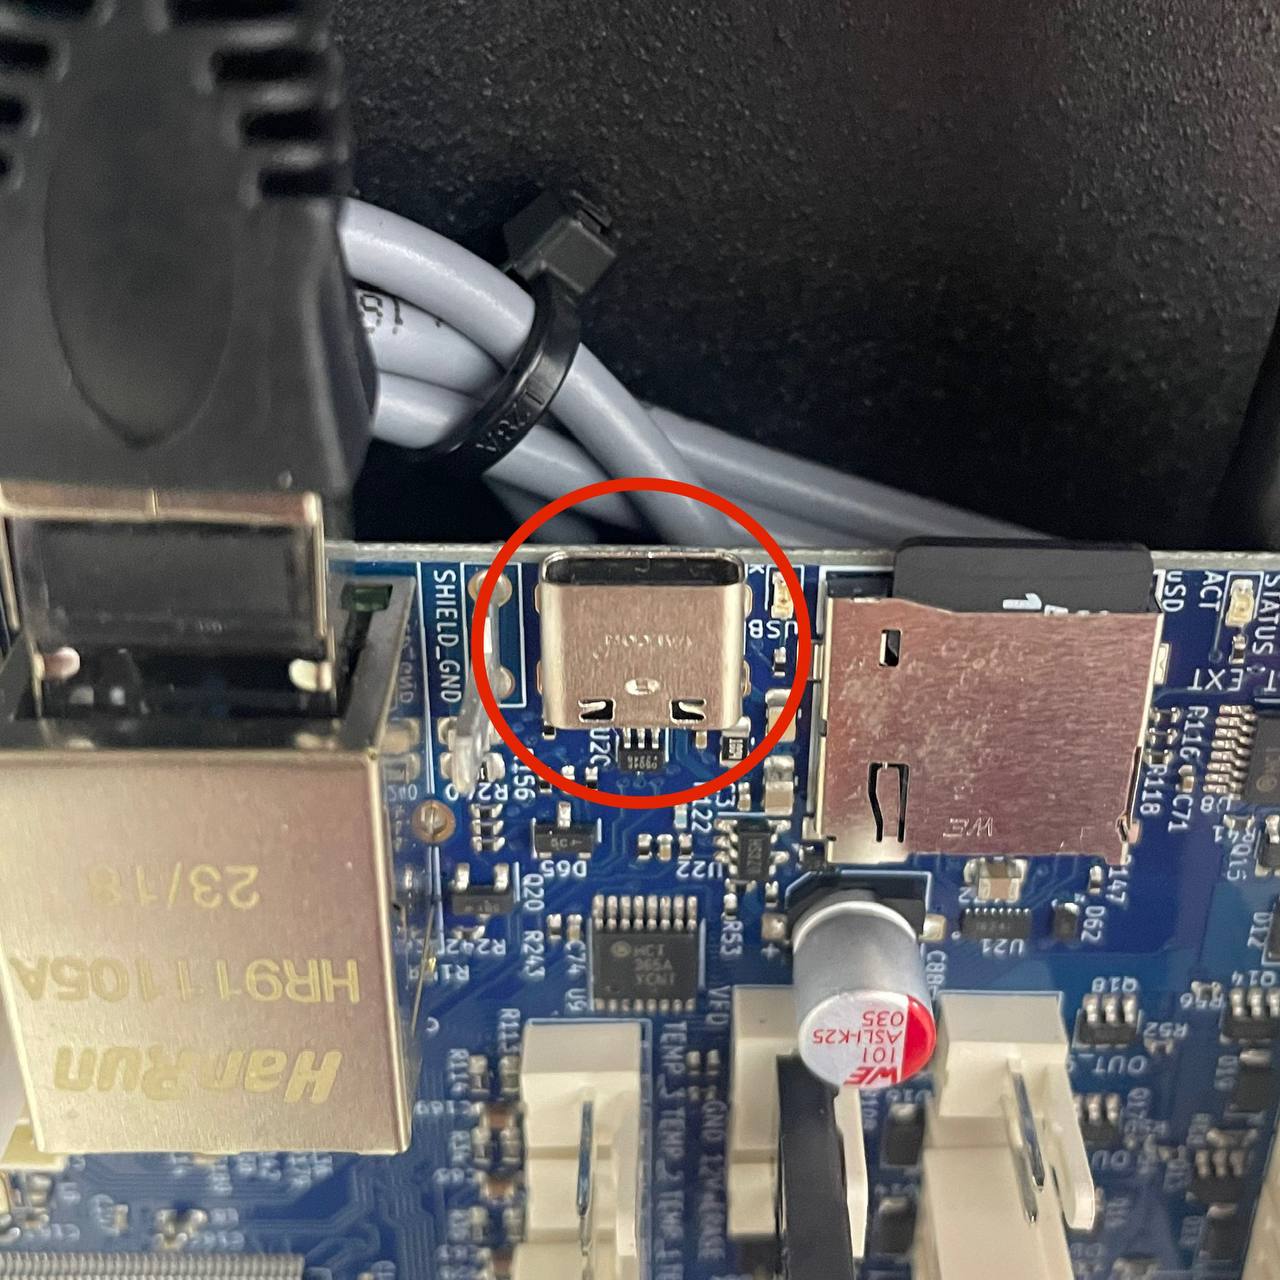
- Plug the other end of the USB cable into a USB port on your computer.
- Power on the printer once the USB cable is securely connected.
¶ 3. Launch Pronterface and Establish Connection
- Open Pronterface on your computer.
- In the upper-left corner of the Pronterface window, locate the drop-down menu containing available COM ports (on Windows) or Serial ports (on macOS/Linux).
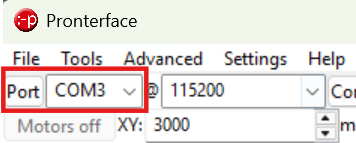
- Select the correct port for your printer. (If you’re not sure, try each available port.)
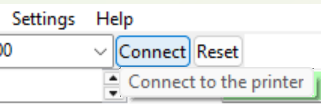
- Click Connect to establish the USB connection.
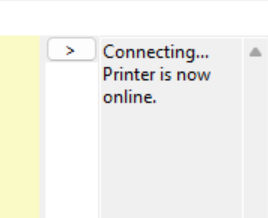
- If the correct port is chosen, Pronterface will display “Printer is now online” in the status area (bottom-right corner).
If the printer fails to connect:
- Cycle through the available COM/Serial ports in Pronterface and attempt to connect again.
- Restart Pronterface or power cycle your printer, then wait a few seconds before retrying.
- Try a different USB cable.
- Refer to Detailed Connection Troubleshooting if issues persist.
¶ 4. Sending G-code Commands
Once connected, you can send G-code commands to the printer using the console in the lower-right corner of the Pronterface window. Simply type a command and press Enter.
¶ 4.1 M552 Network Mode Commands
Use M552 to enable, disable, or change the network mode on Ethernet or Wi-Fi interfaces:
| Interface | Command | Action |
|---|---|---|
| Ethernet (I0) | M552 I0 S1 |
Enables Ethernet in client mode (uses DHCP). |
M552 I0 S0 |
Disables the Ethernet interface. | |
| Wi-Fi (I1) | M552 I1 S-1 |
Powers down the Wi-Fi module (completely off). |
M552 I1 S0 |
Sets Wi-Fi to idle (no connection, module on). | |
M552 I1 S1 |
Enables Wi-Fi client mode (connects to saved networks). | |
M552 I1 S2 |
Enables Wi-Fi access point mode (printer broadcasts SSID). |
Important: These changes are temporary unless you configure them permanently through the web interface (config.g or macros). After a restart, your printer may revert to its previous state.
¶ WiFi Command Generator
Below is a tool that allows you to input your SSID and password, and then generates the corresponding tolerated command automatically:
First send:
M552 I0 S0
M552 I1 S-1
M552 I1 S0
Then use the generated M587 command.
¶ Troubleshooting Tips & FAQs
-
Cannot Find or Connect to the Correct COM Port
- Close and re-open Pronterface.
- Check device manager (Windows) or system report (macOS) to see if your printer is recognized.
- Ensure the USB cable is firmly connected and try a different USB port on your computer.
-
“Printer Is Not Online” Error
- Double-check power to the printer.
- Verify you selected the correct COM/Serial port in Pronterface.
- Restart printer or Pronterface to reset connections.
-
Wi-Fi Configuration Issues
- Ensure your Wi-Fi is 2.4 GHz.
- Try using
M552 I1 S2(access point) to see if you can directly connect to the printer’s SSID. - Check if your router has assigned a new IP address to the printer (sometimes DHCP IPs change).
-
Commands Not Persisting After Restart
- M552 changes are not saved permanently by default.
- Use your printer’s web interface or the config.g file to make permanent changes.
¶ Conclusion & Additional Resources
Summary
- Download and install Pronterface.
- Safely connect the USB cable to the left-hand side electronics compartment.
- Select the correct COM port and click Connect.
- Use the console to send G-code commands like
M552for network configuration.
Links and Additional Resources
- Pronterface Download Page: Pronterface
- Detailed Connection Guide: Detailed Guide
- G-code Reference: G-code Documentation
Customer Support
If you have any further questions or issues, please contact us at Contact Support. We’re here to help you get the most out of your 3D printer experience!