¶ Preparation
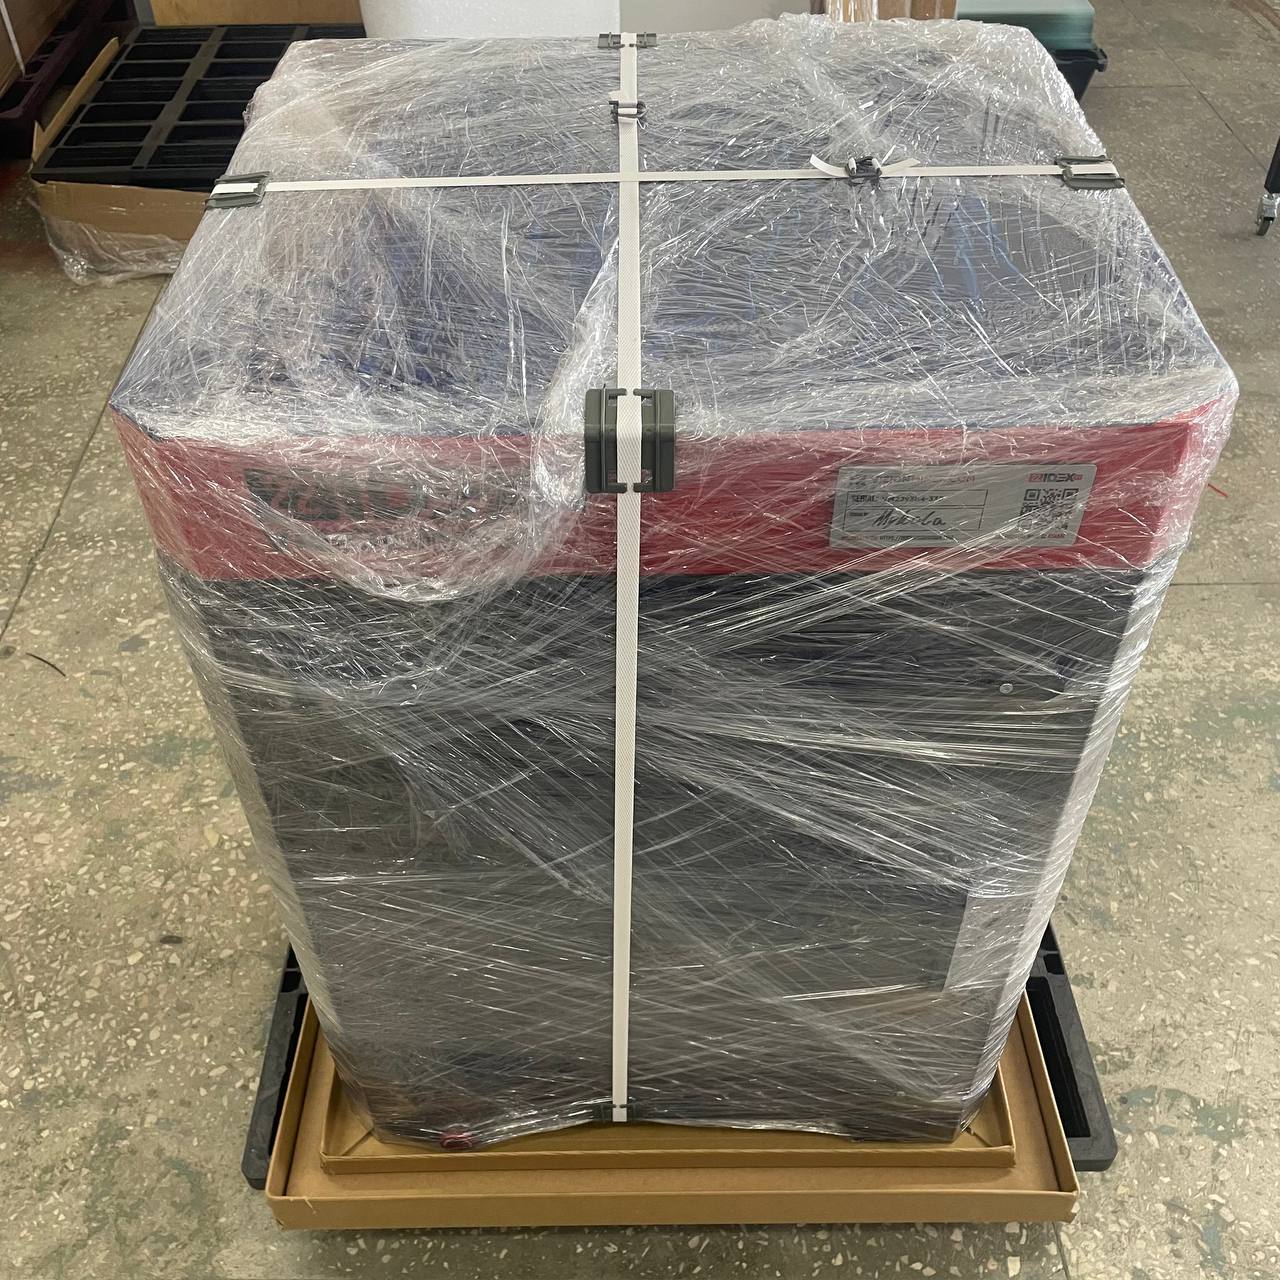
¶ Inspect Crate for Damage
- Before opening the shipping crate, inspect it for any signs of exterior damage. If you find evidence of excessive damage, report it immediately to Vision Miner and the shipping company.
¶ Moving the Crated Printer
- The Vision Miner 22 IDEX shipping crate is designed to be lifted and moved by a forklift or pallet jack from designated locations. Move the crate to a flat, open area with at least 100 cm of clearance on all sides.
¶ Required Tools and Equipment
- Basic hand tools: Screwdriver or standard drill with Philips PH2 bit
- Utility knife
- Two or more people
The crated printer weighs approximately 80 kg (175 lbs). Ensure that equipment and personnel are capable of moving the system safely.
¶ Unpacking the Printer
¶ 1. Remove crate panels:
- Remove straps holding the box to the pallet and remove plastic wrap on the outside of the box.
- Remove 1 Top and 4 Side panels.
- Carefully lift the box up with the help of at least two people. Slide the box up to avoid scratching the printer.
- Set the box aside and save it for future use.

¶ 2. Position the printer:
- Lift the printer with a minimum of two people and place it on a stable, level surface that does not wobble or rock.
- Ensure the surface can support the printer's weight of approximately 80 kg (175 lbs).
- Provide at least 60 x 60 inches of space for the printer to sit and operate.
- Keep at least 20 inches of clearance on all sides and enough space for the front and rear doors to open.
¶ 3. Adjust feet:
- Adjust the feet at each corner of the printer to ensure it sits level. It should not be inclined or tilted for optimal operation.
¶ 4. Remove protective film and zip ties:
- Carefully pull away and remove the plastic wrap from the printer.
- Remove the protective film from the top and front of the printer.
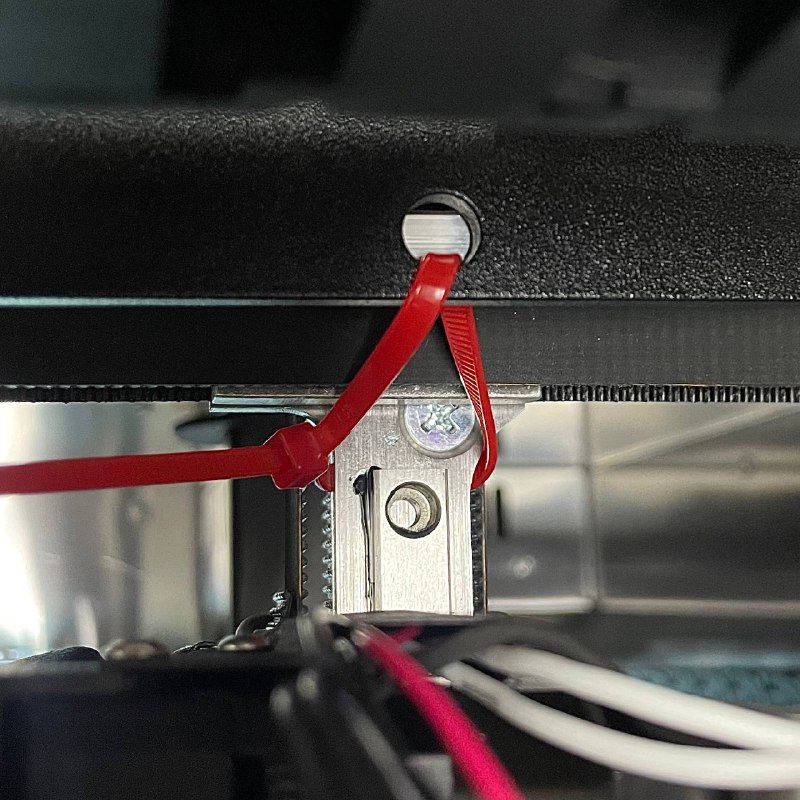
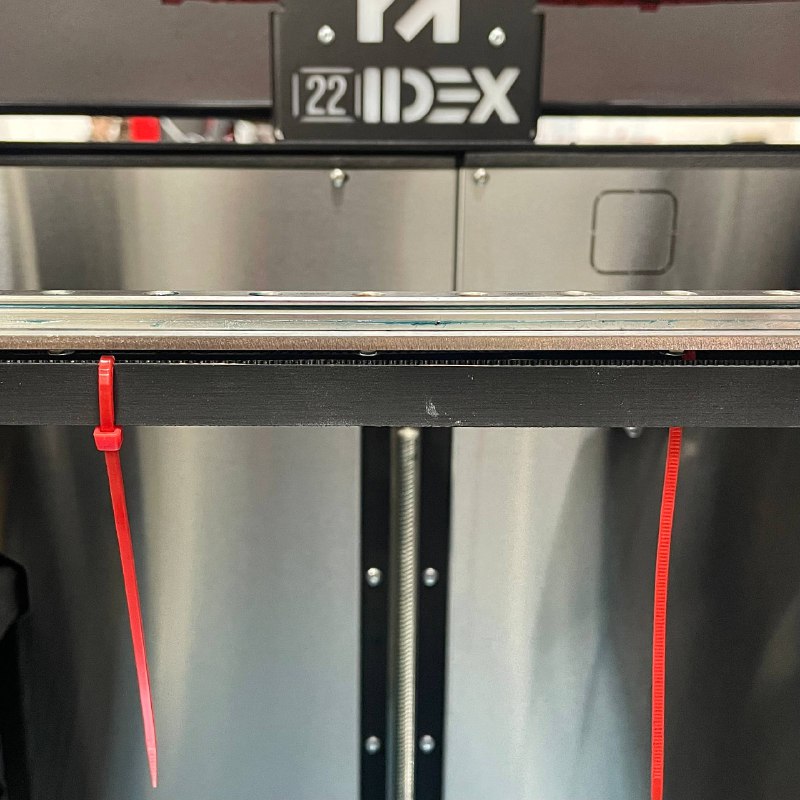
- Open the lid and front door to cut the 4 red zip ties on the belts using side wire cutters. Be careful not to damage the belts.
¶ 5. Remove accessory box:
- Push the build plate up and remove the accessory box from underneath the build plate. You will find the WiFi antenna, power cord, touchscreen, and other tools inside.
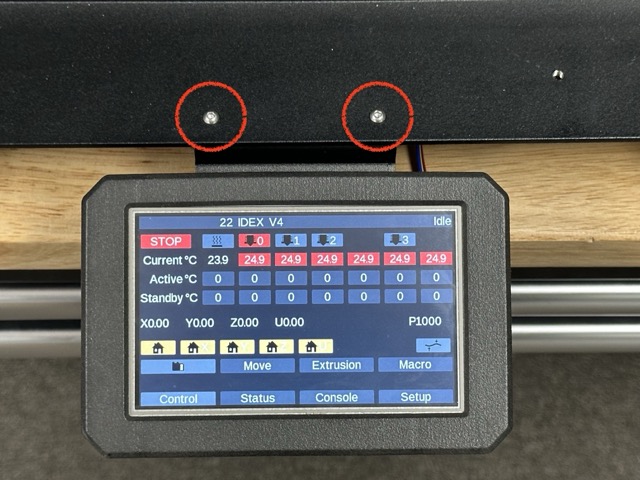
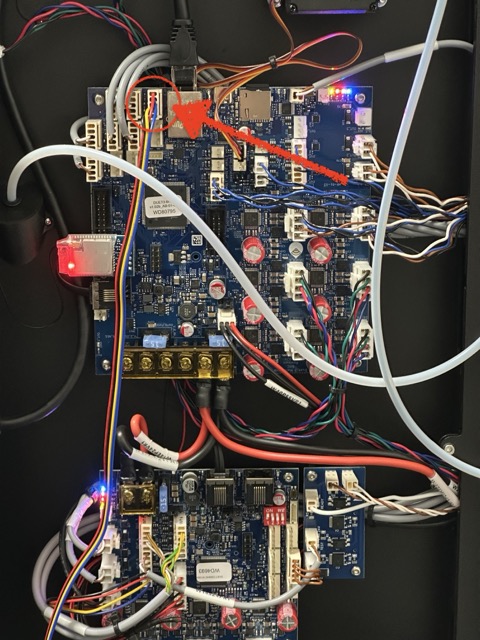
¶ 6. Install the touchscreen:
-
Open the front door of the printer.
-
Locate the two mounting holes beneath the machine (front area).
-
Position the touchscreen from underneath and align it with the mounting holes.
-
Secure the screen with two screws from the top using the supplied 2mm hex key.
-
Connect the touchscreen cable to the main board.
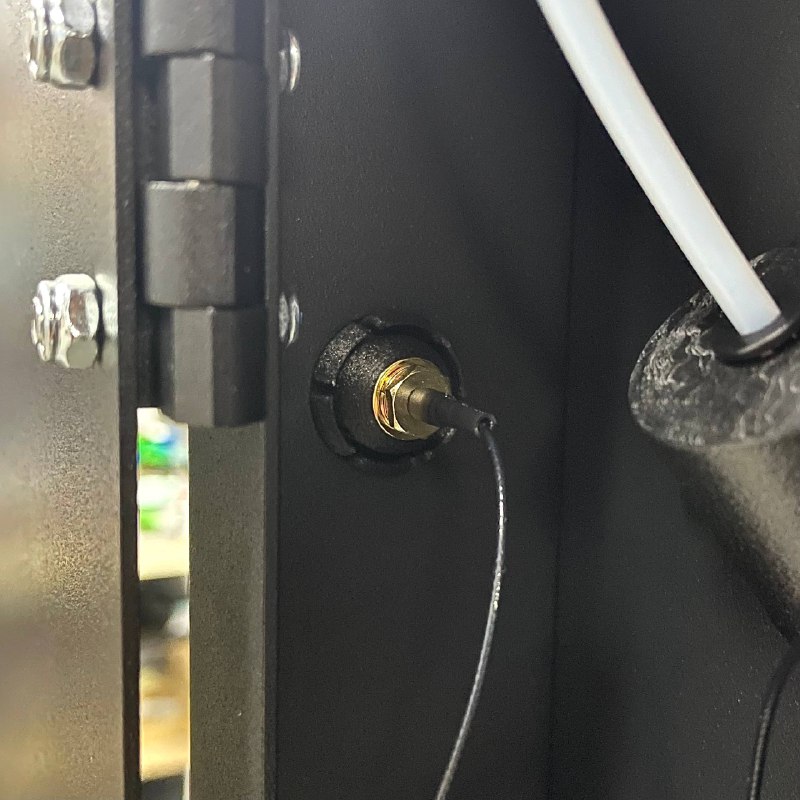
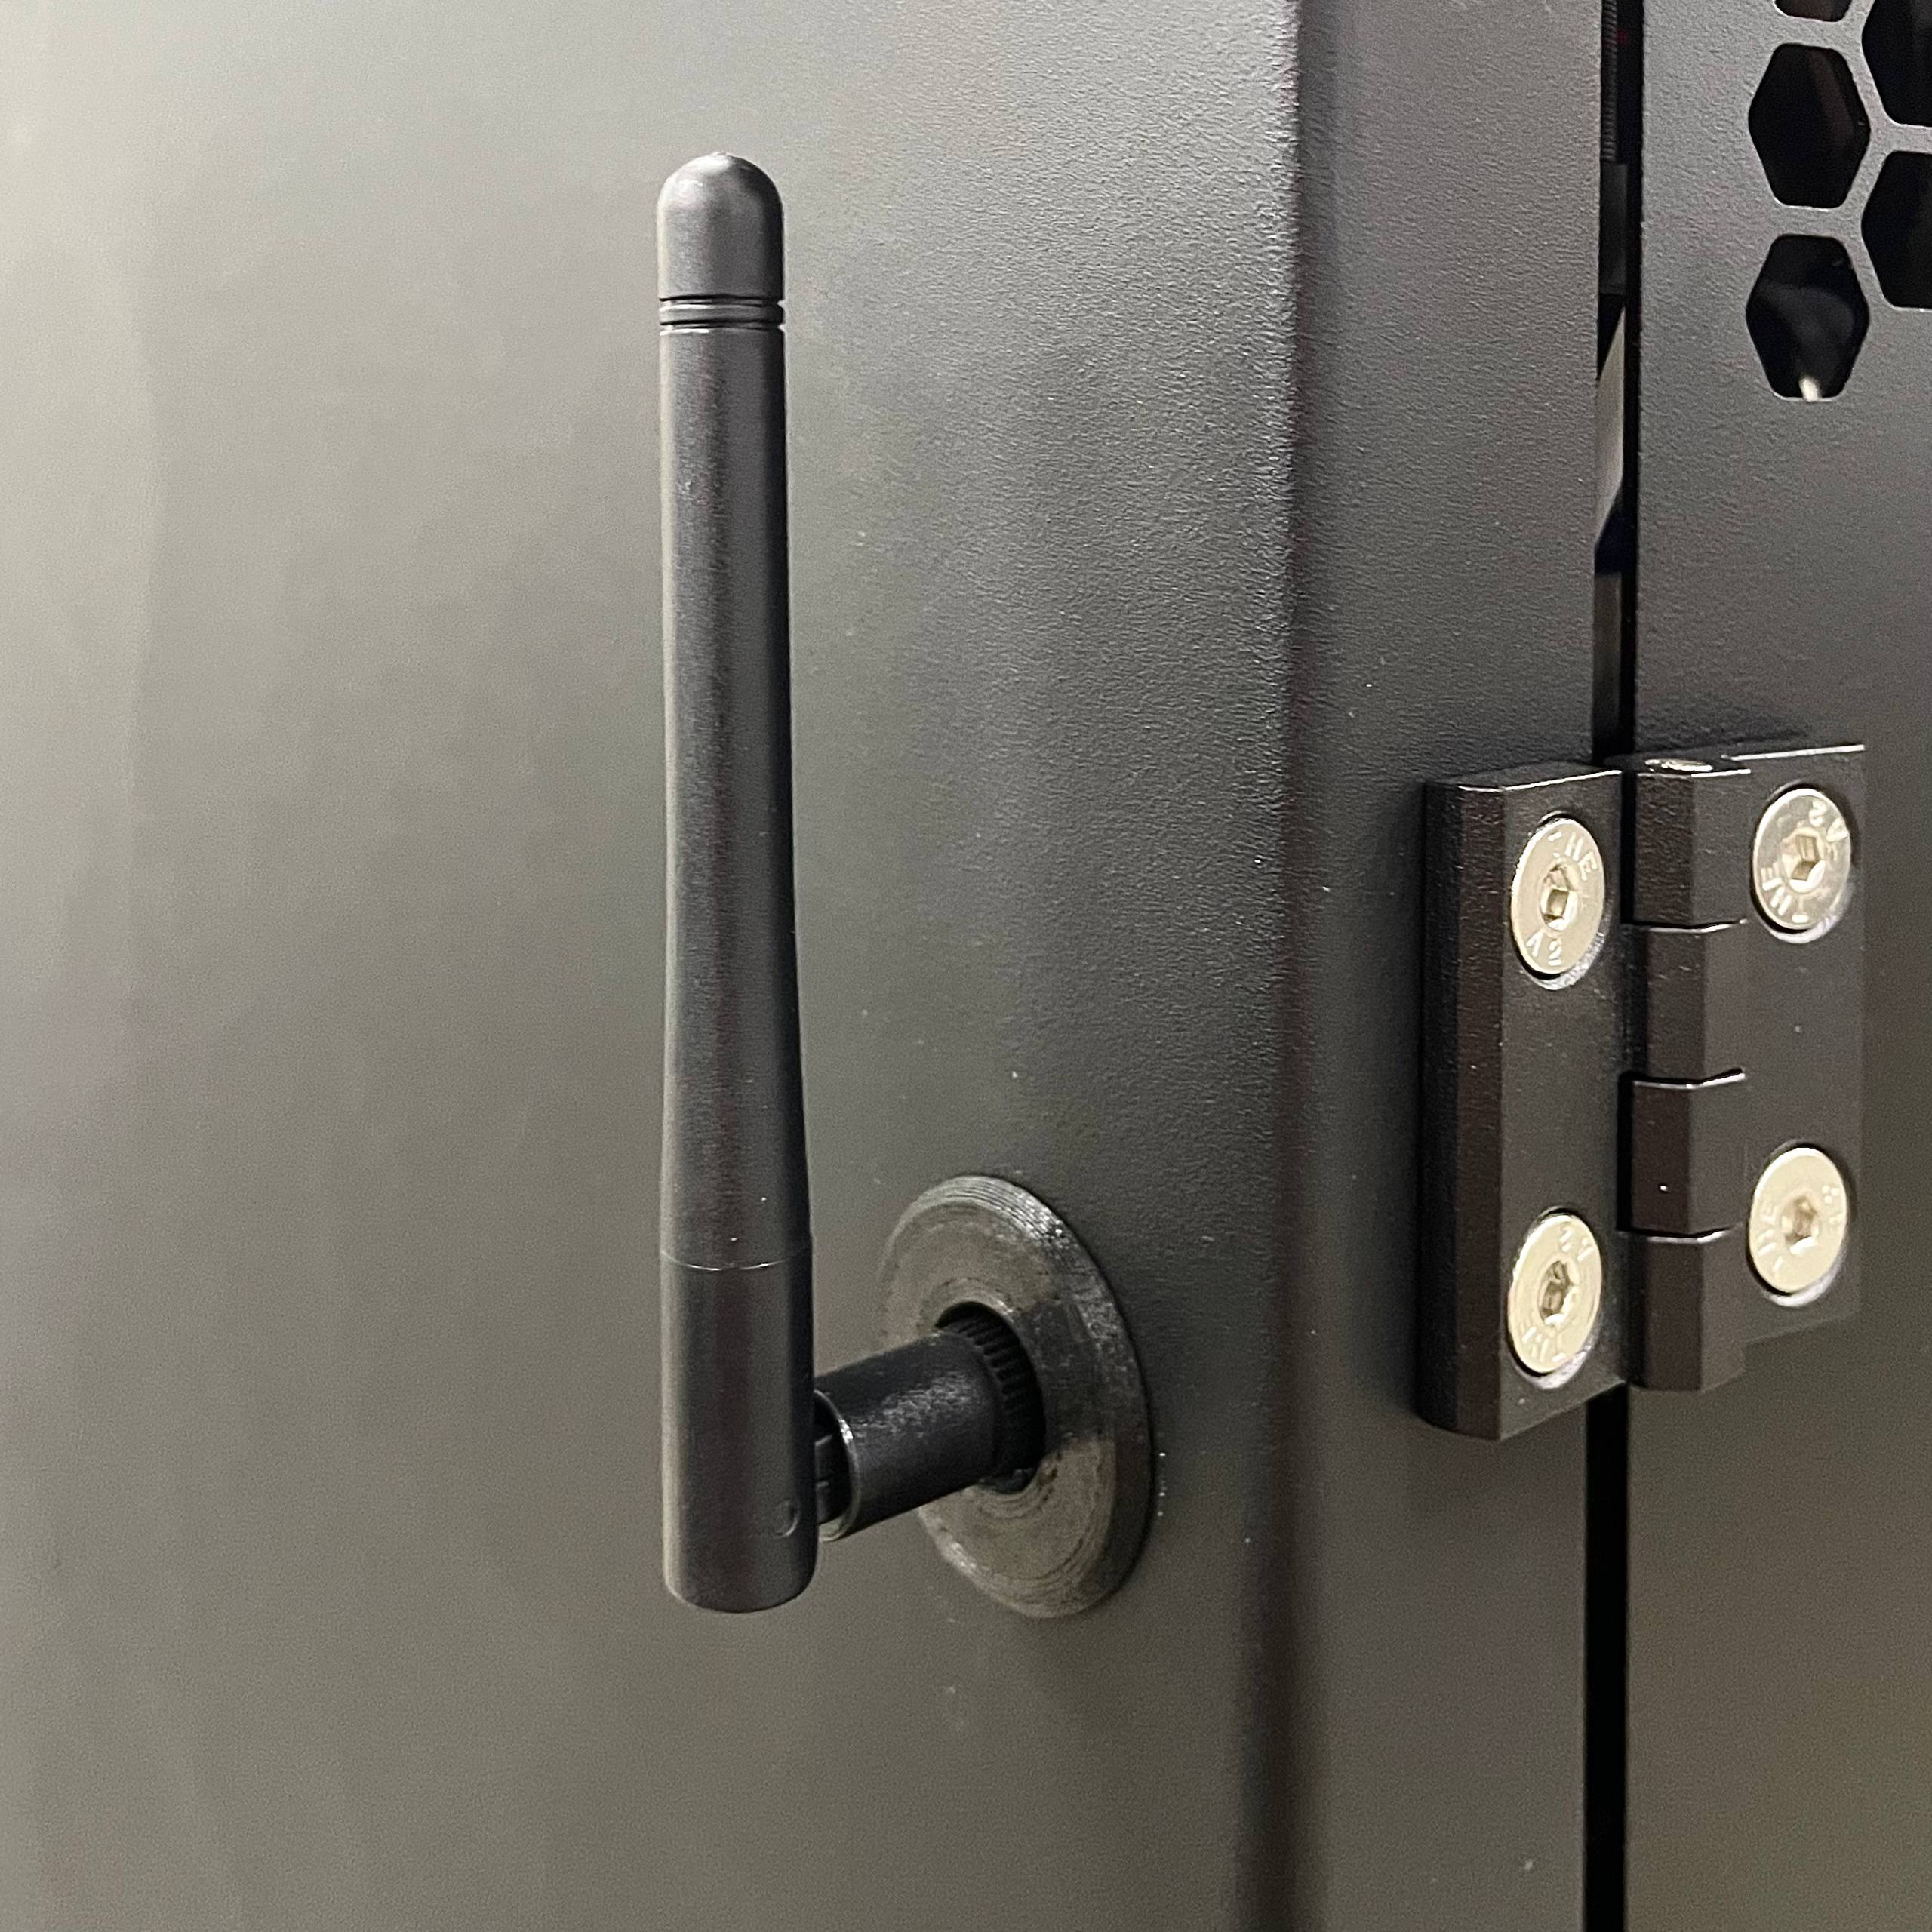
¶ 7. Install the WiFi antenna:
- Find the WiFi antenna in the accessory box and screw it on from the outside of the printer.
¶ 8. Connect the power:
- Using the included power cord, connect the printer to a standard outlet rated for 20 amps and properly grounded.
- Warning: Proper grounding is crucial for safe operation.
¶ 9. Test the power button functionality:
- When pressed in, the button should turn off the machine.
- When turned clockwise, it should turn on the machine.
¶ Safety Precautions
- Connect equipment to a grounded facility power source. Do not defeat or bypass the ground lead.
- Know the location of equipment branch circuit interrupters or circuit breakers and how to turn them on and off in case of emergency.
- Know the location of fire extinguishers and how to use them. Use only certified type extinguishers on electrical fires.
- Know local procedures for first aid and emergency assistance at the customer facility.
- Use adequate lighting at the equipment.
- Maintain the recommended range of temperature and humidity in the equipment area.
- Do not use this product in an environment containing volatile or flammable compounds.
- Always inspect the crate and printer for damage before proceeding with unboxing.
- Use appropriate lifting techniques and equipment to avoid injury.
- Ensure proper grounding and electrical connections to prevent electrical hazards.
- Follow all local and national safety codes and regulations during setup and operation.