¶ Introduction
The 22 IDEX V4 printer for Department of Defense (DoD) customers is configured specifically for secure, wired-only network connectivity. As per standard DoD procurement requirements, these machines are shipped without a WiFi module installed, ensuring that all network communication occurs exclusively through Ethernet connections. This configuration meets security requirements for environments where wireless connectivity is restricted or prohibited.
This manual is designed for DoD customers who need to establish a network connection using only the Ethernet interface. Unlike standard 22 IDEX V4 printers that support both WiFi and Ethernet, your machine relies entirely on wired Ethernet connectivity. The printer includes an automatic network detection system that simplifies the setup process by testing your Ethernet connection and configuring the appropriate network mode.
By the end of this guide, you'll understand how to verify your WiFi module has been removed, connect your printer via Ethernet to either a network switch/router or directly to a computer, and access the printer's web interface for operation and monitoring.
Important: This manual is specifically for DoD customers with machines configured for Ethernet-only operation. If your machine has a WiFi module installed, you must remove it before proceeding with this setup.
¶ Prerequisites
Before beginning the Ethernet setup process, ensure you have the following:
¶ Required Equipment:
- 22 IDEX V4 Printer: Configured for DoD (no WiFi module)
- Ethernet Cable: Cat5e or better, appropriate length for your setup
- Network Infrastructure: One of the following:
- Network switch or router with available Ethernet port (for Regular Ethernet Mode)
- Computer with Ethernet port or USB-to-Ethernet adapter (for Ethernet to PC Mode)
¶ Required Access:
- Physical Access: Ability to access the printer's control board to verify WiFi module removal
- Network Access: Ability to connect to your network infrastructure or configure computer network settings
- Administrative Privileges: If connecting directly to a computer, you'll need permission to modify network settings
Note: DoD machines are shipped without WiFi modules by default if requested during procurement. However, always verify the module has been removed before proceeding.
¶ Step 1: Verify WiFi Module Removal
DoD machines are shipped without WiFi modules. Verify the module has been removed before connecting to your network.
¶ Verification Steps
- Power off the printer and unplug the power cable.
- Open the left-hand rear door (as viewed from the back).
- Locate the control board and check near the Ethernet port—the WiFi module socket should be empty.
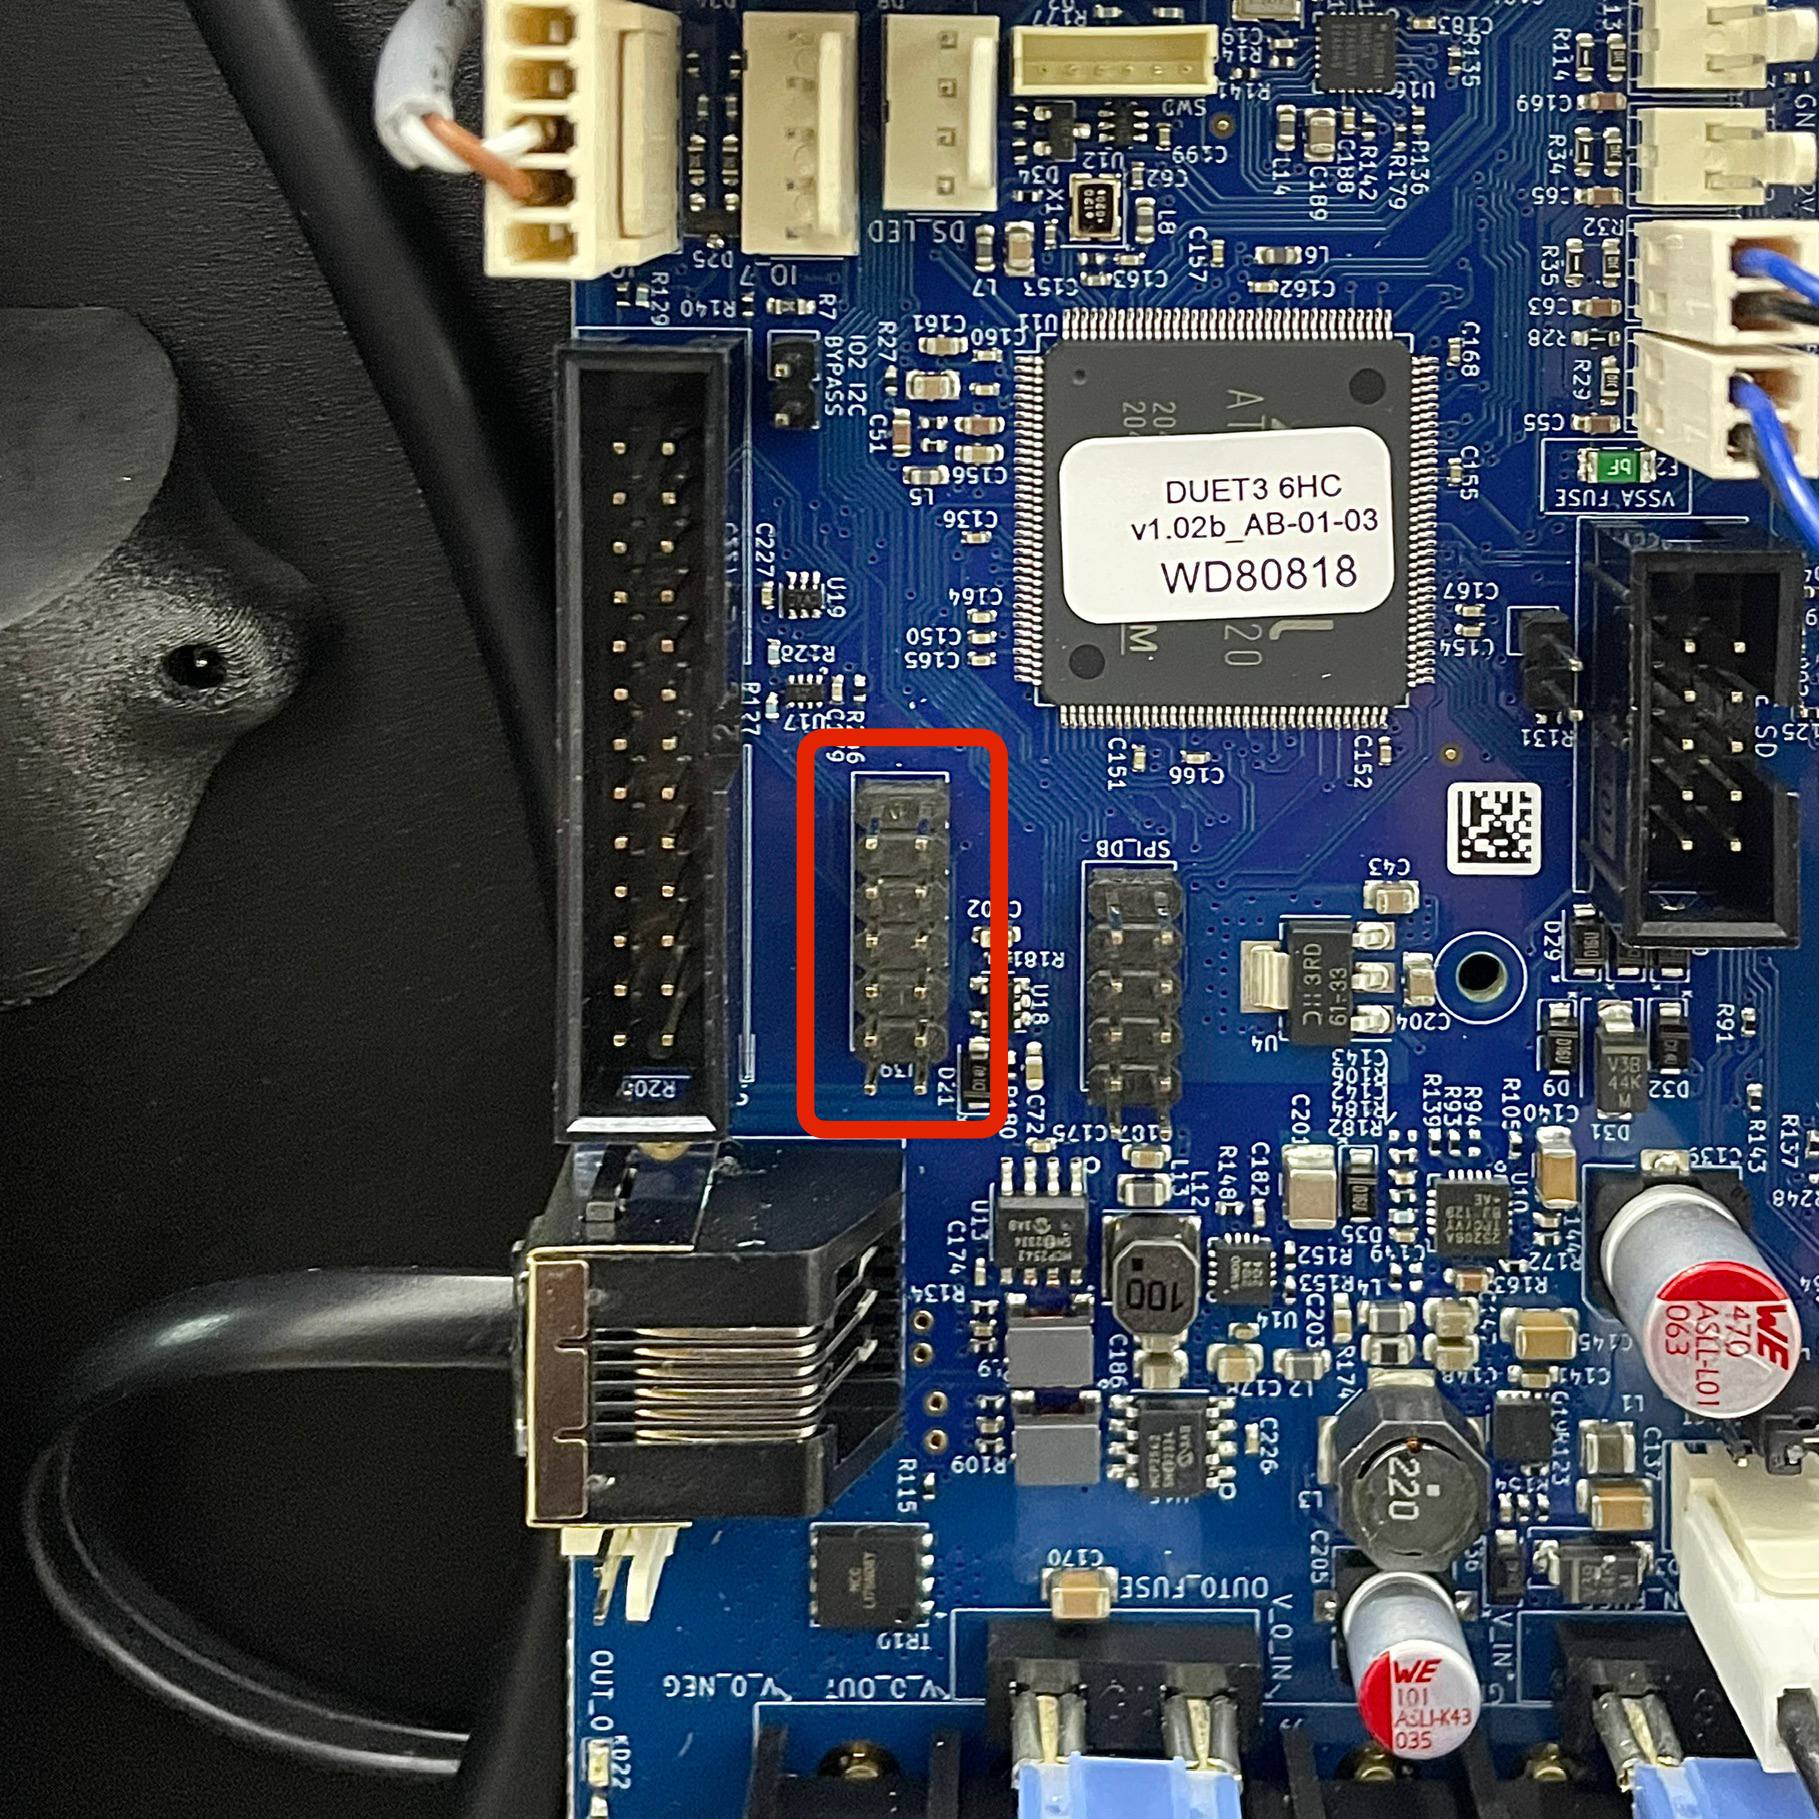
If the socket is empty, close the door and proceed to Step 2.
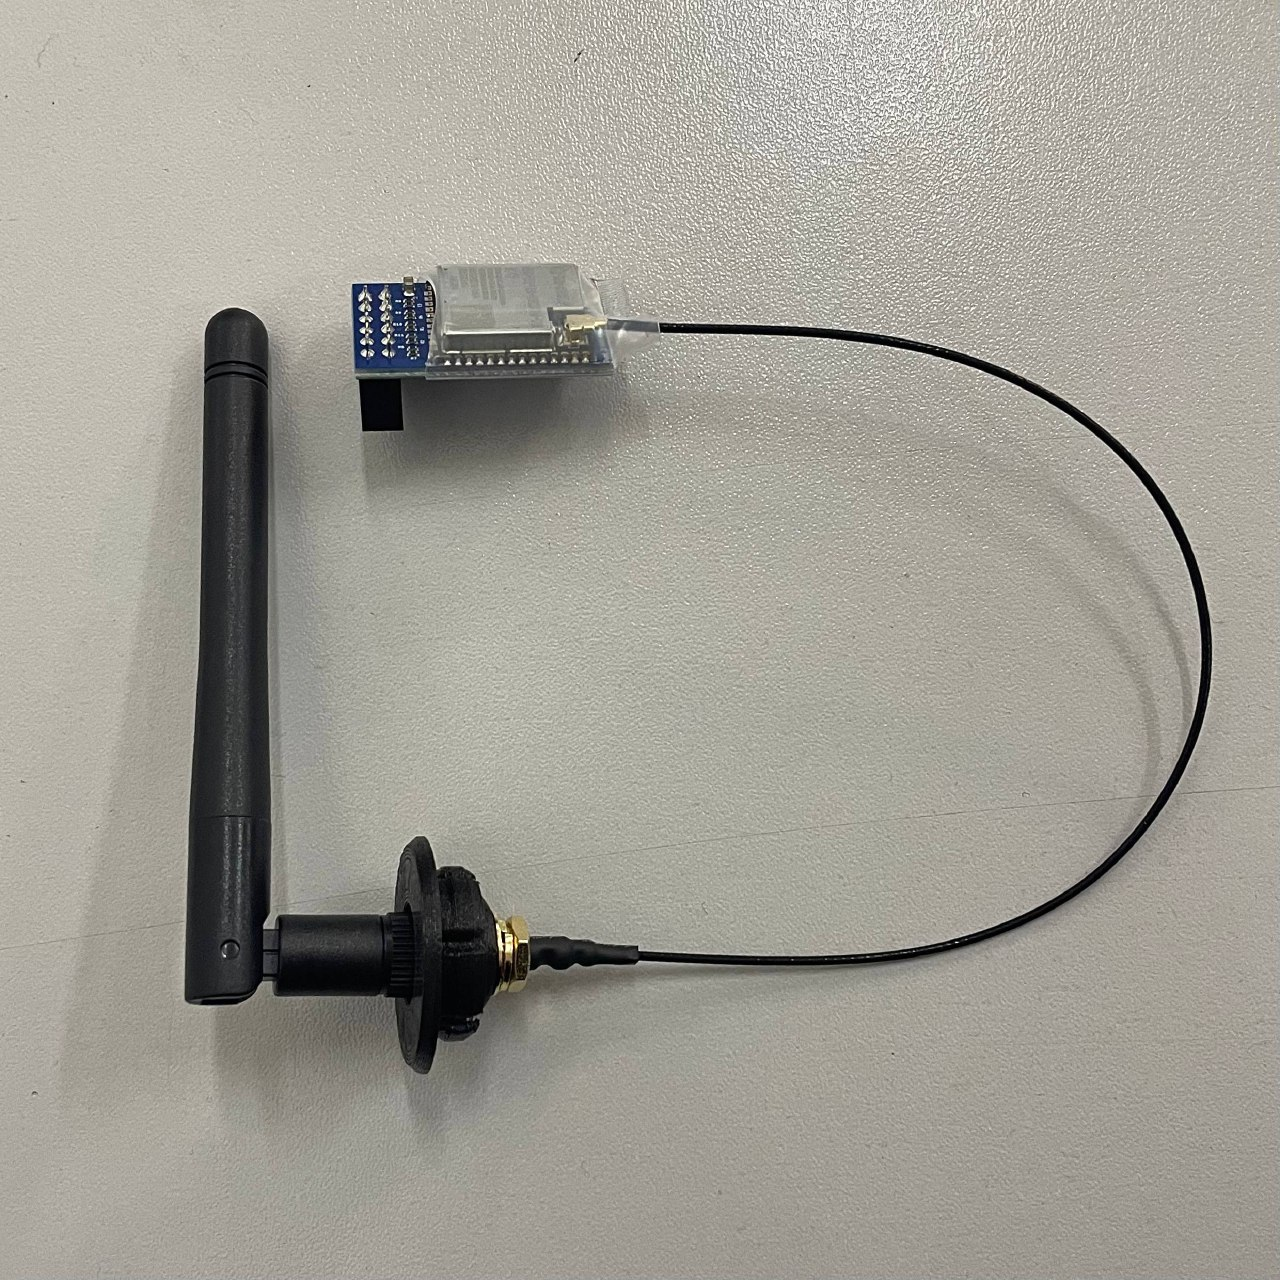
If a WiFi module is installed (small circuit board in the socket):
- Disconnect the antenna cable (if present)
- Gently pull the module straight up from the socket
- Store in an anti-static bag
- Close the rear door
Warning: Operating a DoD machine with an active WiFi module may violate your facility's security policies.
¶ Step 2: Choose Your Ethernet Connection Method
Your 22 IDEX V4 printer supports two distinct Ethernet connection modes. Choose the method that best fits your network infrastructure and security requirements.
¶ Option 1: Regular Ethernet Mode (Network Switch/Router)
Regular Ethernet Mode connects your printer to your existing network infrastructure through a switch or router using DHCP (Dynamic Host Configuration Protocol).
Characteristics:
- Printer automatically obtains an IP address from your network's DHCP server
- Multiple devices on your network can access the printer
- Integrates seamlessly with existing network infrastructure
- Recommended for most DoD installations with standard network infrastructure
When to Use:
- You have an established network with a DHCP-enabled switch or router
- Multiple workstations need access to the printer
- You want automatic IP address management
- Your facility's network security policies permit DHCP-based device enrollment
Proceed to: Connecting via Regular Ethernet Mode
¶ Option 2: Ethernet to PC Mode (Direct Computer Connection)
Ethernet to PC Mode creates a direct point-to-point connection between the printer and a single computer using static IP addresses.
Characteristics:
- Printer uses a fixed IP address (default:
192.168.1.50) - Only the directly connected computer can access the printer
- Requires manual IP configuration on both printer and computer
- No network switch or router required
- Complete network isolation
When to Use:
- You do not have access to a network switch or DHCP server
- Security policies require isolated, point-to-point connections
- Only one workstation needs printer access
- The printer must be physically isolated from the broader network
- You need maximum control over network addressing
Proceed to: Connecting via Ethernet to PC Mode
Important: Once you choose a connection method and complete the setup, the printer will automatically use that method after each restart. You can change modes later if your requirements change.
¶ Understanding LED Status Indicators
After powering on and waiting 60 seconds, the chamber LEDs indicate connection status:
| LED Color | Connection Method | Status | Action |
|---|---|---|---|
| 🟡 Yellow | Network Switch/Router | Connection successful via DHCP | Save configuration on touchscreen |
| 🔵 Blue | Direct PC Connection | Connection successful (static IP) | Save configuration on touchscreen |
| ⚪ White | Any | Previously saved mode active | Normal operation - no action needed |
| 🔴 Red | Any | Connection failed | See Troubleshooting |
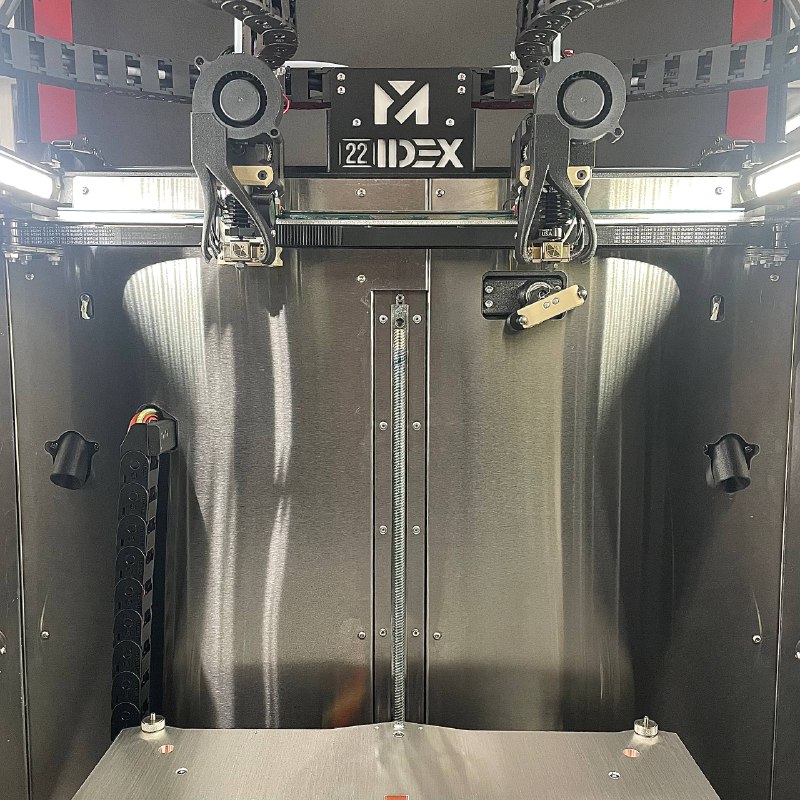
Look for the LED lights inside the printer chamber:
¶ Connecting via Regular Ethernet Mode
This section covers connecting your printer to a network switch or router using automatic DHCP configuration.
¶ Step-by-Step: Connect to Network Switch/Router
¶ 1. Connect Ethernet Cable (Machine OFF)
Important: Ensure you completed Step 1 and verified the WiFi module has been removed from the printer.
- Ensure the printer is powered OFF.
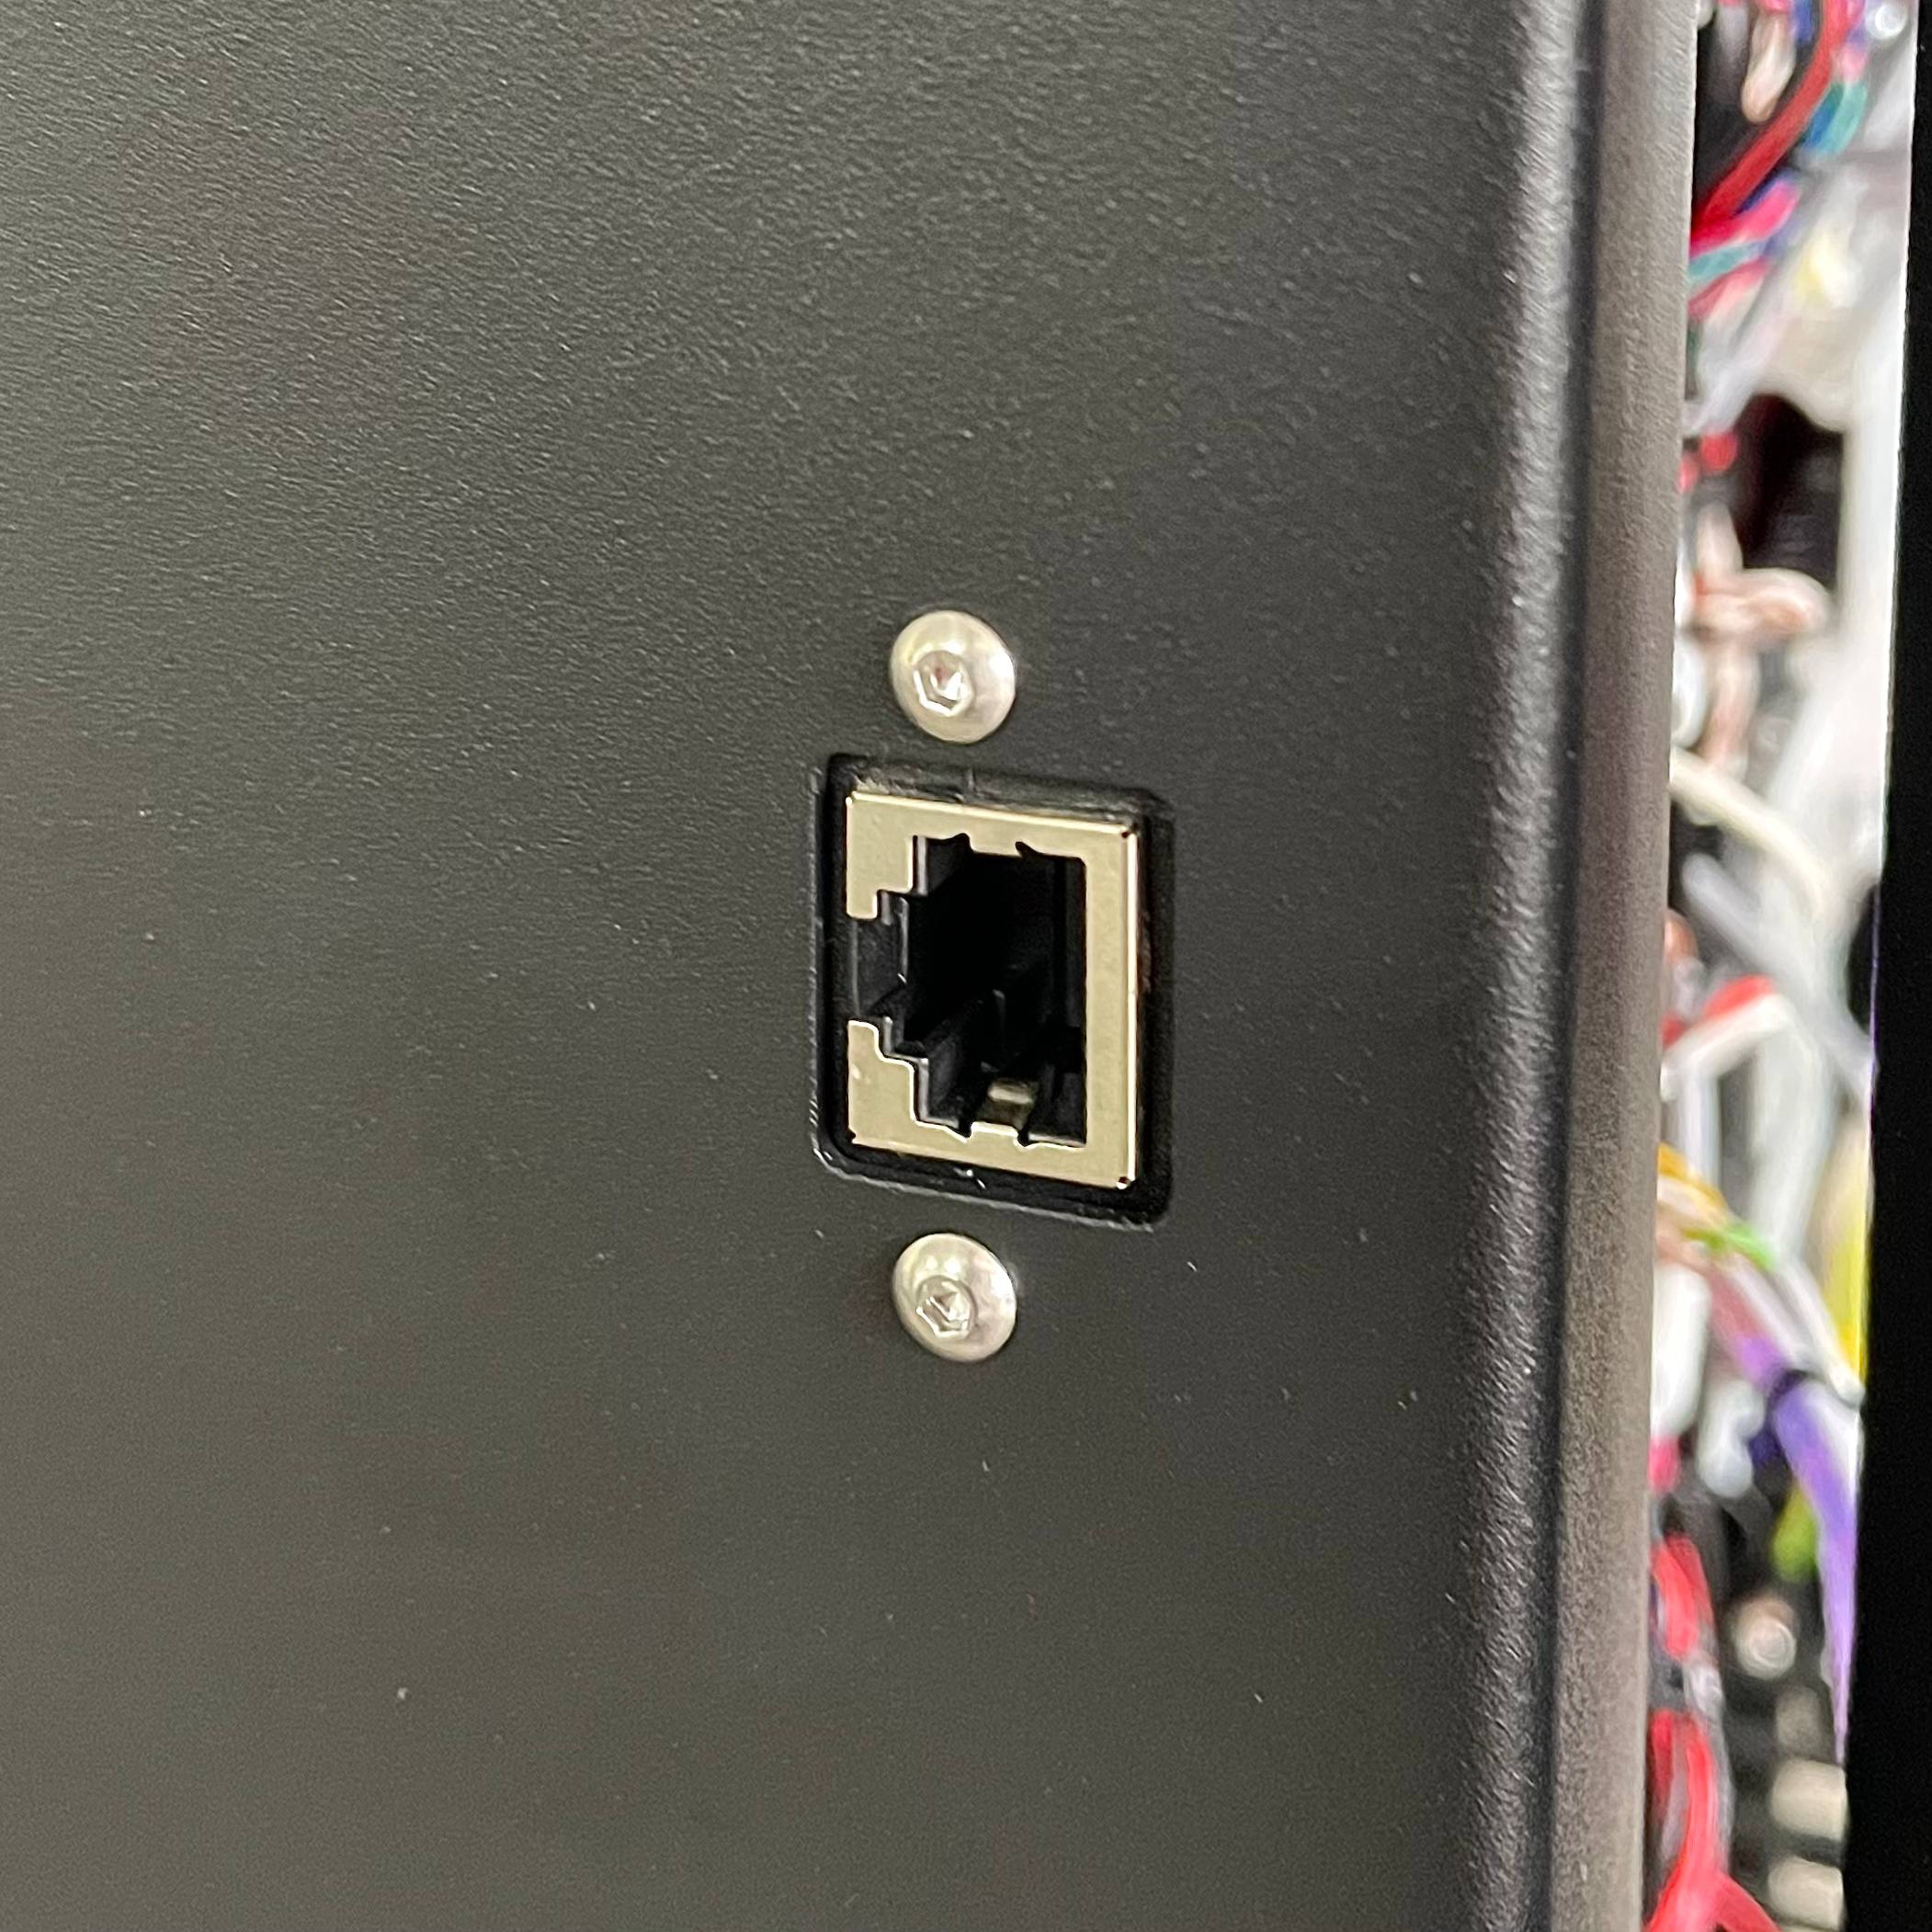
- Locate the Ethernet port on the side of your printer (near the control board).
- Plug one end of your Ethernet cable into the printer's Ethernet port.
- Plug the other end into an available port on your network switch or router.
- Verify the connection:
- Check that the cable is firmly seated in both ports
- Link LEDs on the switch/router should illuminate when cable is connected
¶ 2. Power On and Observe LEDs
- Turn on the printer using the power switch.
- Look inside the printer chamber and observe the LED lights.
- Wait 60 seconds for automatic network detection to complete.
LED Status After 60 Seconds:
- 🟡 Yellow LEDs: Connection successful! Proceed to Step 3.
- 🔴 Red LEDs: Connection failed—see Troubleshooting section.
Note: The printer automatically detects the Ethernet connection, requests an IP address from your network's DHCP server, and configures itself. This process takes up to 60 seconds.
¶ 3. Check Touchscreen for Connection Prompt
When the printer successfully connects (yellow LEDs appear), the touchscreen will display a pop-up:
Pop-up Title: Network Connected - IP: [your IP address]
Message: Do you want to remember this network mode after restart?
Buttons:
- Save network configuration - Printer will automatically use Ethernet mode after every restart
- Don't save - Printer will attempt the previously configured mode on next startup
Important: The pop-up shows your printer's IP address (example: 192.168.1.150)

¶ 4. Connect to Web Interface First
Before saving the network mode, verify the connection works:
- Write down the IP address shown on the touchscreen pop-up
- Open a web browser on a computer connected to the same network
- Enter the IP address in the address bar (example:
http://192.168.1.150) - Verify the web interface loads successfully
Alternative: You can also try
http://22idex.localinstead of the IP address
¶ 5. Save Network Configuration
After confirming the web interface works:
- Return to the printer's touchscreen
- Tap "Save network configuration" on the pop-up
- The printer will remember this network mode after every restart
Recommendation: Always save the configuration after verifying the connection works.
¶ 6. Verify Connection Persistence (After Restart)
Test that the printer automatically reconnects after restart:
- Turn off the printer using the power switch.
- Turn on the printer and wait 60 seconds.
- Look inside the chamber at the LED lights:
- ⚪ White LEDs: Configuration saved correctly—printer is working normally
- 🟡 Yellow LEDs: Setting was NOT saved—printer is reconnecting but configuration was not saved
- 🔴 Red LEDs: Connection failed—see Troubleshooting section
If LEDs are Yellow (setting not saved):
- The printer successfully connected, but the network mode was not saved
- Repeat the connection procedure and make sure to tap "Save network configuration" on the touchscreen pop-up
If LEDs are NOT white after 60 seconds:
- Reconnect to the printer's web interface
- Navigate to Macros > System > Settings > Network
- Select Enable Ethernet Mode
- Restart the printer and verify white LEDs appear after 60 seconds

¶ Connecting via Ethernet to PC Mode
This section covers creating a direct Ethernet connection between your printer and a single computer using static IP addresses. This method provides complete network isolation and is ideal for secure environments where the printer must not be connected to a broader network.
Warning: This is an advanced configuration method that requires manual IP address configuration on your computer. Only use this mode if you cannot connect to a network switch/router or if security policies require isolated connections.
¶ Step-by-Step: Direct Connection to Computer
¶ 1. Configure Your Computer's Network Settings FIRST
Important: Ensure you completed Step 1 and verified the WiFi module has been removed from the printer.
Before connecting the printer, you must configure your computer with a static IP address that will allow communication with the printer.
Required Computer Configuration:
- IP Address:
192.168.1.51 - Subnet Mask:
255.255.255.0 - Gateway: Leave empty or set to
192.168.1.50
Critical: Your computer and printer must be on the same subnet. The first three numbers must match:
192.168.1.xxx— only the last number should be different (printer:.50, computer:.51).
¶ Configure Network Settings - Windows
- Open Settings > Network & Internet > Ethernet
- Click on your Ethernet adapter
- Click Edit next to "IP assignment"
- Select Manual
- Enable IPv4
- Enter the following values:
- IP address:
192.168.1.51 - Subnet mask:
255.255.255.0 - Gateway: Leave empty or enter
192.168.1.50
- IP address:
- Click Save
¶ Configure Network Settings - macOS
- Open System Preferences > Network
- Select your Ethernet connection
- Click Advanced
- Go to the TCP/IP tab
- Set Configure IPv4:
Manually - Enter the following values:
- IP Address:
192.168.1.51 - Subnet Mask:
255.255.255.0 - Router: Leave empty or enter
192.168.1.50
- IP Address:
- Click OK, then Apply
¶ Configure Network Settings - Linux
- Open your network settings (varies by distribution)
- Select your Ethernet connection
- Change connection method to Manual
- Enter the following values:
- Address:
192.168.1.51 - Netmask:
255.255.255.0 - Gateway: Leave empty or enter
192.168.1.50
- Address:
- Save and apply the settings
Important: After configuring these settings, your computer's Ethernet adapter will NOT have internet access. Use WiFi or a separate network adapter if you need internet connectivity while connected to the printer.
¶ 2. Connect Ethernet Cable (Machine OFF)
- Ensure the printer is powered OFF.
- Locate the Ethernet port on the side of your printer (near the control board).
- Plug one end of your Ethernet cable into the printer's Ethernet port.
- Plug the other end directly into your computer's Ethernet port (or USB-to-Ethernet adapter).
- Do NOT connect to a router or switch—this must be a direct point-to-point connection.
¶ 3. Power On and Observe LEDs
- Turn on the printer using the power switch.
- Look inside the printer chamber and observe the LED lights.
- Wait 60 seconds for automatic network detection to complete.
LED Status After 60 Seconds:
- 🔵 Blue LEDs: Configuration successful! Proceed to Step 4.
- 🔴 Red LEDs: Configuration failed—see Troubleshooting section.
Note: The printer attempts DHCP first (finds no DHCP server), then automatically configures Ethernet to PC mode with static IP
192.168.1.50. This process takes up to 60 seconds.
¶ 4. Check Touchscreen for Connection Prompt
When the printer successfully connects (blue LEDs appear), the touchscreen will display a pop-up:
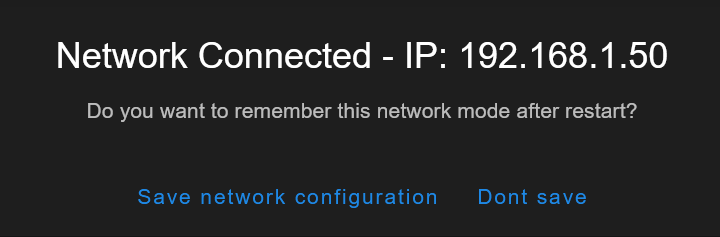
Pop-up Title: Network Connected - IP: 192.168.1.50
Message: Do you want to remember this network mode after restart?
Buttons:
- Save network configuration - Printer will automatically use Ethernet to PC mode after every restart
- Don't save - Printer will attempt the previously configured mode on next startup
Important: The pop-up confirms the printer's IP address is 192.168.1.50
¶ 5. Connect to Web Interface First
Before saving the network mode, verify the connection works:
- Open a web browser on your computer
- Enter
http://192.168.1.50orhttp://22idex.localin the address bar - Verify the web interface loads successfully
¶ 6. Save Network Configuration
After confirming the web interface works:
- Return to the printer's touchscreen
- Tap "Save network configuration" on the pop-up
- The printer will remember this network mode after every restart
Recommendation: Always save the configuration after verifying the connection works.
¶ 7. Verify Connection Persistence (After Restart)
Test that the printer automatically reconnects after restart:
- Turn off the printer using the power switch.
- Turn on the printer and wait 60 seconds.
- Look inside the chamber at the LED lights:
- ⚪ White LEDs: Configuration saved correctly—printer is working normally
- 🔵 Blue LEDs: Setting was NOT saved—printer is reconnecting but configuration was not saved
- 🔴 Red LEDs: Connection failed—see Troubleshooting section
If LEDs are Blue (setting not saved):
- The printer successfully connected, but the network mode was not saved
- Repeat the connection procedure and make sure to tap "Save network configuration" on the touchscreen pop-up
If LEDs are NOT white after 60 seconds:
- Reconnect to the printer's web interface at
http://192.168.1.50 - Navigate to Macros > System > Settings > Network
- Select Enable Ethernet to PC Mode
- Restart the printer and verify white LEDs appear after 60 seconds
¶ Finding Your Printer's IP Address Later
If you need to find the IP address after dismissing the touchscreen pop-up:
¶ Method 1: Console Command (Recommended)
Using Touchscreen Console:
- On the printer's touchscreen, tap the Console tab
- Type:
M552 I0 - Press Send
- The printer displays its IP address

Using Web Interface Console:
- Access the printer's web interface (if already connected)
- Go to the Console tab
- Type:
M552 I0 - Press Send
- The printer displays its IP address
Example Response:
Network interface 0: IP address 192.168.1.150
Note: Use the touchscreen console when troubleshooting connection issues, as the web interface may not be accessible if the printer is not connected to the network.
¶ Method 2: Use Hostname
Open a web browser and navigate to: http://22idex.local
Works on most networks without needing the IP address.
¶ Method 3: Check SD Card File
- Power off the printer and remove the SD card
- Insert the SD card into a computer
- Open the file
IP_address.txtto view connection details (includes network mode, IP address, and timestamp)
¶ Method 4: Check Router/Switch Admin Panel
- Access your router or switch's administrative interface
- Navigate to the connected devices list (often called "DHCP Clients" or "Device List")
- Look for a device named "22idex"
- Note the assigned IP address
¶ Advanced: Assigning a Static IP Address
If your network requires a static IP address instead of DHCP, use the built-in Assign Static IP macro.
To configure static IP:
- Connect to the printer using one of the connection methods above
- Access the web interface
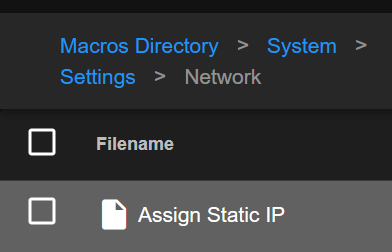
- Navigate to: Macros > System > Settings > Network > Assign Static IP
- Follow the on-screen prompts to configure your static IP address
The macro will guide you through:
- Detecting your current network connection type
- Choosing to use your current IP or entering a custom one
- Testing the configuration before saving
- Saving the configuration for automatic use after restart
Note: After configuring a static IP, the printer will maintain this configuration across restarts and will not request DHCP addresses.
¶ Troubleshooting
If you encounter connection issues, use this section to diagnose and resolve problems. Most issues fall into one of these categories:
¶ Quick Troubleshooting Guide
| Problem | Likely Cause | Quick Fix |
|---|---|---|
| Red LEDs after 60 seconds | Cable not connected, network issue | Check cable connections, verify network equipment is on |
| Can't access web interface | Wrong subnet | Ensure computer and printer are on same network (first 3 numbers of IP must match) |
| Works first time but fails after restart | Configuration not saved | Tap "Save network configuration" on touchscreen pop-up |
| Blue LEDs but can't connect (PC Mode) | Computer IP wrong | Verify computer is set to 192.168.1.51 |
¶ Detailed Troubleshooting
¶ Red LEDs After 60 Seconds - Connection Failed
What this means: The printer cannot establish a network connection. It has tried all available methods and all have failed.
Step 1: Check Physical Connection
- Verify cable is firmly seated at both ends (printer and switch/router/computer)
- Try a different Ethernet cable (Cat5e or better)
- Check link LEDs on the switch/router port (should be lit when cable is connected)
- Try a different network port on your switch/router
- Verify network equipment is powered on and functioning
- Wait the full 60 seconds (some switches take longer to negotiate)
Step 2: Mode-Specific Checks
For Network Switch/Router Connection:
- Verify DHCP is enabled on your router
- Test the network port with another device to confirm it works
- Check if your network requires device pre-registration or MAC address allowlisting
- Try connecting directly to computer (PC Mode) to isolate if it's a network infrastructure issue
For Direct PC Connection:
- Double-check computer IP configuration: Must be
192.168.1.51with subnet255.255.255.0 - Restart your computer's network adapter (disable/re-enable in network settings)
- Temporarily disable WiFi on your computer to ensure Ethernet takes priority
- Restart your computer after configuring network settings
- Temporarily disable firewall to test if it's blocking the connection
- Verify cable connects DIRECTLY from printer to computer (not through router)
Step 3: Network Department Assistance (For DoD Networks)
If red LEDs persist when connected to your network switch/router (but direct PC connection with blue LEDs works), your network infrastructure is preventing printer connectivity.
DoD networks often have strict security policies that block unauthorized devices. Contact your network/IT department with this information:
Device Information:
- Device Type: 22 IDEX V4 3D Printer (DoD Ethernet-only configuration)
- Required Access: DHCP IP assignment, HTTP access (port 80), FTP access (port 21, if needed)
- Connection Behavior: Printer attempts DHCP but receives no response; direct computer connection works (rules out hardware issues)
Questions to Ask Your Network Team:
- "Does this network require device pre-registration or MAC address allowlisting?"
- "Are there VLAN restrictions that would prevent this device from connecting?"
- "Is 802.1X authentication required for network access?"
- "Can you verify DHCP is enabled and has available addresses in the pool?"
- "Are there port security or firewall rules blocking this device?"
¶ Cannot Access Web Interface - Wrong Subnet
What this means: Printer connected successfully (yellow or blue LEDs) but you cannot access the web interface. This is the most common issue.
Why this happens: Your computer and printer must have IP addresses in the same subnet. The first three numbers must match.
Examples:
✅ Works - Printer: 192.168.1.150, Computer: 192.168.1.100 (first three match: 192.168.1)
✅ Works - Printer: 192.168.1.50, Computer: 192.168.1.51 (first three match: 192.168.1)
❌ Doesn't Work - Printer: 192.168.1.150, Computer: 192.168.0.100 (third number different)
❌ Doesn't Work - Printer: 10.0.0.150, Computer: 192.168.1.100 (completely different)
Solution:
Step 1: Check Your Computer's IP Address
- Windows: Open Command Prompt, type
ipconfig, look for "IPv4 Address" - macOS: System Preferences > Network > Ethernet > Advanced > TCP/IP, look for "IPv4 Address"
- Linux: Open Terminal, type
ip addrorifconfig, look for Ethernet interface IP

Step 2: Compare IP Addresses
- Write down your computer's IP (e.g.,
192.168.1.100) - Write down your printer's IP (shown on touchscreen pop-up)
- Verify the first three numbers match
Step 3: Fix Subnet Mismatch
For Network Switch/Router Connection:
- If your computer is on a different subnet, connect to the correct network
- Restart your computer's network adapter to obtain a new IP from DHCP
- Check WiFi vs Ethernet: Ensure your computer is connected to the same network as the printer
- Verify your router's subnet configuration (most common:
192.168.1.xor192.168.0.x)
For Direct PC Connection:
- Verify you configured
192.168.1.51on your computer (not192.168.0.51or another subnet) - Double-check for typos in the static IP configuration
- Restart your computer to ensure settings are applied
¶ Connection Works Initially But Fails After Restart
What this means: First connection was successful (yellow or blue LEDs), but after restarting printer, red LEDs appear and printer is no longer accessible.
Solutions:
- Verify Ethernet cable is still connected (check both ends are firmly seated)
- Check network equipment is powered on (router/switch must be functioning)
- Verify computer IP configuration (PC Mode only - ensure
192.168.1.51is still configured; some systems revert to DHCP after restart) - Check if network configuration changed (verify subnet hasn't changed, DHCP is still enabled)
If red LEDs persist after checking these items, follow the detailed troubleshooting steps in the Red LEDs After 60 Seconds section above.
¶ Configuration Not Saving (Yellow/Blue LEDs After Restart)
What this means: Printer reconnects successfully after restart but shows yellow or blue LEDs instead of white. The network mode was not saved.
Solution:
Option 1: Save via Touchscreen Pop-up (Recommended)
- The pop-up appears showing the IP address
- Tap "Save network configuration" before dismissing the pop-up
- Restart the printer to verify white LEDs appear
Option 2: Save via Web Interface
- Connect to the printer's web interface (use the IP address shown)
- Navigate to Macros > System > Settings > Network
- Select:
- Enable Ethernet Mode (for network switch/router connection)
- Enable Ethernet to PC Mode (for direct computer connection)
- Restart the printer and verify white LEDs appear after 60 seconds
¶ Support and Contact Information
For technical support, network configuration assistance, or security-related questions regarding your 22 IDEX V4 DoD printer:
Vision Miner Support
Email: support@visionminer.com
Note: For security-sensitive questions or facility-specific network configurations, please contact your facility's network administrator or security officer before reaching out to external support.