¶ Introduction
The 22 IDEX V4 printer supports Ethernet connectivity for reliable, high-speed wired access to the web interface. Ethernet offers stable connections, faster file transfers, and immunity to wireless interference compared to WiFi.
This manual guides you through connecting your printer via Ethernet using the touchscreen interface. Simply connect the cable, run the setup macro on the touchscreen, and the printer will automatically configure itself and display the connection information.
You can choose between:
- Regular Ethernet Mode - Connect to your network router or switch (automatic or static IP)
- Ethernet to PC Mode - Direct connection to a single computer
Note: Ethernet requires Cat5e or better cable. Ensure you have appropriate cable length to reach from printer to router, switch, or computer.
¶ Ethernet Connection Options
The Enable Ethernet Mode macro offers three configuration options:
¶ DHCP (Automatic)
Easiest option - Router automatically assigns IP address.
Use when:
- You have a network router or switch
- You want multiple devices to access the printer
No manual configuration needed.
¶ Static IP (Manual)
Fixed IP address - Useful for advanced network configurations.
Use when:
- Your network requires fixed IP addresses
- You need consistent printer addressing
Requires: IP address, subnet mask, and gateway.
¶ Ethernet to PC Mode
Direct connection - Point-to-point connection to one computer.
Use when:
- You don't have a router or switch
- You want isolated connection to single computer
Requires: Computer configured with static IP 192.168.1.51.
Important: Ethernet to PC mode requires configuring your computer's network settings first.
¶ Prerequisites
For Regular Ethernet Mode:
- Ethernet cable (Cat5e or better)
- Network router or switch with available port
- DHCP enabled on router (default on most routers)
For Ethernet to PC Mode:
- Ethernet cable (Cat5e or better)
- Computer with Ethernet port (or USB-to-Ethernet adapter)
- Administrative access to change network settings
Note: You cannot use Ethernet and WiFi simultaneously. Enabling Ethernet automatically disables WiFi.
¶ LED Status Indicators
During setup, watch the chamber LEDs for connection status:
| LED Color | Meaning |
|---|---|
| 🟡 Yellow | Testing connection |
| 🟢 Green | Test successful - stays on until you save or revert |
| 🔴 Red | Test failed - automatically reverts to previous mode |
| ⚪ White | Configuration saved - persists after restart |
LED lights are inside the printer chamber:
¶ Ethernet Connection Procedure
¶ Step 1: Connect Cable
For DHCP or Static IP:
- Connect Ethernet cable from printer to your router or network switch
- Verify DHCP is enabled on router (default on most routers)
For Ethernet to PC Mode:
- Connect Ethernet cable directly from printer to computer
- Do NOT connect through a router
- Continue to Step 2 - you'll configure your computer after choosing PC Mode
¶ Step 2: Access Enable Ethernet Mode Macro
-
On the printer's touchscreen, navigate to:
Macros > System > Settings > Network > Enable Ethernet Mode -
The macro will launch and present configuration options

¶ Step 3: Choose Your Configuration Option
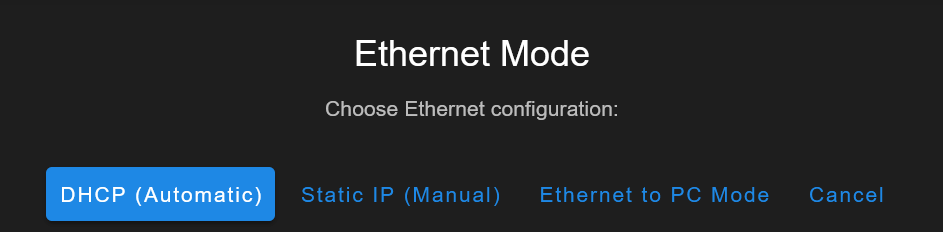
A dialog will appear with the title "Ethernet Mode" asking "Choose Ethernet configuration:"
Four options are presented:
- DHCP (Automatic) - For router/switch with automatic IP assignment
- Static IP (Manual) - For router/switch with fixed IP address
- Ethernet to PC Mode - For direct computer connection
- Cancel - Exits without making changes
Select the option that matches your setup (see Step 1 above for guidance).
¶ Step 4: Enter Configuration Details (If Required)
¶ If you chose DHCP (Automatic):
No input required - proceed to Step 5
¶ If you chose Static IP (Manual):
You'll see dialogs titled "Network Setup" prompting you to enter (in order):
- IP Address - Enter your desired static IP (default shown:
192.168.1.100) - Subnet Mask - Enter subnet mask (default shown:
255.255.255.0, enter 0 to skip) - Gateway - Enter your router's IP address (default shown:
192.168.1.1, enter 0 to skip)

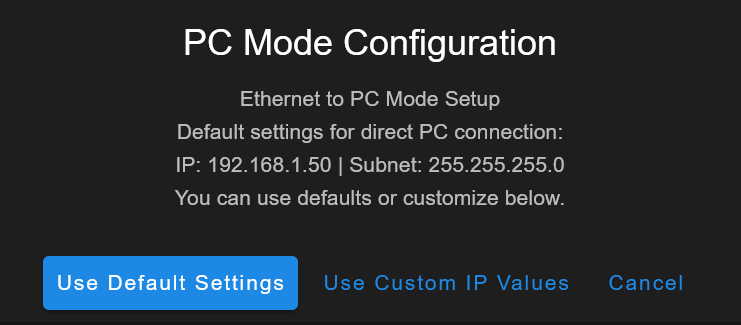
¶ If you chose Ethernet to PC Mode:
A dialog titled "PC Mode Configuration" will appear with the following message:
"Ethernet to PC Mode Setup
Default settings for direct PC connection:
IP: 192.168.1.50 | Subnet: 255.255.255.0
You can use defaults or customize below."
Three options:
- Use Default Settings - Recommended for most users (uses IP
192.168.1.50) - Use Custom IP Values - For advanced configurations
- Cancel - Exits without making changes
If you select "Use Custom IP Values":
You'll be prompted to enter (in order):
- IP Address - Enter your custom IP or use default
192.168.1.50 - Subnet Mask - Enter subnet mask or use default
255.255.255.0(enter 0 to skip) - Gateway - Enter gateway or use default
192.168.1.1(enter 0 to skip)
Important: If using custom IP, your computer must be configured with a compatible IP address in the same subnet.
¶ Step 4A: Configure Your Computer (PC Mode Only)
If you chose Ethernet to PC Mode in Step 3, you must configure your computer's network settings:
¶ Windows Configuration
- Open Control Panel > Network and Sharing Center
- Click Change adapter settings
- Right-click your Ethernet adapter, select Properties
- Select Internet Protocol Version 4 (TCP/IPv4), click Properties
- Select Use the following IP address
- Enter:
- IP address:
192.168.1.51 - Subnet mask:
255.255.255.0 - Default gateway: Leave empty or enter
192.168.1.50
- IP address:
- Click OK, then OK again

¶ macOS Configuration
- Open System Preferences > Network
- Select Ethernet connection
- Change Configure IPv4 to Manually
- Enter:
- IP Address:
192.168.1.51 - Subnet Mask:
255.255.255.0 - Router: Leave empty or enter
192.168.1.50
- IP Address:
- Click Apply

¶ Linux Configuration
- Open network settings
- Select Ethernet connection
- Change to Manual
- Enter:
- Address:
192.168.1.51 - Netmask:
255.255.255.0 - Gateway: Leave empty or enter
192.168.1.50
- Address:
- Save and apply
Note: Your computer will NOT have internet through Ethernet after this. Use WiFi for internet.
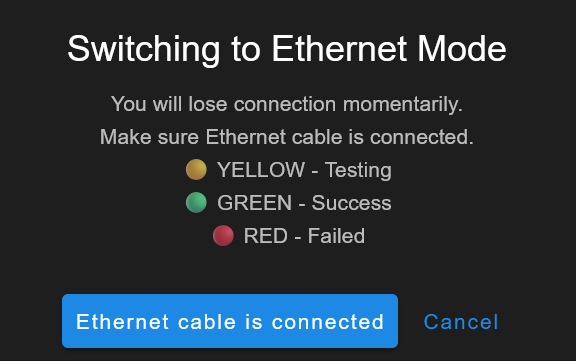
¶ Step 5: Confirm Cable Connection and Begin Test
A confirmation dialog appears: "Switching to Ethernet Mode"
The dialog explains LED indicators:
- 🟡 YELLOW - Testing connection
- 🟢 GREEN - Test successful
- 🔴 RED - Test failed (automatic revert)
Action:
- Verify your Ethernet cable is connected (printer to router/switch/computer)
- Tap "Ethernet cable is connected" to begin the test
What happens during the test:
- Printer disables WiFi
- Printer enables Ethernet interface
- Printer attempts connection using your chosen configuration
- LED lights indicate test progress
¶ Step 6: Observe LED Indicators
Look inside the printer chamber and watch the LED lights:
¶ 🟡 Yellow LEDs - Testing In Progress
- The printer is testing the Ethernet connection
- Wait for the color to change (typically 10-30 seconds)
- Do not power off or interrupt the test
¶ 🟢 Green LEDs - Test Successful
- Connection test passed!
- Green LEDs stay on until you save or revert
- The printer is connected but NOT yet saved
- Proceed to Step 7
¶ 🔴 Red LEDs - Test Failed
- Connection test failed
- Printer automatically reverts to previous network mode
- Review error dialog on touchscreen
- See Troubleshooting section
- You can retry after fixing the issue
¶ Step 7: Note IP Address from Touchscreen (Don't Save Yet)
If green LEDs appear, the touchscreen displays a success dialog:
Title: "Connection Successful"
Dialog shows:
"✅ Ethernet Mode Connected Successfully!
IP Address: 192.168.1.150 (DHCP)" (or "(Static)" or "(PC Mode)" depending on your choice)
Local Domain: 22idex.local
Would you like to save this mode?"
Three buttons:
- Save Mode - Permanently saves this configuration
- Revert to Previous - Returns to previous network mode
- Cancel - Closes dialog, stays in test mode (green LEDs remain)

Warning: DO NOT click any button yet! Write down the IP address and proceed to Step 8.
Important: Do NOT save yet!
- Write down the IP address displayed
- Tap "Cancel" to dismiss the dialog
- Green LEDs will stay on - this is correct
- Proceed to Step 8 to verify the connection works
Why not save immediately? Always verify the web interface is accessible before saving the configuration. This ensures the connection actually works from your computer.
¶ Step 8: Verify Connection via Web Browser
Before saving the configuration, verify you can access the printer:
- Open a web browser on your computer
- Enter the IP address you wrote down in Step 7
- Example:
http://192.168.1.150 - Or try:
http://22idex.local(hostname method)
- Example:
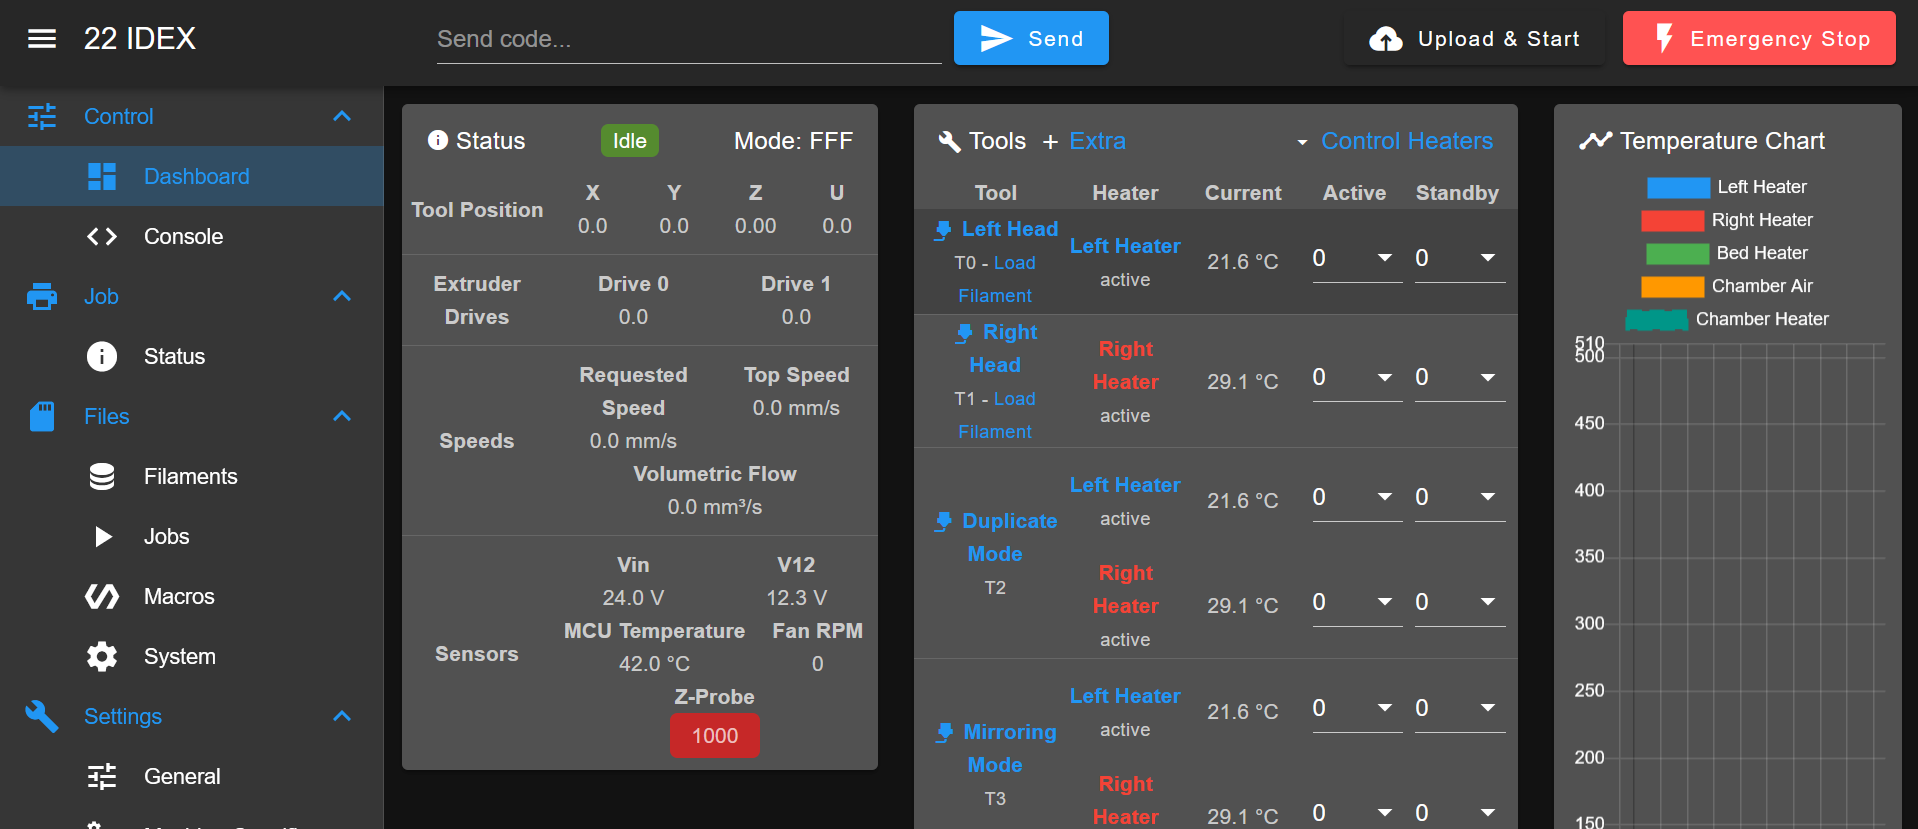
- Verify the web interface loads successfully
- Confirm you can see the printer's dashboard
If the web interface loads:
- ✅ Connection is working correctly
- ✅ Proceed to Step 9 to save the configuration
If the web interface does NOT load:
- ❌ Connection has an issue
- ❌ See Cannot Access Web Interface in Troubleshooting
- ❌ Do NOT save the configuration yet
¶ Step 9: Save the Configuration
After verifying the web interface works, save the configuration to make it permanent.
¶ Method 1: Save via Touchscreen (Recommended)
- Look at the printer's touchscreen
- If the success dialog is still visible, tap "Save Mode"
- If you dismissed the dialog, navigate to:
Macros > System > Settings > Network > Save Current Network Mode
- Green LEDs will change to white, indicating saved configuration
- Done! The printer will use this network mode after every restart

¶ Method 2: Save via Web Interface
- In the web interface, click Settings (gear icon)
- Navigate to Network section
- Find "Save Current Network Mode" button
- Click to save the configuration
- Green LEDs will change to white
- Done! The printer will use this network mode after every restart

Success! Your Ethernet configuration is now saved. The printer will automatically connect using this mode after every restart.
¶ Troubleshooting Ethernet Connection Issues
| Problem | Quick Fix |
|---|---|
| Red LEDs during test | Check cable, verify network equipment on, retry |
| Can't access web interface | Check subnet - first 3 numbers of IP must match |
| Green LEDs but no access (PC Mode) | Verify computer IP is 192.168.1.51 |
| Can't connect after restart | Verify cable connected, network equipment on |
¶ Cannot Access Web Interface - Wrong Subnet (MOST COMMON)
Symptoms:
- Green LEDs (test successful)
- Cannot access printer via IP address
Warning: This is the most common issue. Your computer and printer must be on the same subnet!
Why this happens:
For devices to communicate, the first three numbers of the IP address must match.
Examples:
✅ Works - Printer: 192.168.1.150, Computer: 192.168.1.100
❌ Doesn't Work - Printer: 192.168.1.150, Computer: 192.168.0.100
Solution:
-
Check your computer's IP:
- Windows: Command Prompt >
ipconfig - macOS: System Preferences > Network > TCP/IP
- Linux: Terminal >
ip addr
- Windows: Command Prompt >
-
Compare IPs - First three numbers must match
-
Fix mismatch:
- Regular Ethernet: Restart network adapter or connect to correct network
- PC Mode: Verify computer is set to
192.168.1.51
¶ Red LEDs During Test - Connection Failed
What happens:
- Printer tests connection
- Test fails
- Automatically reverts to previous mode
Solutions:
- Check cable - Firmly seated at both ends
- Try different cable - Use Cat5e or better
- Check equipment - Router/switch powered on
- Try different port - Test another port on router/switch
For PC Mode:
- Verify computer IP is
192.168.1.51 - Restart computer after changing network settings
- Disable WiFi temporarily
- Cable connects DIRECTLY to computer (not router)
¶ Connection Works Then Fails After Restart
Solutions:
- Check cable still connected
- Verify network equipment powered on
- PC Mode: Confirm computer still has
192.168.1.51configured - Check if network subnet changed
¶ Conclusion
You now know how to connect your 22 IDEX V4 via Ethernet using Regular Ethernet Mode or Ethernet to PC Mode.
What You Can Now Do:
- Access web interface over stable wired connection
- Upload files faster than WiFi
- Operate without wireless interference
Key Points:
- Regular Ethernet Mode is easiest (automatic DHCP)
- PC Mode requires manual computer configuration
- Subnet matching is critical (first 3 numbers must match)
- Printer automatically reconnects after restart
¶ Conclusion
You have successfully learned how to connect your 22 IDEX V4 printer via Ethernet. Whether using Regular Ethernet Mode for seamless router/switch integration or Ethernet to PC Mode for direct computer connection, you now have the knowledge to establish a reliable wired connection that meets your specific needs.
What You Can Now Do:
- Access the web interface from any device on your network (Regular Ethernet Mode)
- Establish a dedicated direct connection to a single computer (Ethernet to PC Mode)
- Upload print files over a stable, high-speed wired connection
- Monitor print progress without wireless interference
- Switch between Ethernet and WiFi modes as your setup requirements change
Key Takeaways:
- Regular Ethernet Mode is recommended for most users—automatic DHCP configuration with router/switch
- Ethernet to PC Mode requires manual IP configuration on both devices—use only when necessary
- Subnet matching is critical—the first three numbers of the IP address must match between devices
- After successful configuration, the printer automatically reconnects after restart
- The network self-test provides automatic fallback to WiFi AP mode if Ethernet connection fails
Next Steps:
- Explore the web interface to familiarize yourself with printer controls
- Consider setting a DHCP reservation in your router for consistent printer IP address
- Upload your first G-code file and start printing
- Configure additional printer settings such as filament profiles and temperature presets
If you encounter any issues not covered in this troubleshooting section or need further assistance, please don't hesitate to reach out to our support team.