¶ Video Guide
¶ Introduction
If you notice inconsistencies in your prints, such as parts on the left-hand side being too close to the build plate and parts on the right-hand side being too far (or vice versa), it might indicate that the bed leveling is not working correctly. This guide will help you troubleshoot and correct bed leveling issues.
¶ Symptoms
When printing large parts or multiple objects on the build plate in Standard Mode, you may observe:
- Inconsistent Z Offset: The first layer height is not consistent from left to right.
- Too Close/Too Far: Parts on one side (left or right) are too close to the build plate, causing over-extrusion, while parts on the other side are too far, causing under-extrusion.
These symptoms suggest that the bed leveling might not be functioning correctly, and bed leveling correction is needed.
On all 22 IDEX V3 machines, automatic bed leveling correction is turned on by default and is adjusted during auto-calibration. If you experience issues with your first layer, please follow the manual bed leveling correction steps described below.
¶ Automated Bed Leveling Correction (Beta)
By default, the automated bed leveling correction is disabled in the firmware. To enable it, follow these steps:
-
Enable Automatic Mode:
- Open the machine’s web interface.
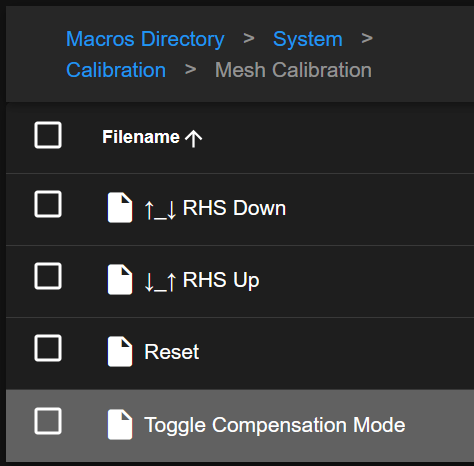
- Navigate to
Macros > System > Calibration > Mesh Calibration. - Click on
Toggle Compensation Mode.
This macro acts as a toggle:
- If it prompts "Auto Mode," the machine will use the last stored calibration value from the previous automatic calibration run.
- If it prompts "Manual Mode," the machine will expect manual adjustments. That is set to 0 by default.
-
AutoCalibration (Recommended to run if you have not done it recently):
- Ensure your nozzle is clean and build plate is removed.
- Run the automatic calibration procedure.
- The machine will measure and record the correct compensation value to maintain a level bed.
Once automated mode is enabled and calibrated, the stored value will be used for all future prints, ensuring consistent results across the build surface.
¶ Manual Bed Leveling Correction
-
Access Manual Adjustment Macros:
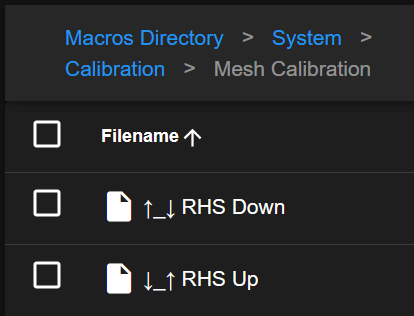
- Go to
Macros > System > Calibration > Mesh Calibration. - You will see two macros:
↑_↓ RHS Down: Rotates the build plate clockwise, lowering the right-hand side (making it farther from the nozzle).↓_↑ RHS Up: Rotates the build plate counterclockwise, raising the right-hand side (making it closer to the nozzle).
- Go to
-
Understanding the Adjustment:
- When you select
↑_↓ RHS Down, the right side of the build plate moves down, increasing the gap between the nozzle and the bed on that side. - When you select
↓_↑ RHS Up, the right side of the build plate moves up, decreasing the gap and bringing it closer to the nozzle.
Remember, adjusting one side affects the other. If you lower the right-hand side, the left-hand side becomes relatively higher, and vice versa. Through small, incremental changes, you can achieve a perfect balance.
- When you select
¶ Testing Procedure
To verify the effectiveness of your bed leveling (automatic or manual), use the built-in test print:
-
Open the Test File:
- Go to the
Jobstab, thenSlicer > Tests, and downloadMesh Bed Test.3MF.
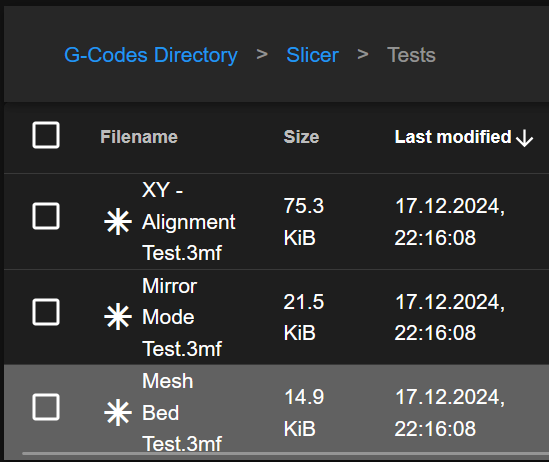
- Or download it Here.
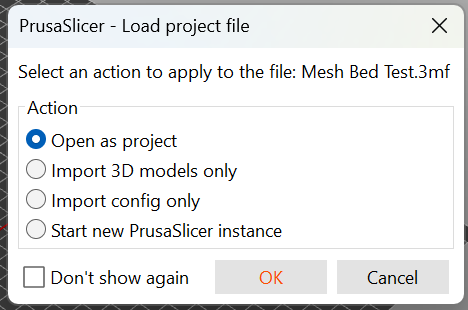
- Open this file in PrusaSlicer.
- Select the material loaded in your left-hand side tool (Tool 0).
- Go to the
-
Print the Test Squares:
-
The test print includes three small squares: one in the center, one on the left, and one on the right.
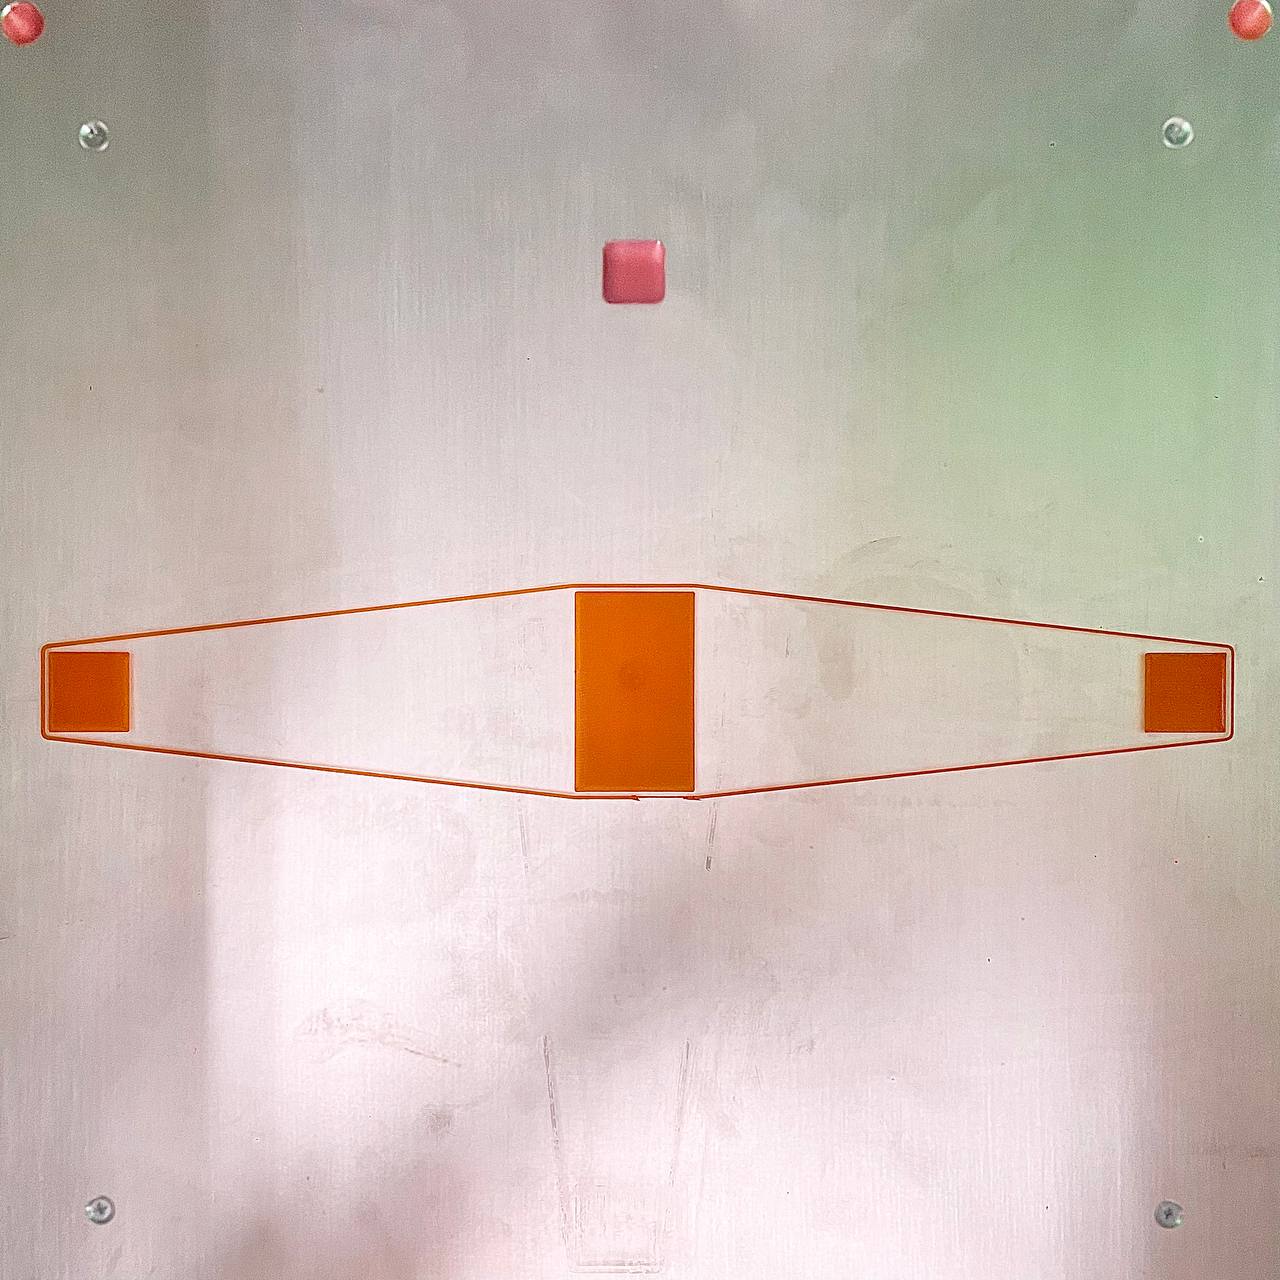
-
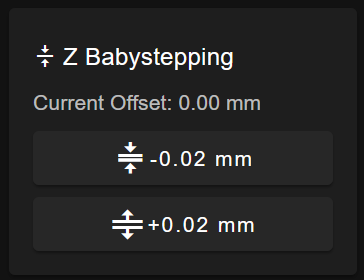
During the first (center) square’s print, adjust your Z-offset (using
Z Babystepping) if necessary to ensure a perfect first layer.
-
Once you dial in the Z-offset for the center square, do not change it again.
-
-
Evaluate the Results:
- After the center square is done, the printer will produce the left and right squares using the same Z-offset setting.
- Compare the left and right squares:
- They should be identical in terms Z - Offset.
- If the right square is too high or too low, use the manual macros
↓_↑ RHS Upto raise or↑_↓ RHS Downto lower the right-hand side as needed.
-
Refine and Reprint:
- Adjust the bed using the manual calibration macros if needed.
- Re-run the test print until both the left and right squares match the quality of the center square.
Once achieved, your machine should maintain consistent first-layer results across the entire build surface for future prints.
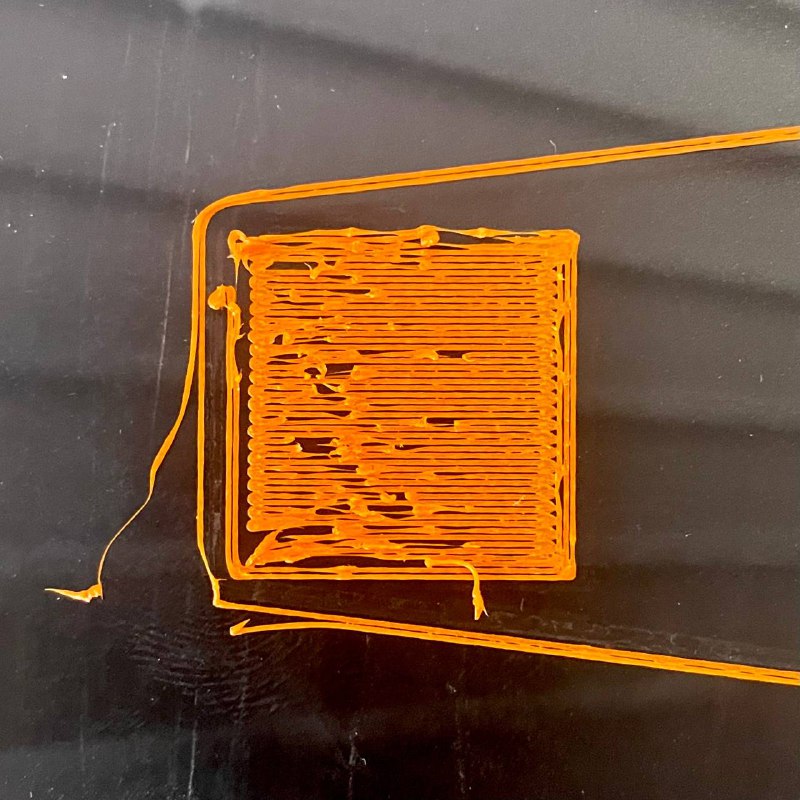
Example setup:
- Result of first print.
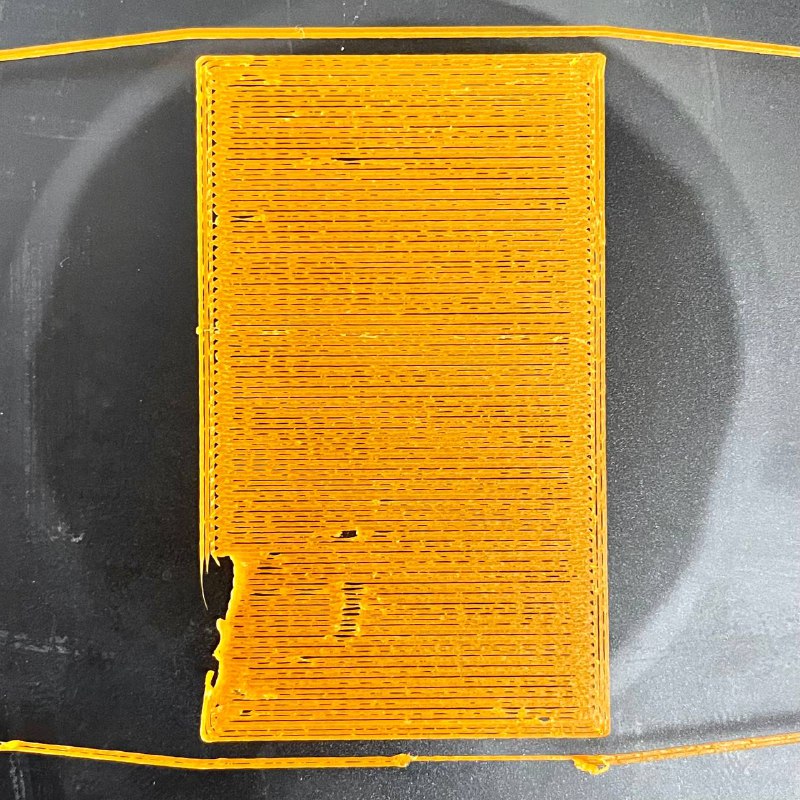
- The middle square is too high, so we use
Z Babysteppingto reduce the distance between the nozzle and the bed by pressing-0.02 mm.
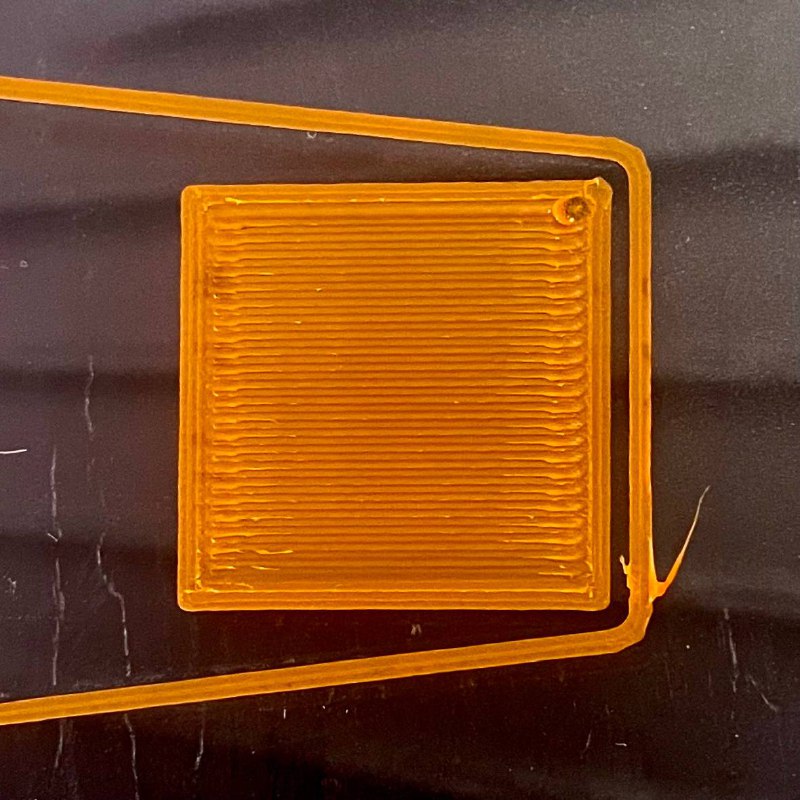
- Reprinting
- After adjusting the Z-offset, the middle square looks good.
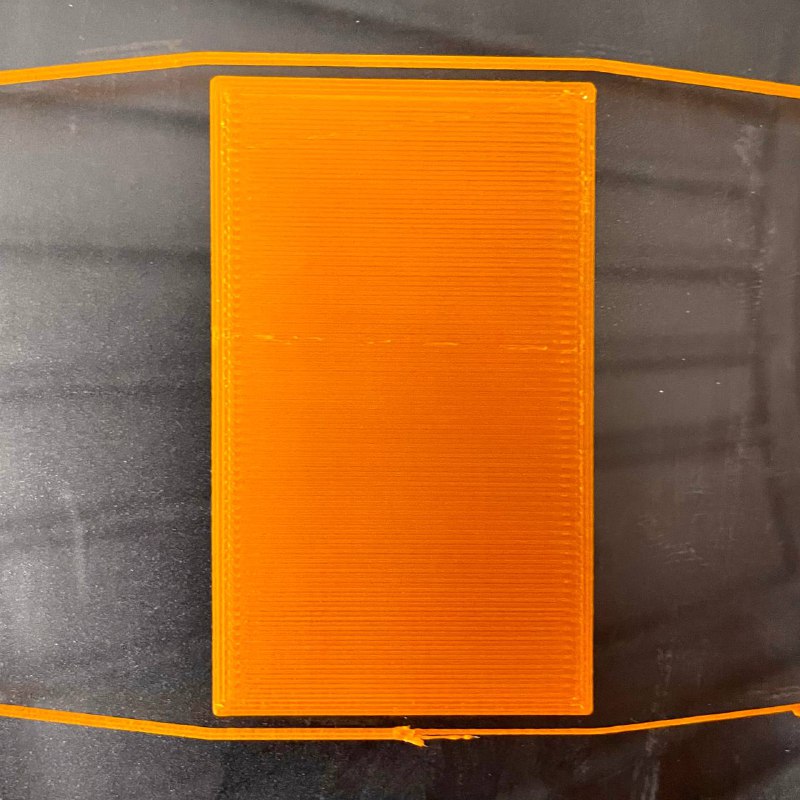
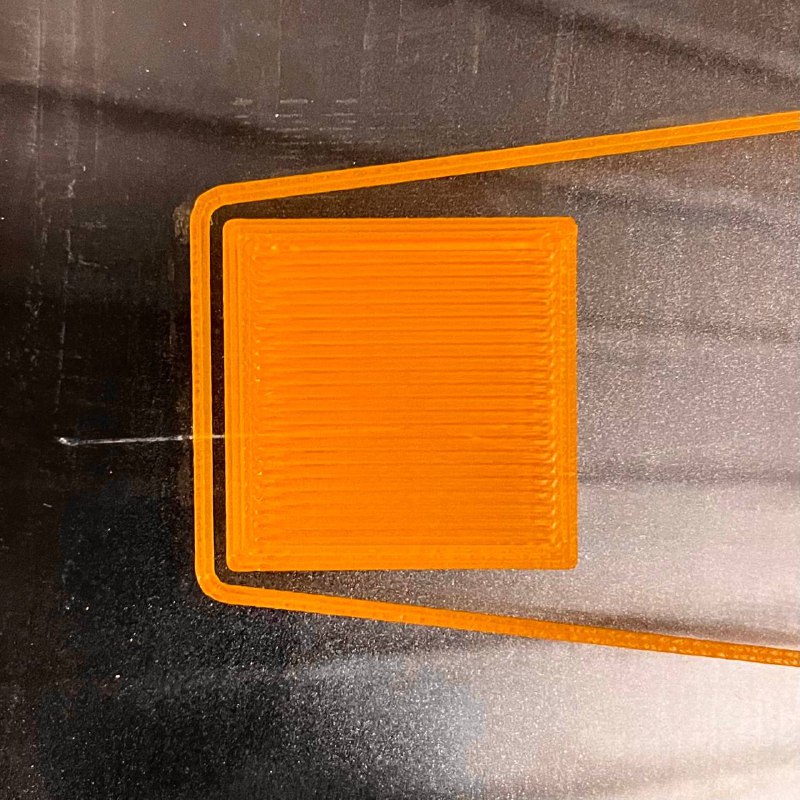
- However, the side squares do not match it.
- The right side of the bed is too close to the nozzle, causing filament buildup on the right square.
- The left side of the bed is too far, resulting in gaps on the left square.
- To fix this, we use the
↑_↓ RHS Downmacro.
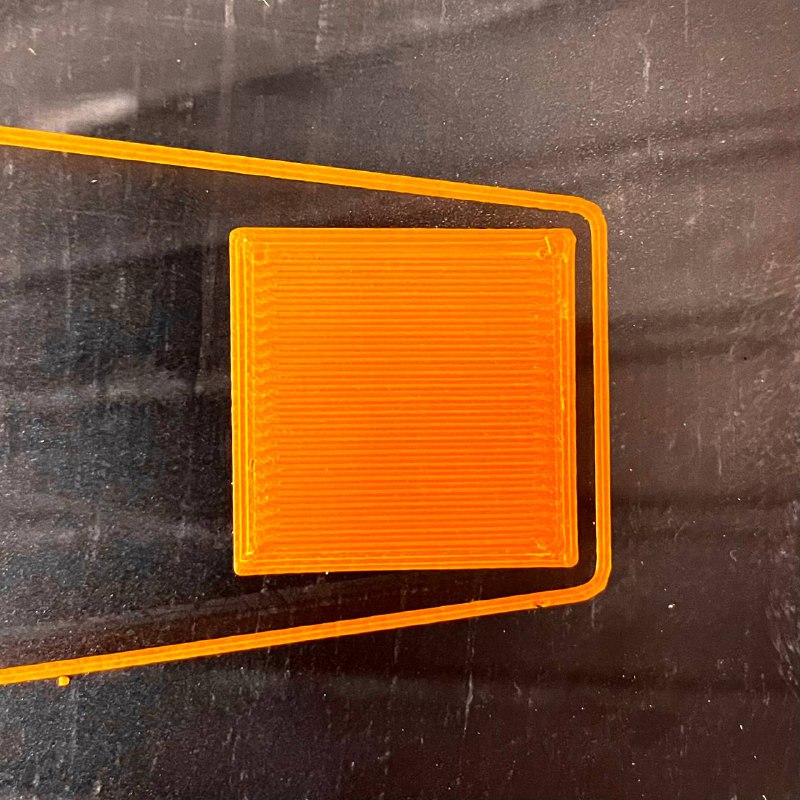
- After this adjustment, the first layer looks good across the entire bed.
¶ Conclusion
By following these steps, you can correct bed leveling issues and ensure consistent first layers across the build plate. If you encounter any difficulties or need further assistance, please contact our support team.