¶ Brief Overview
This guide explains the function of the extruder pre-tension lever on the Vision Miner 22IDEX and provides recommendations for setting the correct tension based on filament type. Proper lever adjustment is crucial for consistent extrusion and print quality.
¶ Introduction
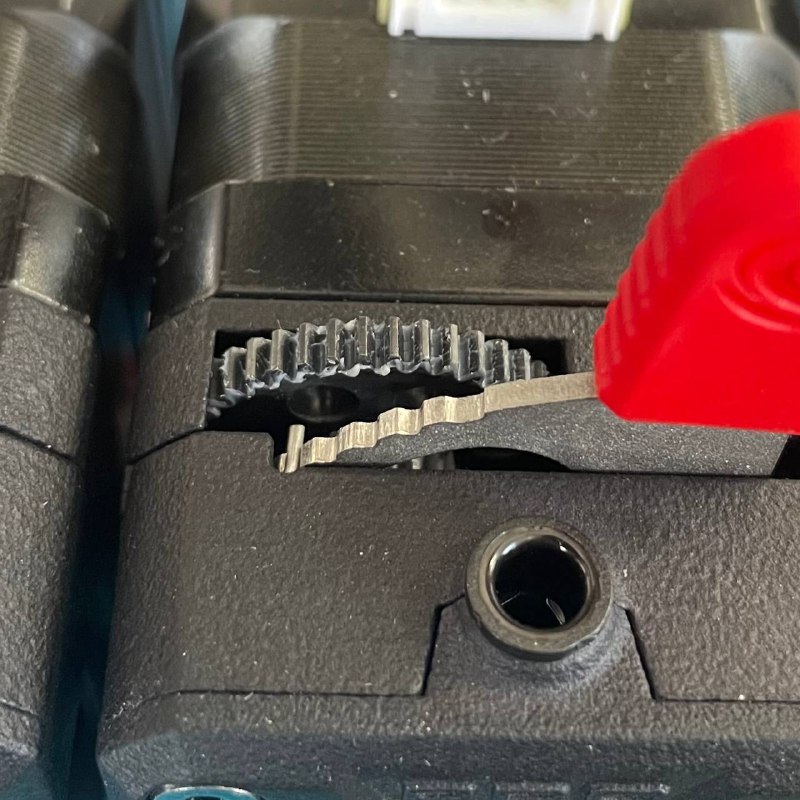
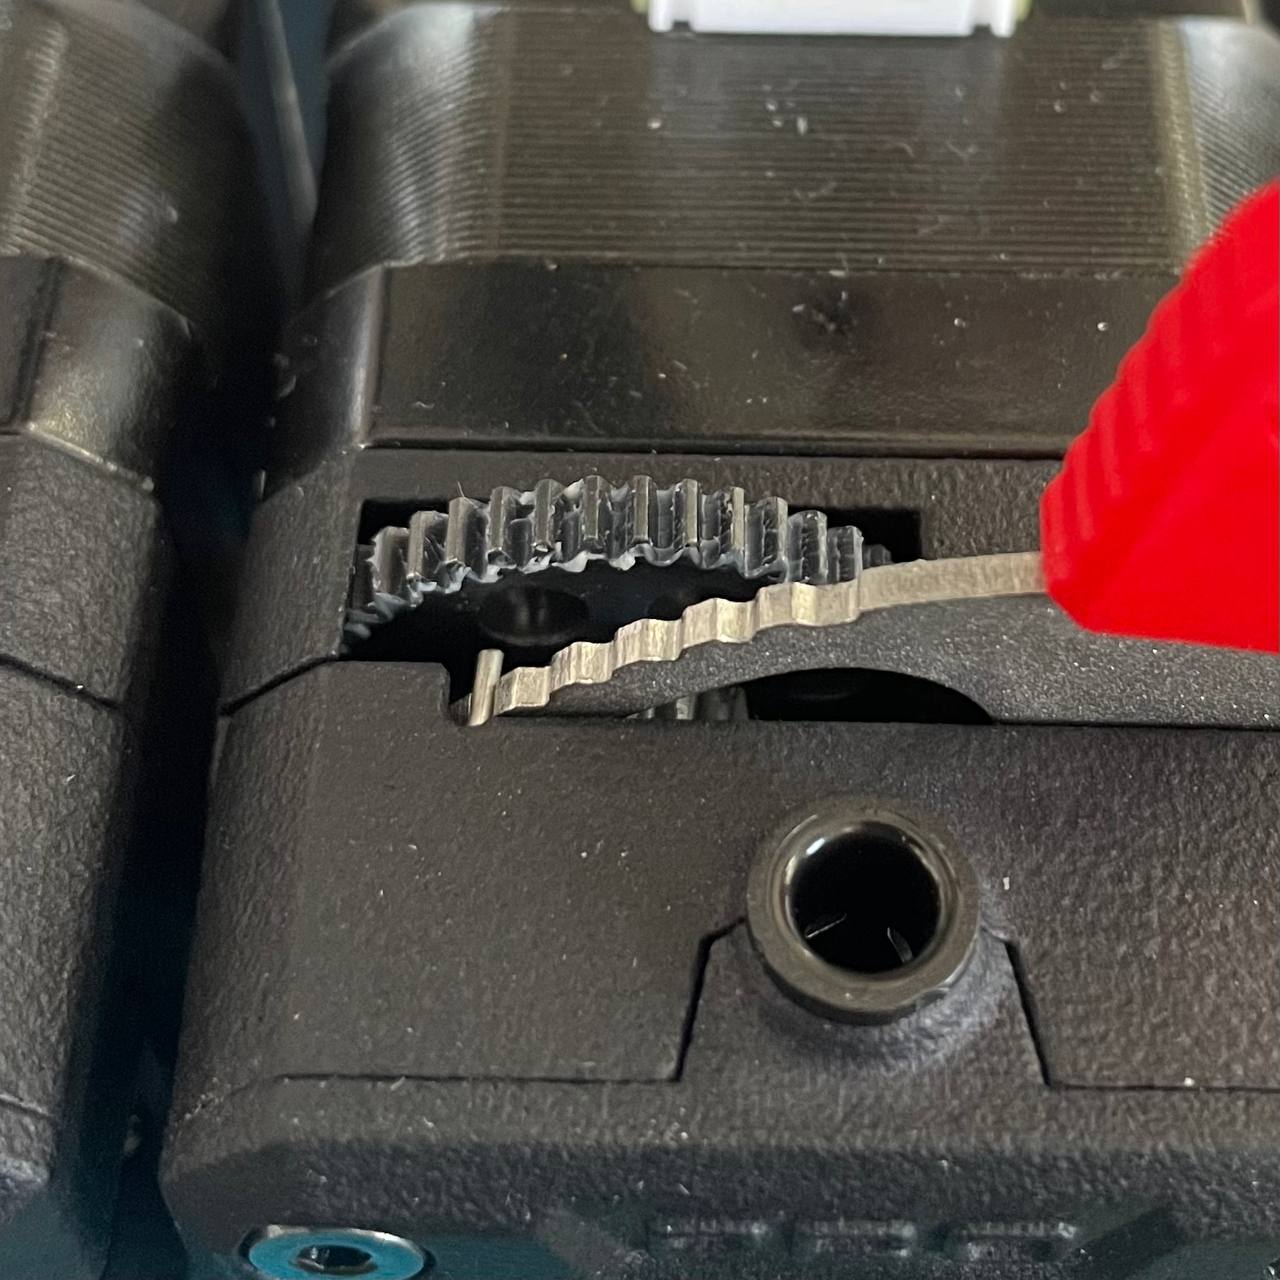
The 22 IDEX's Extruder features a unique pre-tension mechanism with an adjustable lever, allowing you to fine-tune the drive gear pressure for different filaments. Setting the correct lever position is very important for print success.
Important: Setting the lever tension incorrectly can lead to printing problems.
- Too Low: If the tension is set too low (closer to position 0), the drive gears may not grip the filament firmly enough, potentially causing under-extrusion as the filament slips.
- Too High: If the tension is set too high (closer to position 5), the gears might grip the filament too tightly. This can deform the filament or make it difficult for the extruder motor to push the filament through, which can also lead to under-extrusion or grinding. Setting the lever too high can also cause additional wear to extruder components.
Generally, we recommend setting the extruder lever to Position 2 as a starting point. This position works well for a wide variety of materials, including many common engineering filaments used with a heated chamber. However, different filaments, even of the same type, can vary between manufacturers, so slight adjustments may be necessary.
¶ Lever Positions and Their Uses
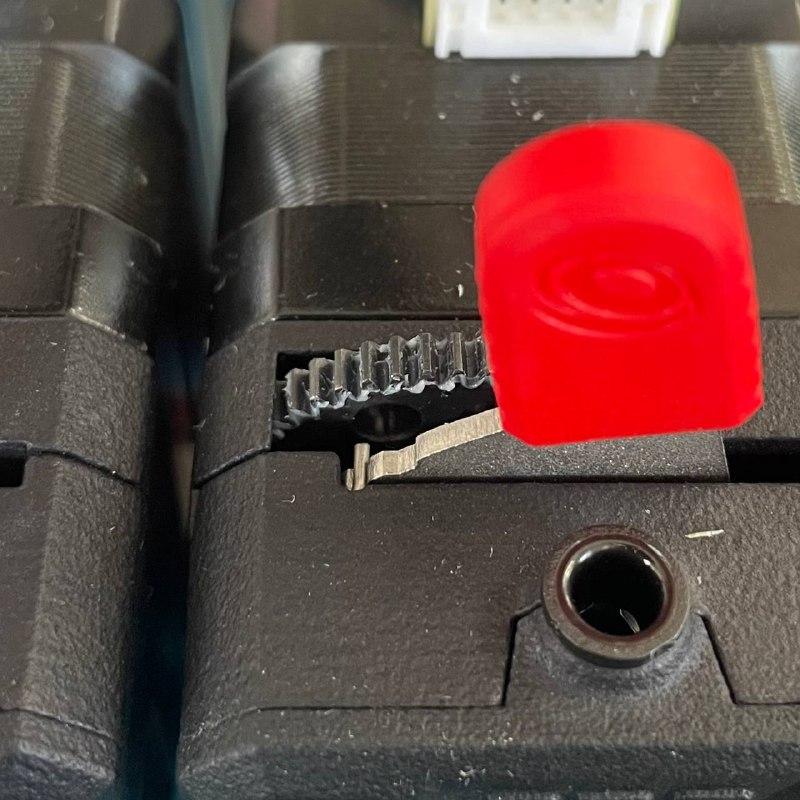
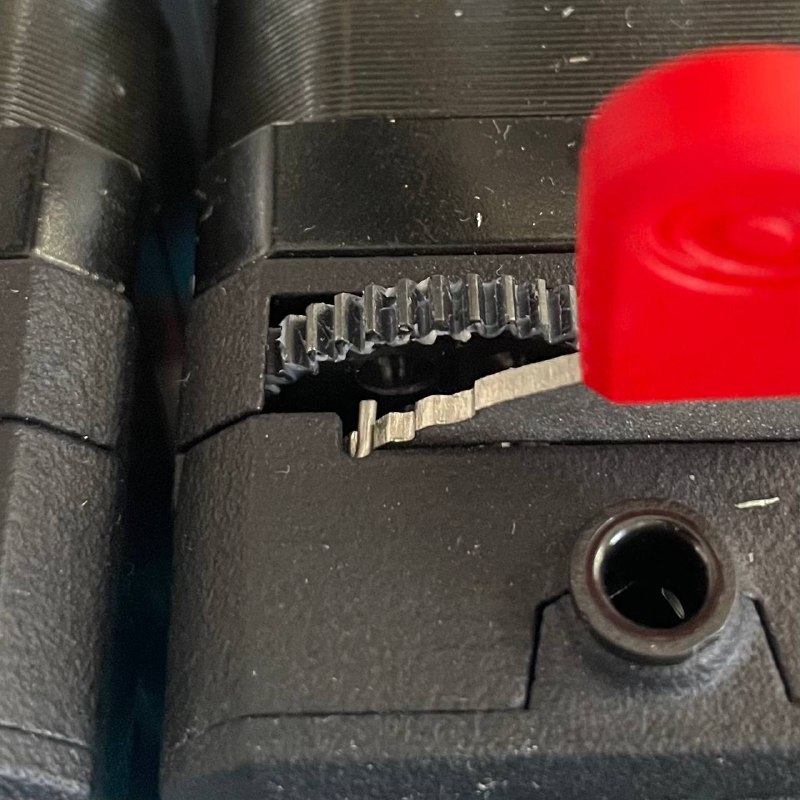
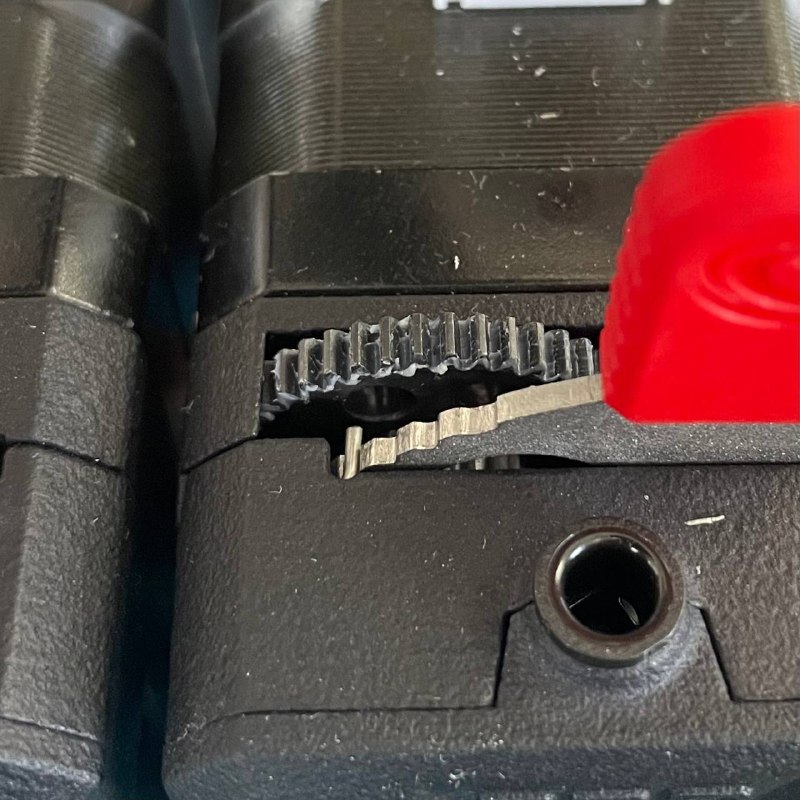
¶ Position 0: Manual Loading and Unloading
- Description: Push the lever fully to the left.
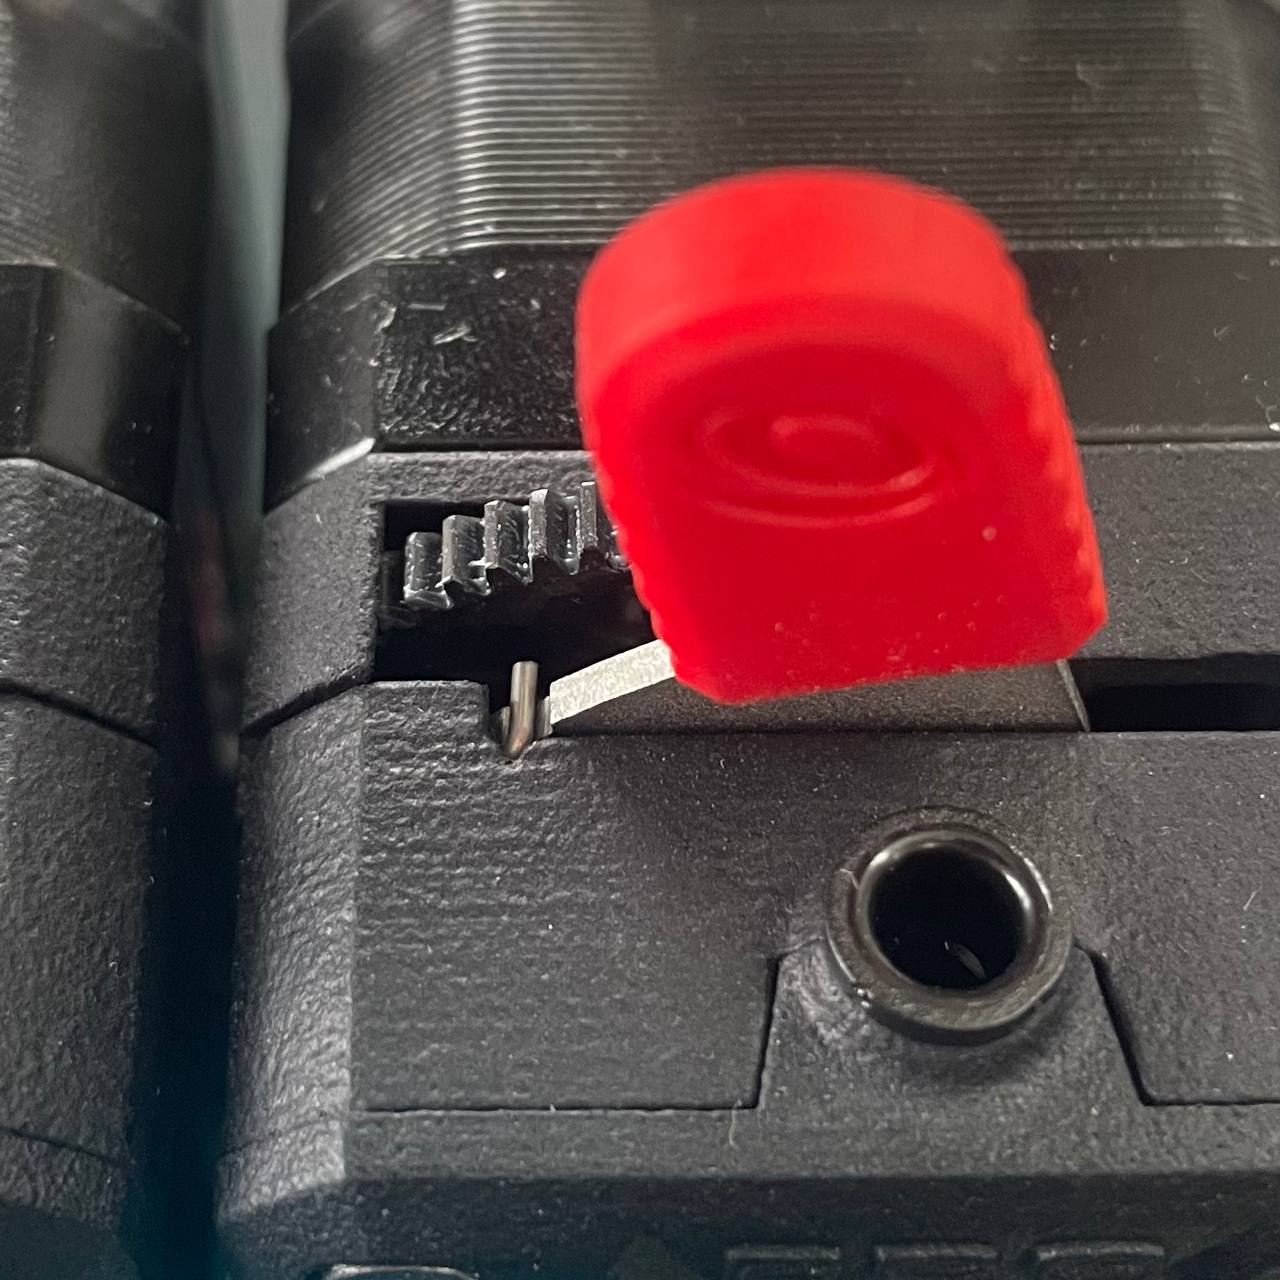
- Use Case: This position disengages the drive gears, applying no pressure to the filament. Use this setting for manually loading or unloading filament. If using the web interface (Load/Unload buttons) for filament changes, ensure the lever is set appropriately for the filament before starting the process (e.g., Position 2).
¶ Position 1: Rigid Materials (No Heated Chamber)
- Description: Push the lever fully left, then move it 1 position to the right.
- Use Case: Suitable for rigid materials typically printed without a heated chamber, such as PLA and PETG. These materials generally require less grip pressure.
¶ Position 2: Standard/Engineering Materials (Heated Chamber - Recommended Starting Point)
- Description: Push the lever fully left, then move it 2 positions to the right.
- Use Case: This is the recommended default position for most materials. It is suitable for a wide range of filaments, especially engineering materials often printed with a heated chamber, such as Nylon and ABS. It provides a balanced tension for reliable feeding.
¶ Position 3: Semi-Flexible Materials
- Description: Push the lever fully left, then move it 3 positions to the right.
- Use Case: Ideal for semi-flexible materials (approx. Shore hardness 95A). This position offers slightly more tension than Position 2 to better control less rigid filaments without excessive deformation.
¶ Position 4: Flexible Materials
- Description: Push the lever fully left, then move it 4 positions to the right.
- Use Case: Recommended for more flexible materials (approx. Shore hardness 85A-95A). Provides increased tension to ensure consistent grip and feeding of softer filaments.
¶ Position 5: Very Soft Materials
- Description: Push the lever fully left, then move it 5 positions to the right.
- Use Case: Used for very soft, flexible materials (approx. Shore hardness 60A-85A). This highest tension setting helps manage the most flexible filaments, preventing buckling and ensuring accurate feeding.
¶ Troubleshooting & FAQs
- Issue: Under-extrusion or Filament Grinding.
- Possible Cause (Lever Too Low): Gears are slipping. Try increasing tension by moving the lever one position to the right (e.g., from 2 to 3).
- Possible Cause (Lever Too High): Gears are too tight, deforming filament or stalling the motor. Try decreasing tension by moving the lever one position to the left (e.g., from 3 to 2).
- Other Causes: Check for clogs, correct temperature settings, and filament diameter consistency.
- Issue: Filament is difficult to load/unload manually.
- Cause: Lever is not in Position 0.
- Solution: Ensure the lever is pushed fully to the left (Position 0) to release all tension before manual loading or unloading.
¶ Conclusion & Additional Resources
Adjusting the 22 IDEX Extruder lever correctly is essential for optimizing print quality and reliability across different filament types. Start with the recommended position (usually Position 2) and make small adjustments if needed based on filament behavior.