¶ Bed remove / place procedure
Tools: Hex 2mm driver
Safety Precautions
Before starting, ensure that the printer chamber and build plate heating are off and that the temperatures are safe to operate with.
Important: Power Off the machine before this manipulations and unplug the cord from the mains.
¶ Removal Procedure
-
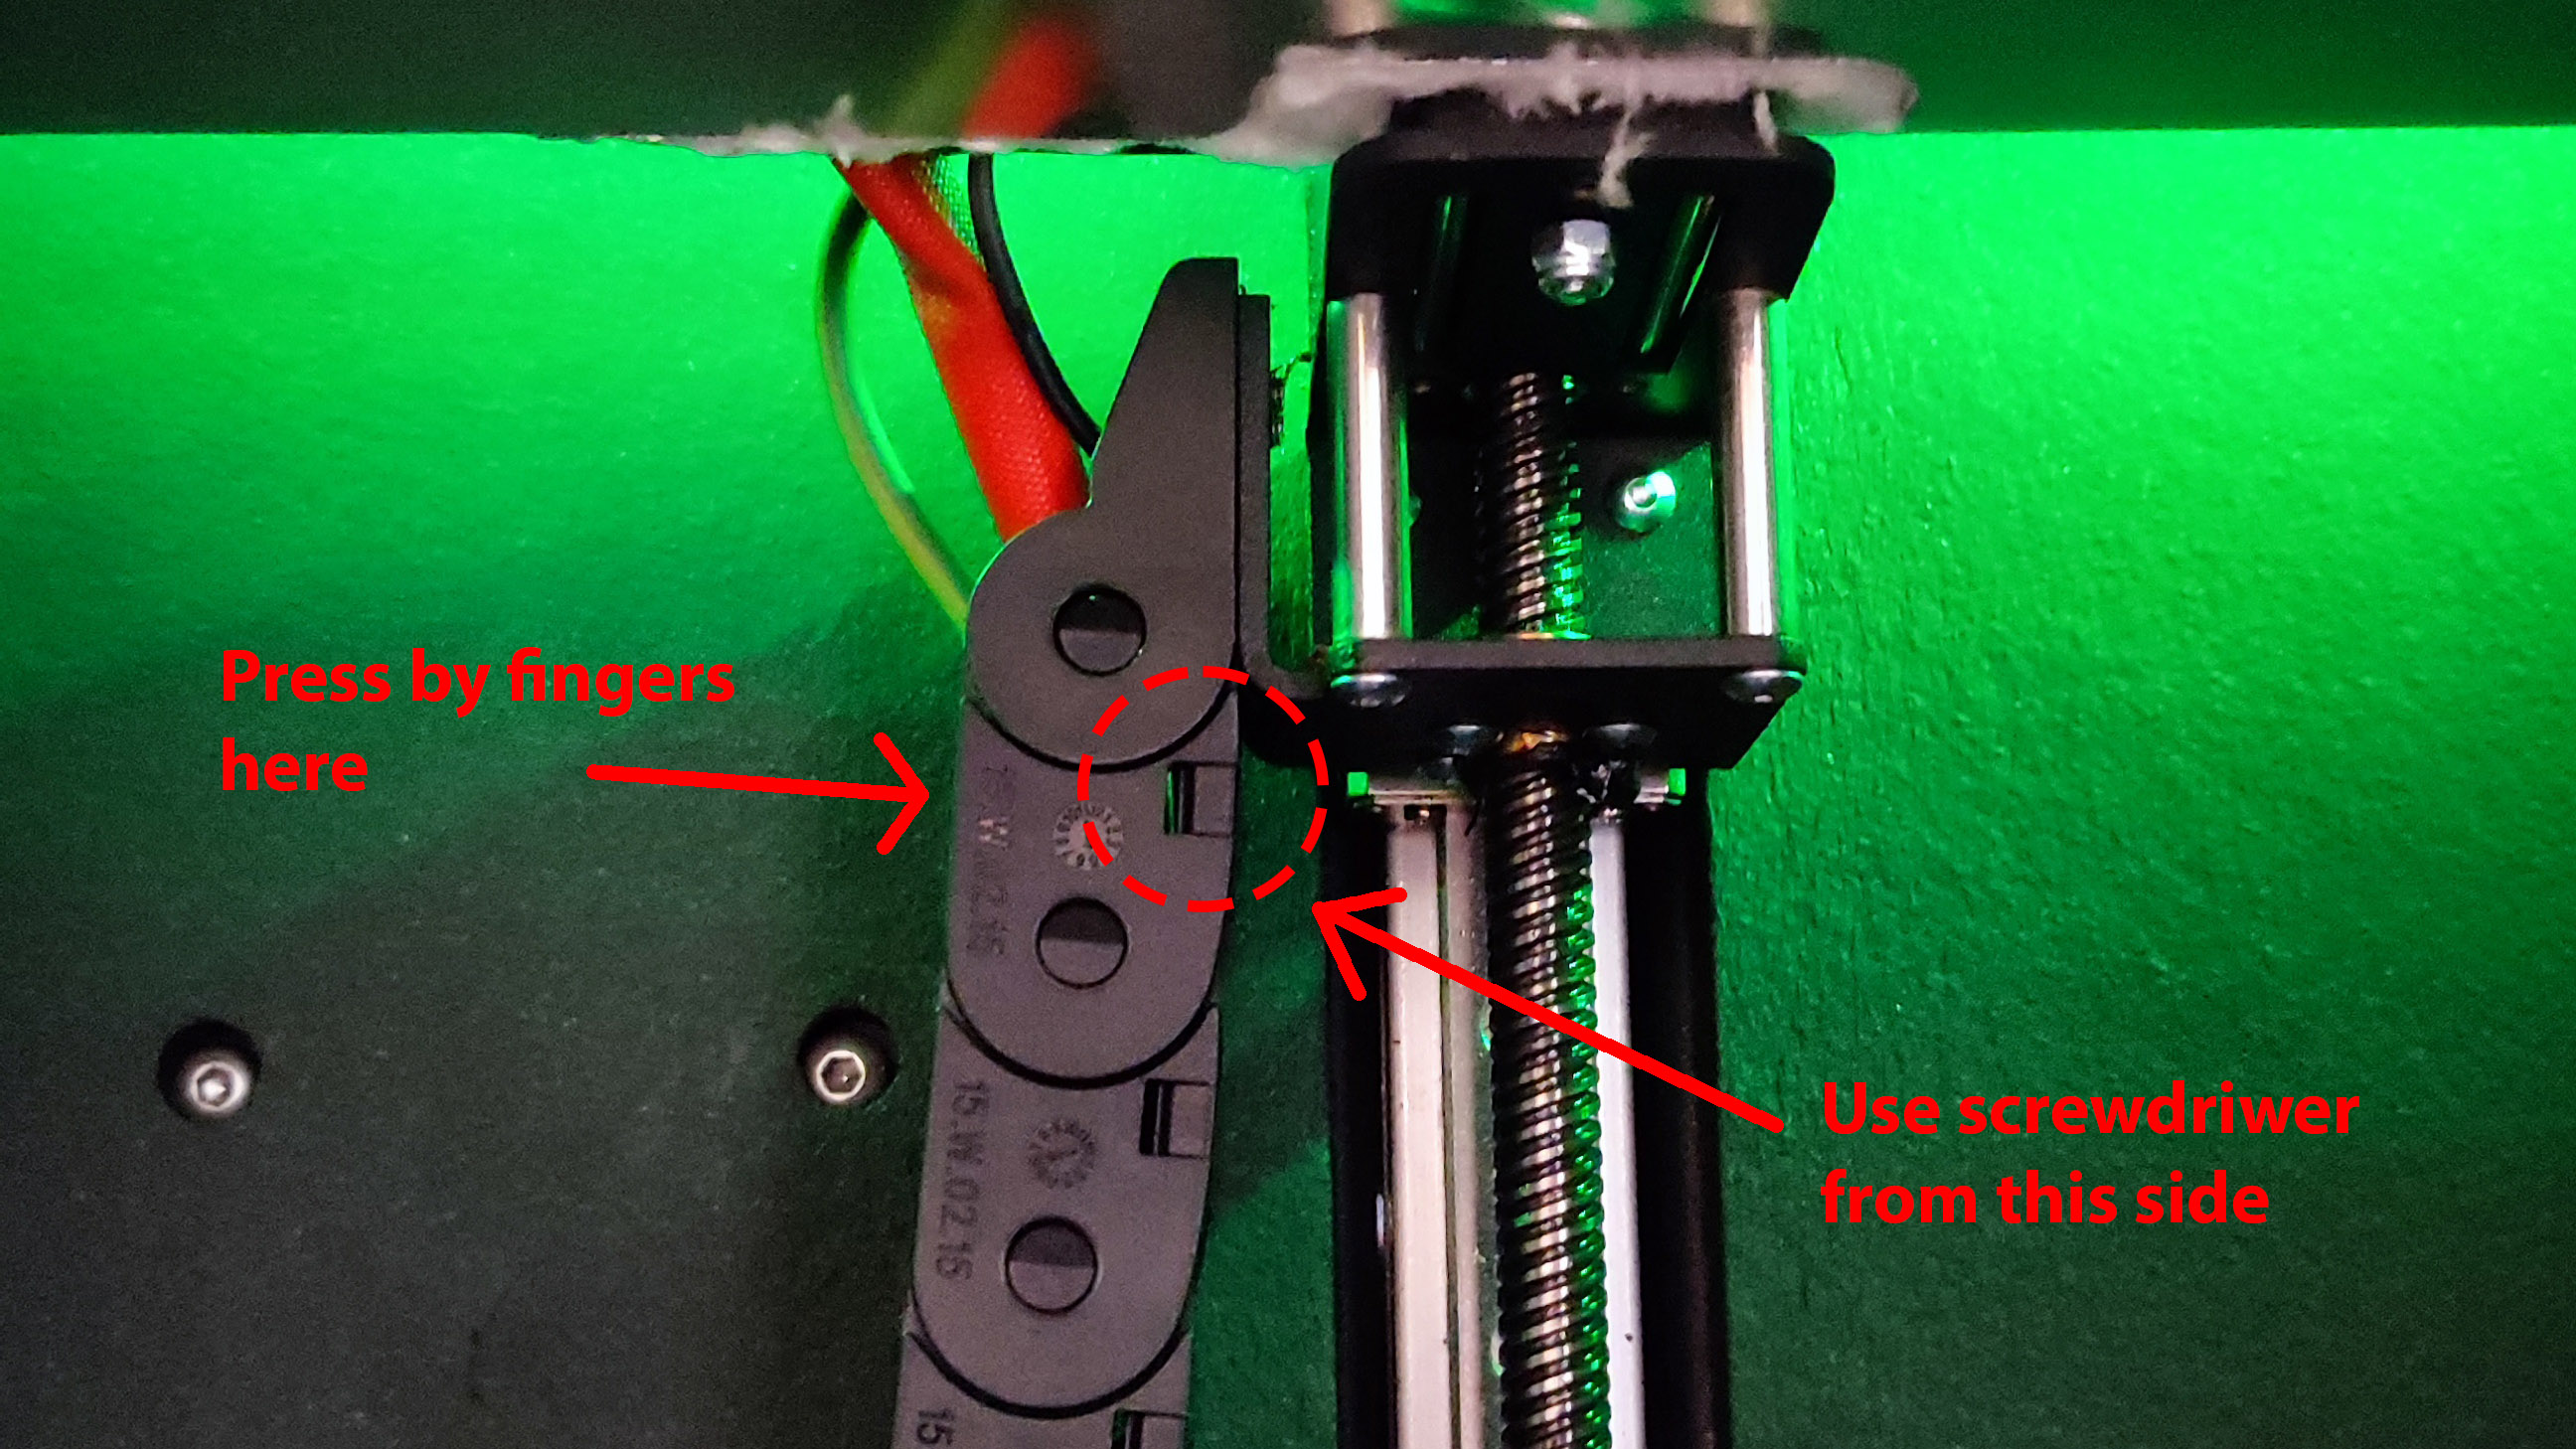
Unplug Bed Wire Chain:
- Unplug the bed wire chain from the holder on the rear Z-axis screw.
- Use a screwdriver to remove the fixation bracket from the right side of the last segment of the wire chain.
- Press the segment by fingers between the rounded sides and slowly pull it down.
- Repeat this procedure for the other side of the wire chain.
-
Disconnect Bed Wires:
- Disconnect the bed wires from the main board. (We recommend mark them and take picture of the mainboard connections to make back connection easier.)
-
Pull Wires:
- Carefully pull the wires into the inner printer chamber.
-
Remove Build Plate:
- Follow the build plate removal instructions here: Build Plate Removal .
- Unscrew Bed:
- Unscrew the three screws (one is hidden while the build plate is installed) near the Z-axis screws.
- Gently remove the build plate.
¶ Installation Procedure
-
Set Bed Holders:
- Set the bed holders to the same height.
-
Place Bed:
- Carefully place the bed on the holders.
- Screw it in with three bolts.
-
Install Build Plate:
- Follow the build plate installation instructions here: Build Plate Installation .
-
Position Wires:
- Carefully pull the wires out from the printer chamber.
-
Plug in Bed Wire Chain:
- Plug the bed wire chain into both holders:
- Press the edged segment by fingers and place it into the holders until a clicking sound is heard.
- Place the fixation bracket in its position.
-
Reconnect Wires:
- Connect the wires to the main board according to the previously saved photos or wiring scheme.
-
Turn on machine and run the bed leveling procedure.