Door Glass Removal and Installation
Remove and refit the 22 IDEX V4 front door glass — pulling the inner panel to clean between panels, correcting bracket positions, and stopping rattles.
This guide covers removing, inspecting, and reinstalling the front door glass on the Vision Miner 22IDEX V4. The front door holds two glass panels - an outer panel and an inner panel - each mounted in a metal frame with four corner brackets.
Use this procedure when the glass shifted during transit, the inner glass needs cleaning (between the outer and inner panels), or a panel broke and needs replacement.
Before you begin - safety and risk
Read the Safety - Before You Begin article to understand the hazards involved in working on the Vision Miner 22IDEX V4 - including electrical, thermal, mechanical, and chemical risks. All procedures in this wiki are provided as recommendations only. By choosing to follow any procedure, you do so at your own risk.
Support the glass whenever brackets are loose
Broken glass can cause injury. Whenever a bracket is loosened or removed, hold the glass panel in the center so it cannot fall. Work over a stable, padded surface.
Tools and Materials
- 2 mm hex screwdriver - for the inner panel screws (hex head)
- PH1 Phillips screwdriver - for the glass bracket screws
- Front Door Glass Brackets Set - only if a bracket is bent or damaged
- Front Door Glass (Outer Side, Tinted) or Front Door Glass (Inner Side, Clear) - only if a panel is broken
- Clean, padded workspace
- A second person, if the machine is on the floor
Work at bench height
Put the machine on a bench or table for easier access to the bottom screws. If it stays on the floor, you will need to lean it back, which takes a second person.
Door Construction
Each glass panel sits in a metal frame and is held by four corner brackets:
- Bottom corners: 2 shorter brackets
- Top corners: 2 longer brackets
High-temperature adhesive tape runs around the glass perimeter. Its job is to stop the glass from rattling - it does not hold the glass in place. The brackets are what secure the glass.
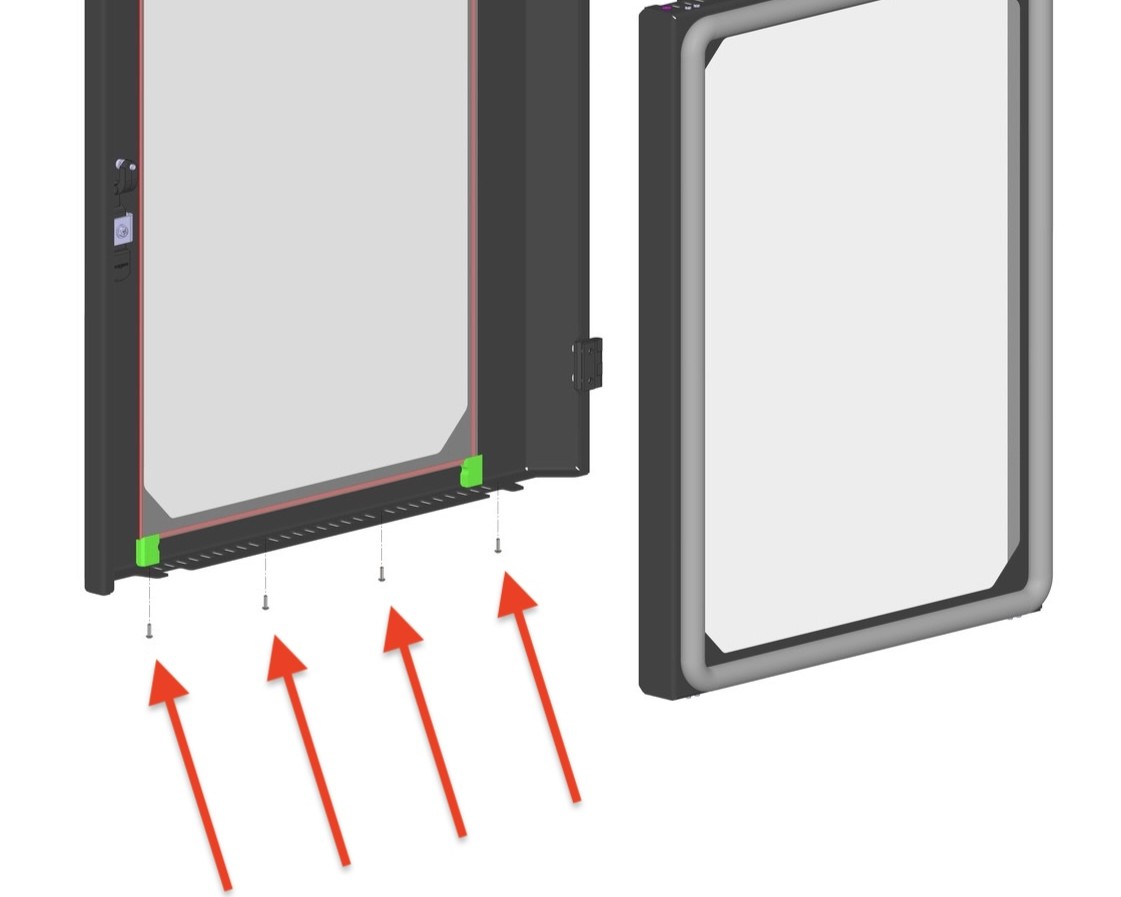
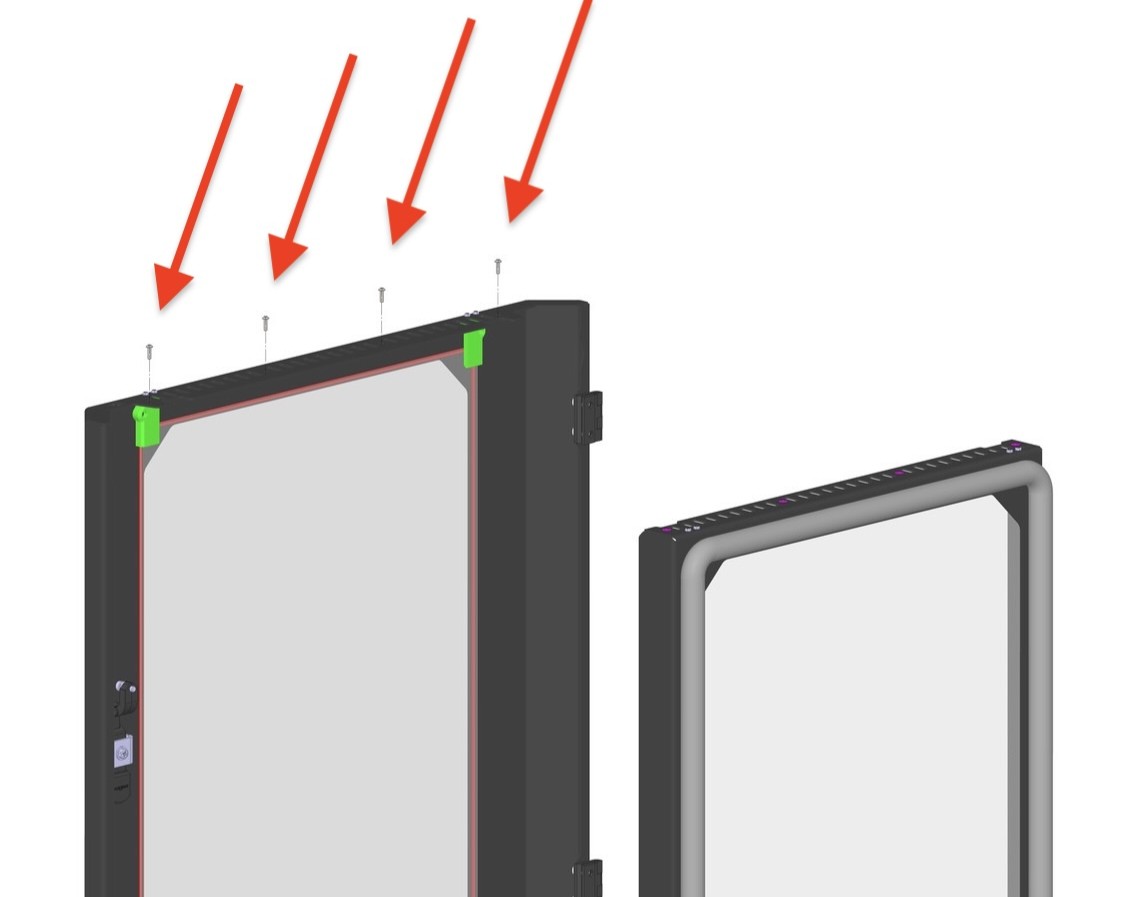
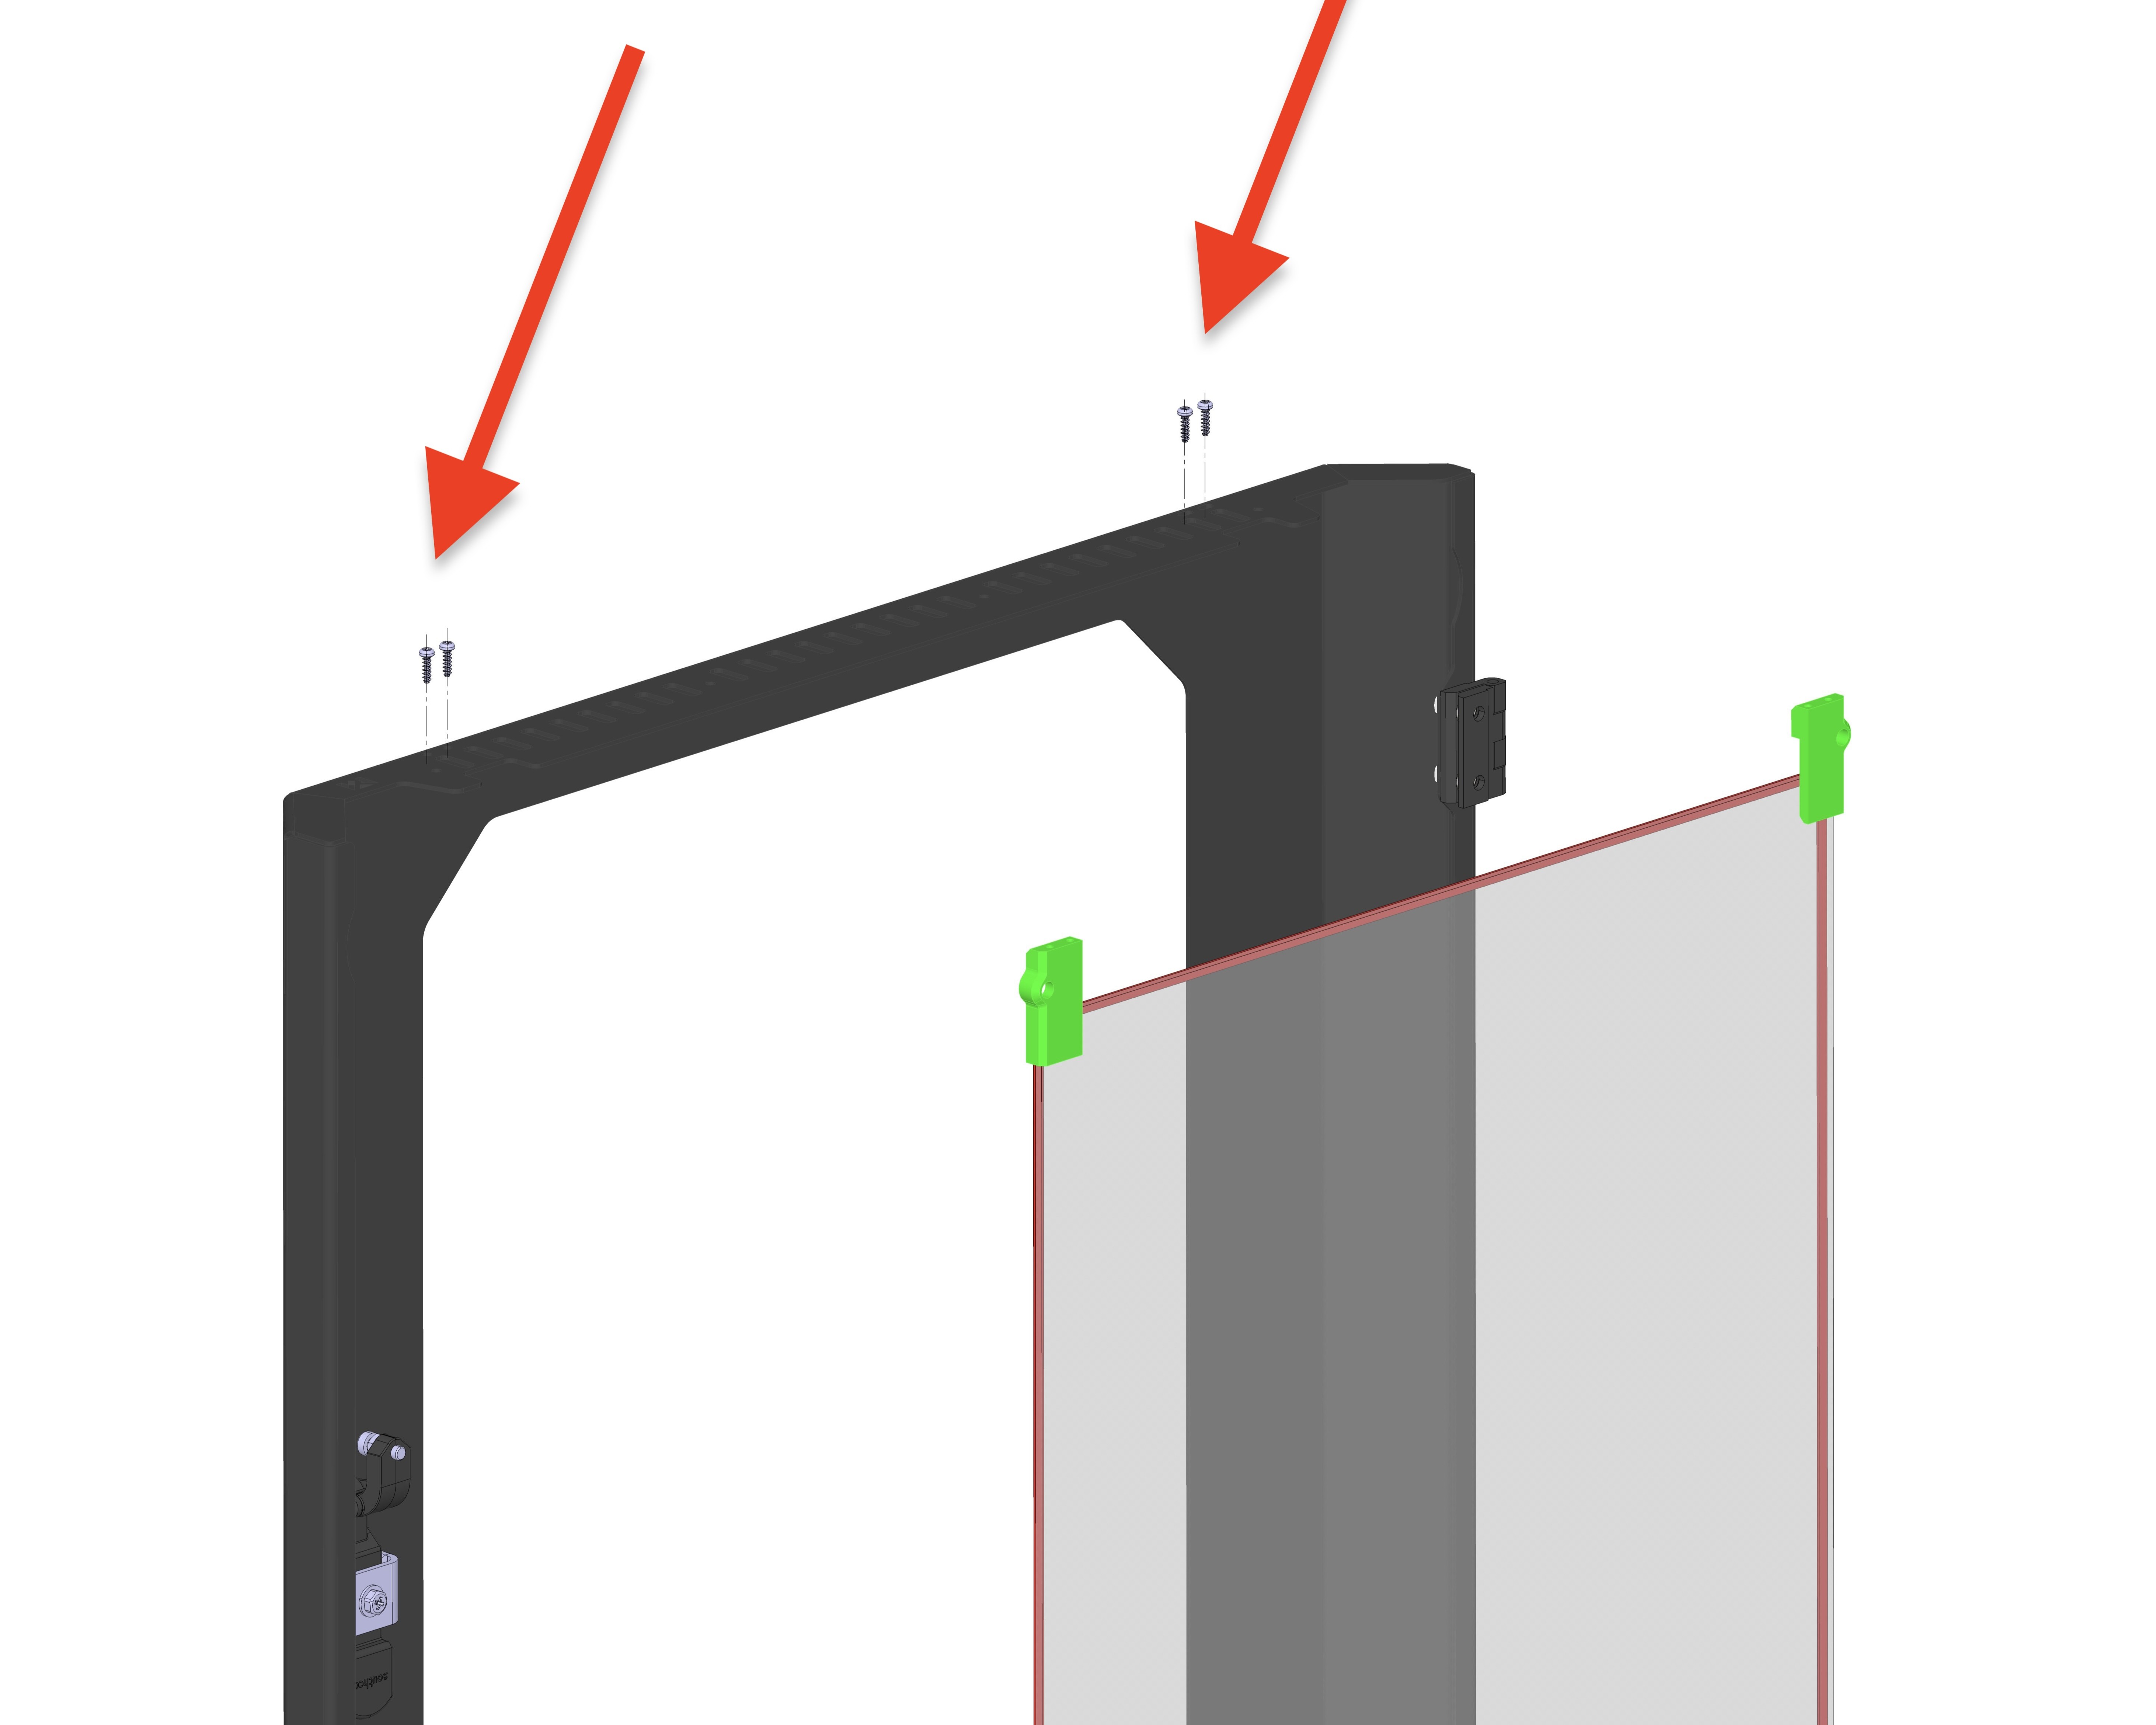
The inner panel inserts inside the outer shell and is held by 8 hex screws (4 top, 4 bottom).
Two screw types - do not mix them
Only the inner panel screws are hex head (2 mm). The glass bracket screws are Phillips head (PH1). Keep the two sets separated so you do not confuse them.
1. Removing the Inner Door Panel
-
Open the front door completely so you have clear access to the door interior.
-
Locate the 4 hex screws on the bottom of the inner panel. Remove all 4 with the 2 mm hex screwdriver and set them aside.
- Locate the 4 hex screws on the top of the inner panel. Remove all 4 and set them aside with the bottom screws.
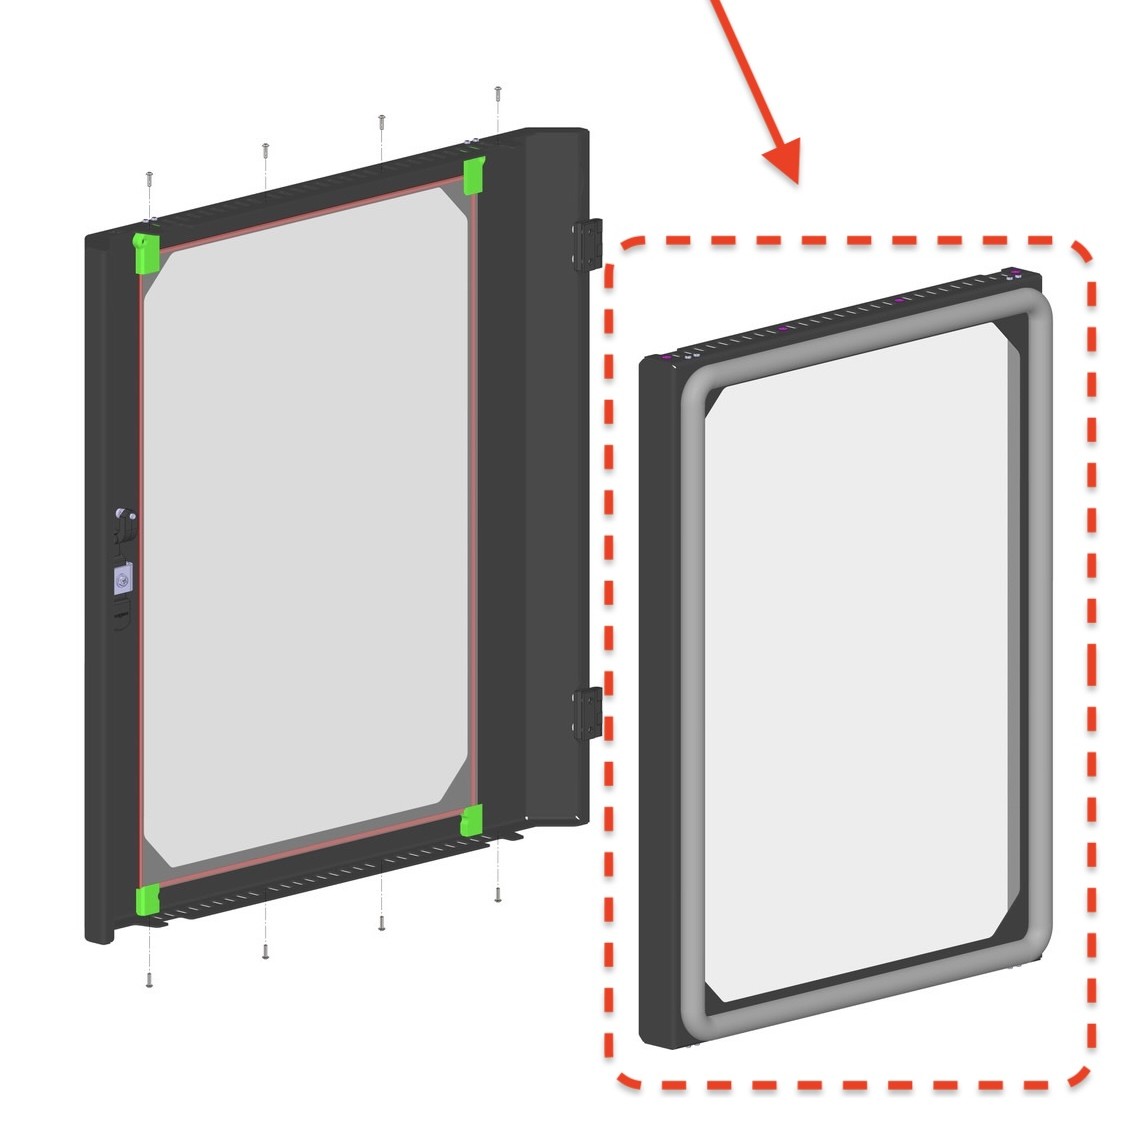
- Lift the inner panel straight out of the outer shell and set it on a clean, flat surface. The inner glass surfaces are now exposed for cleaning or inspection.
2. Inspecting Glass Bracket Installation
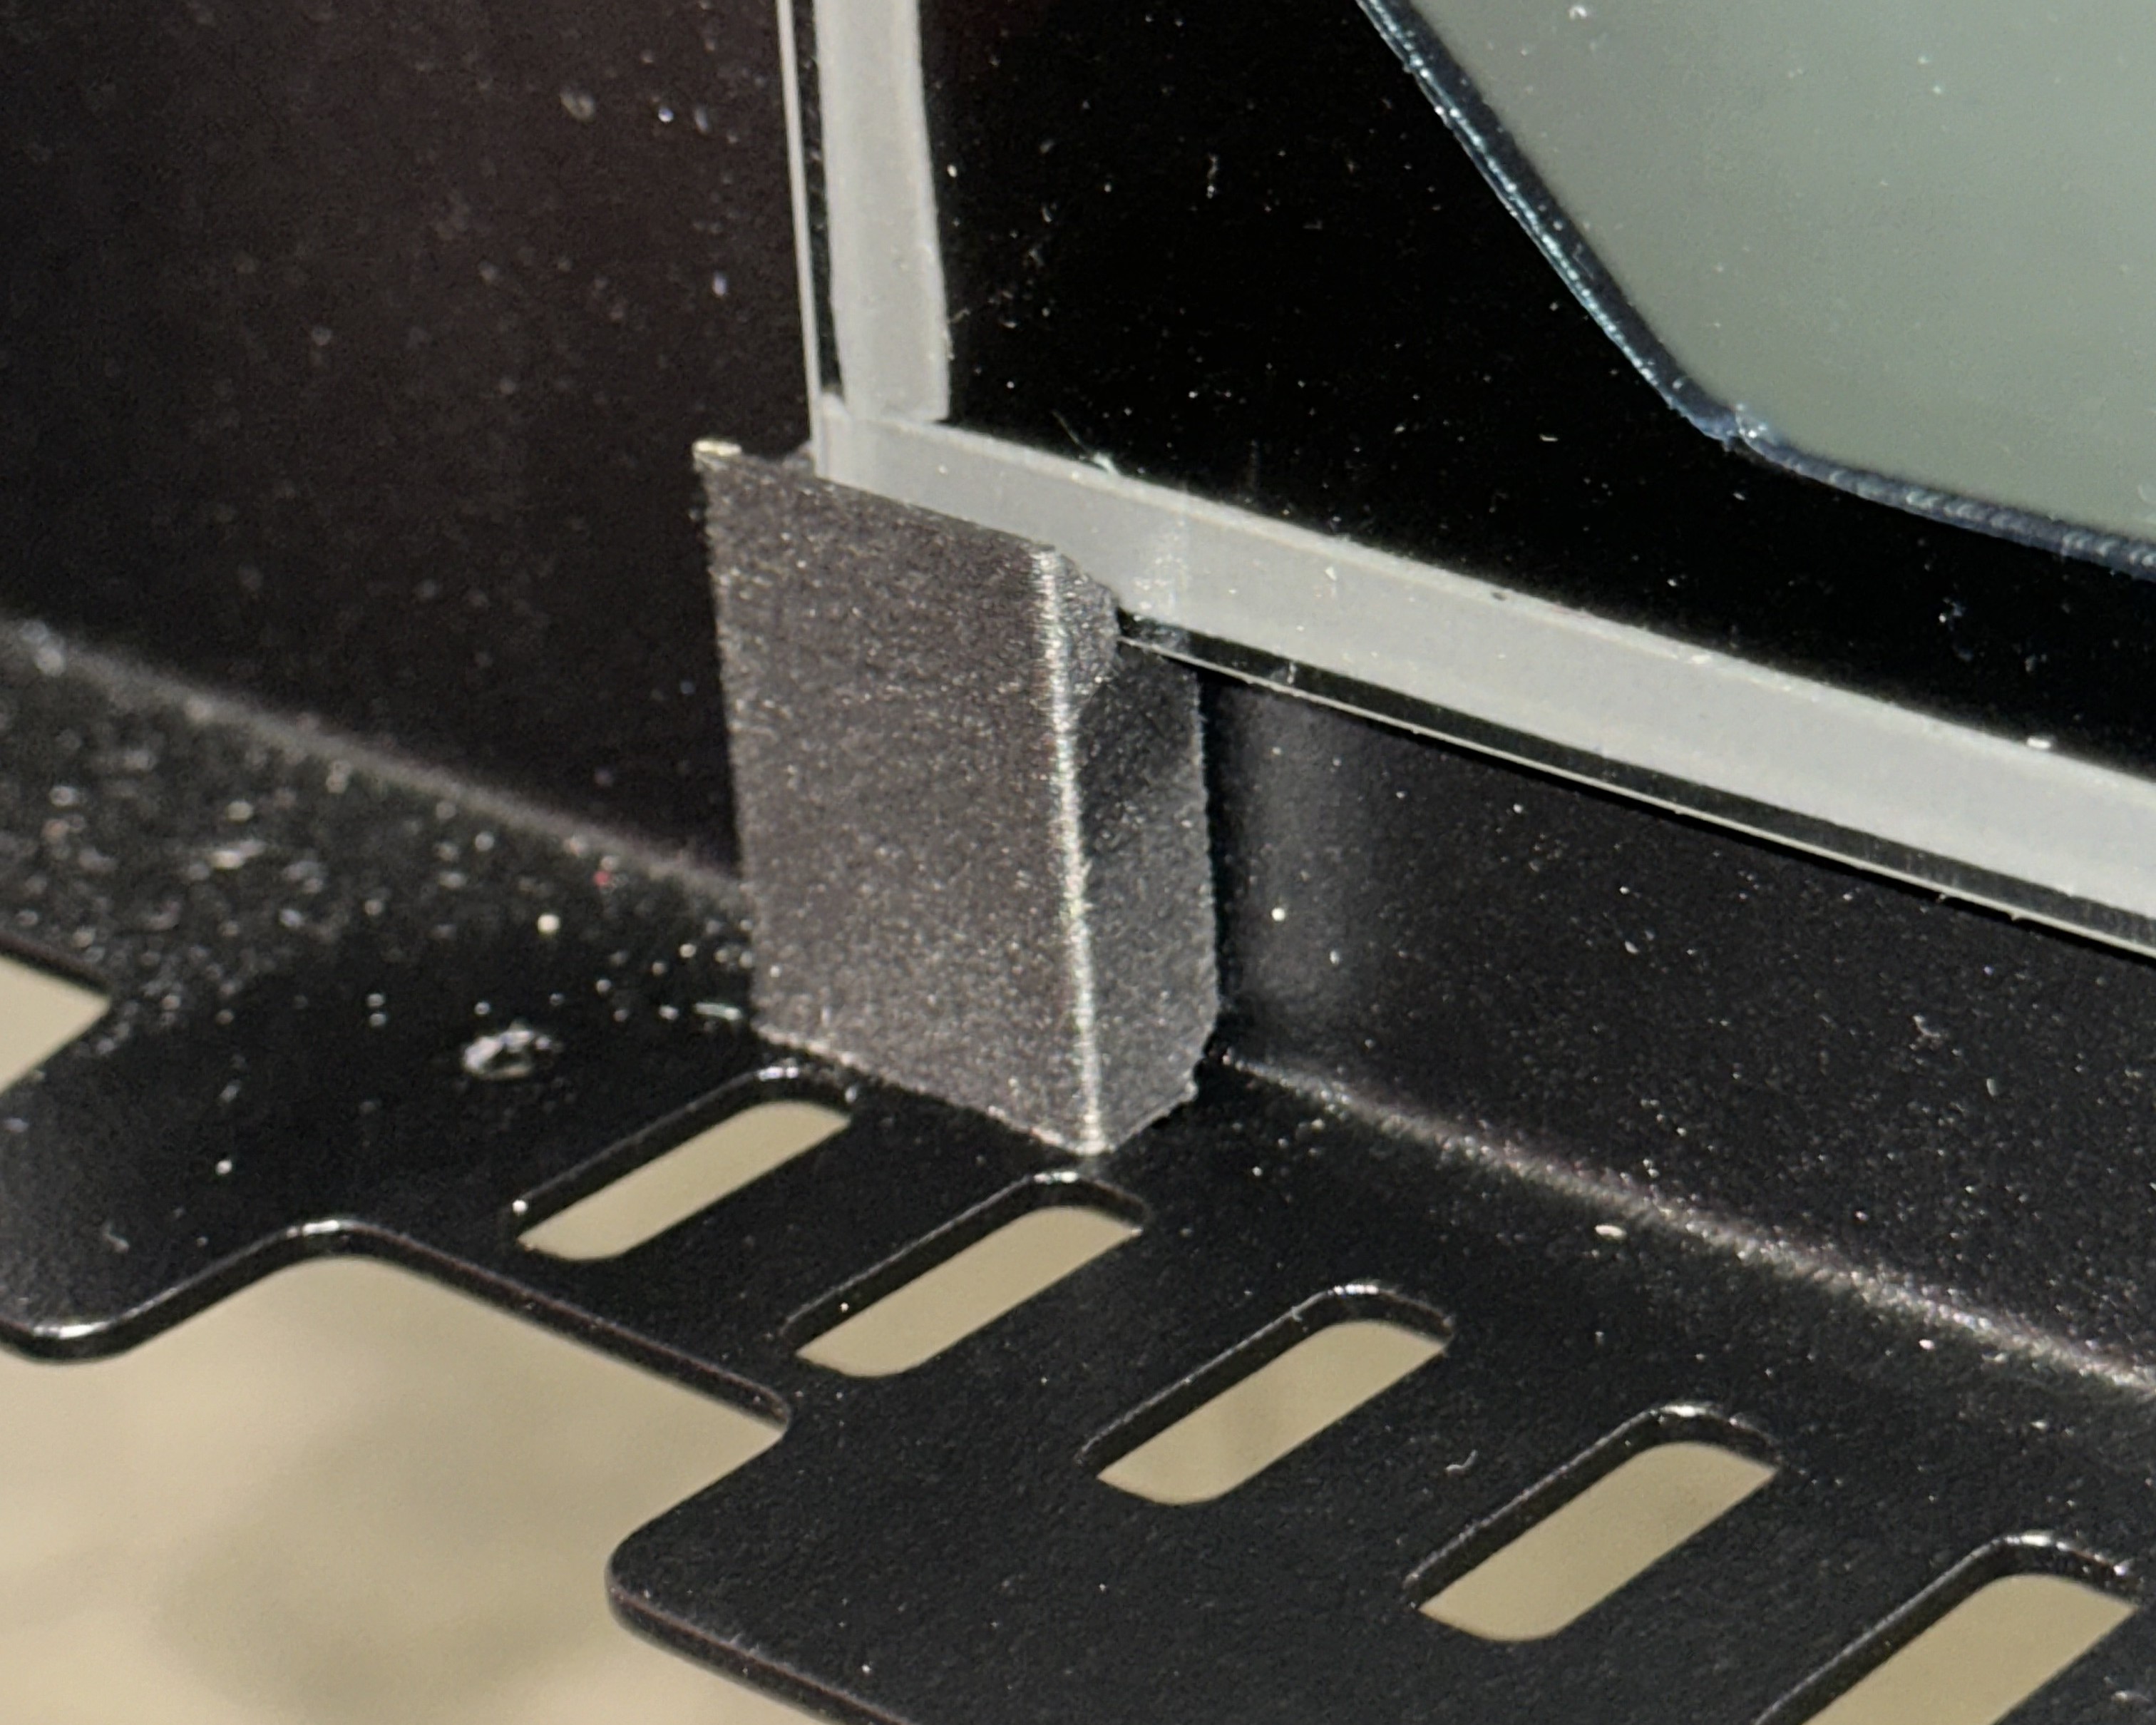
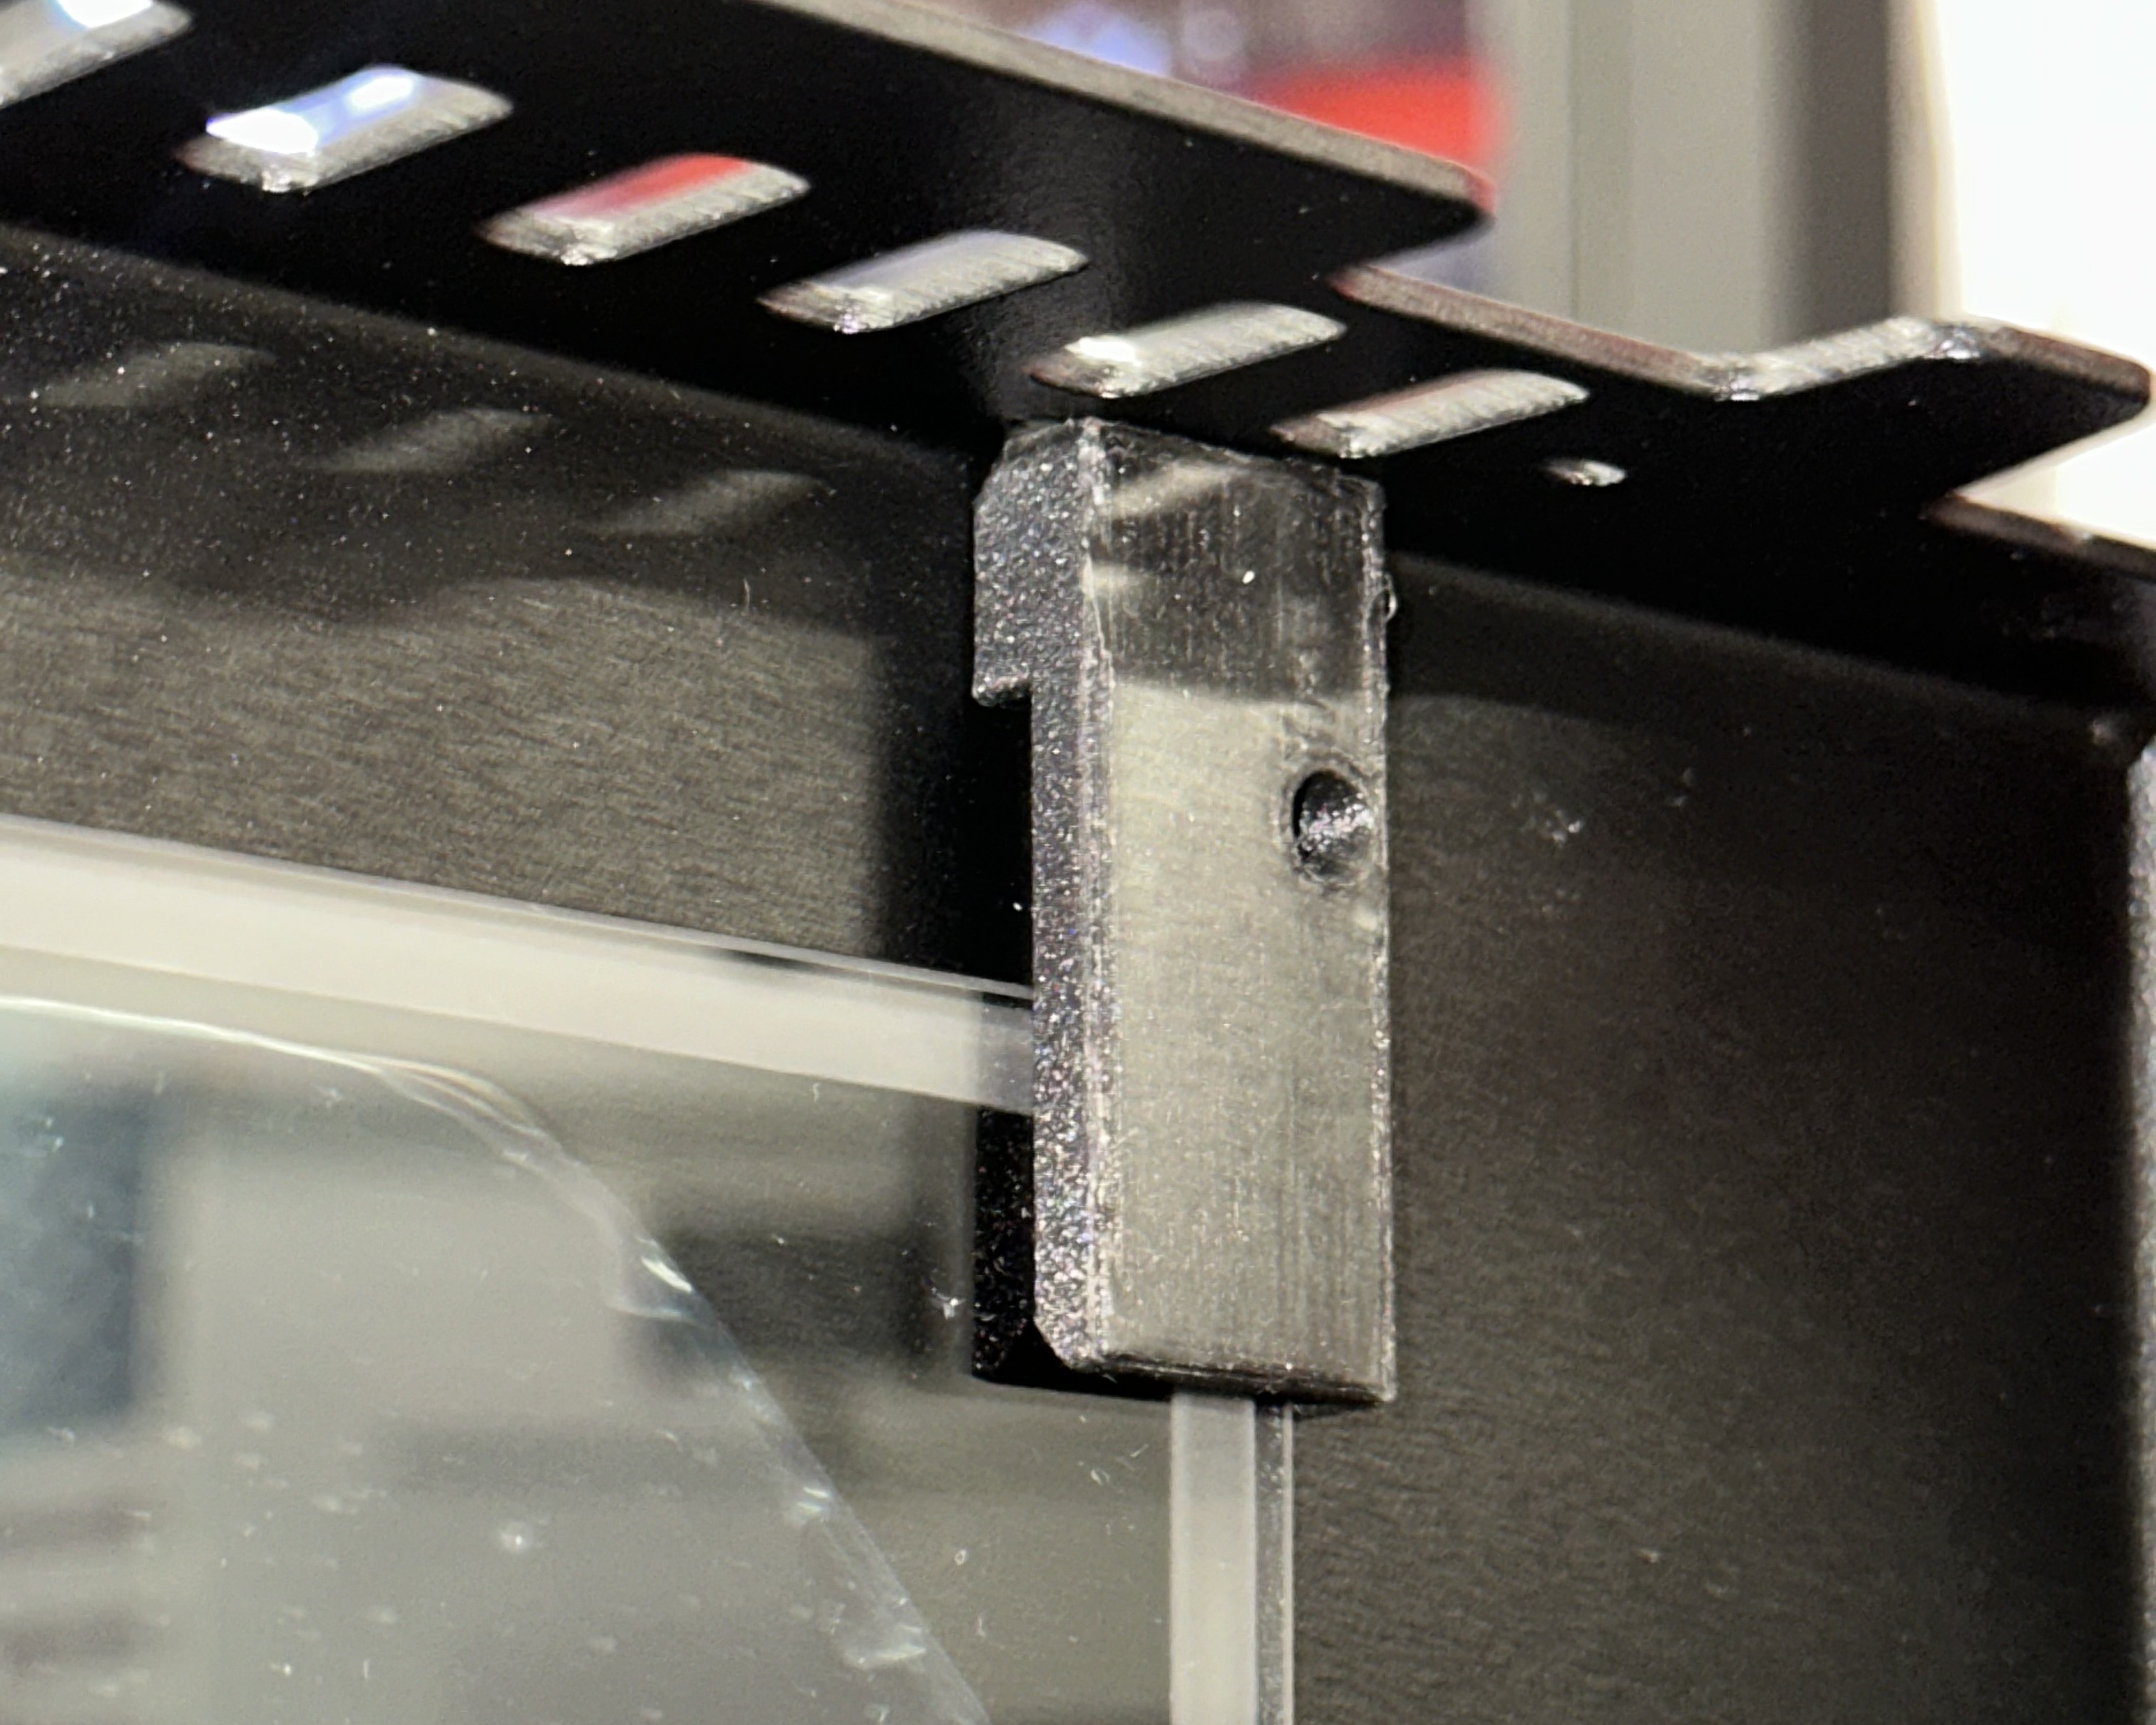
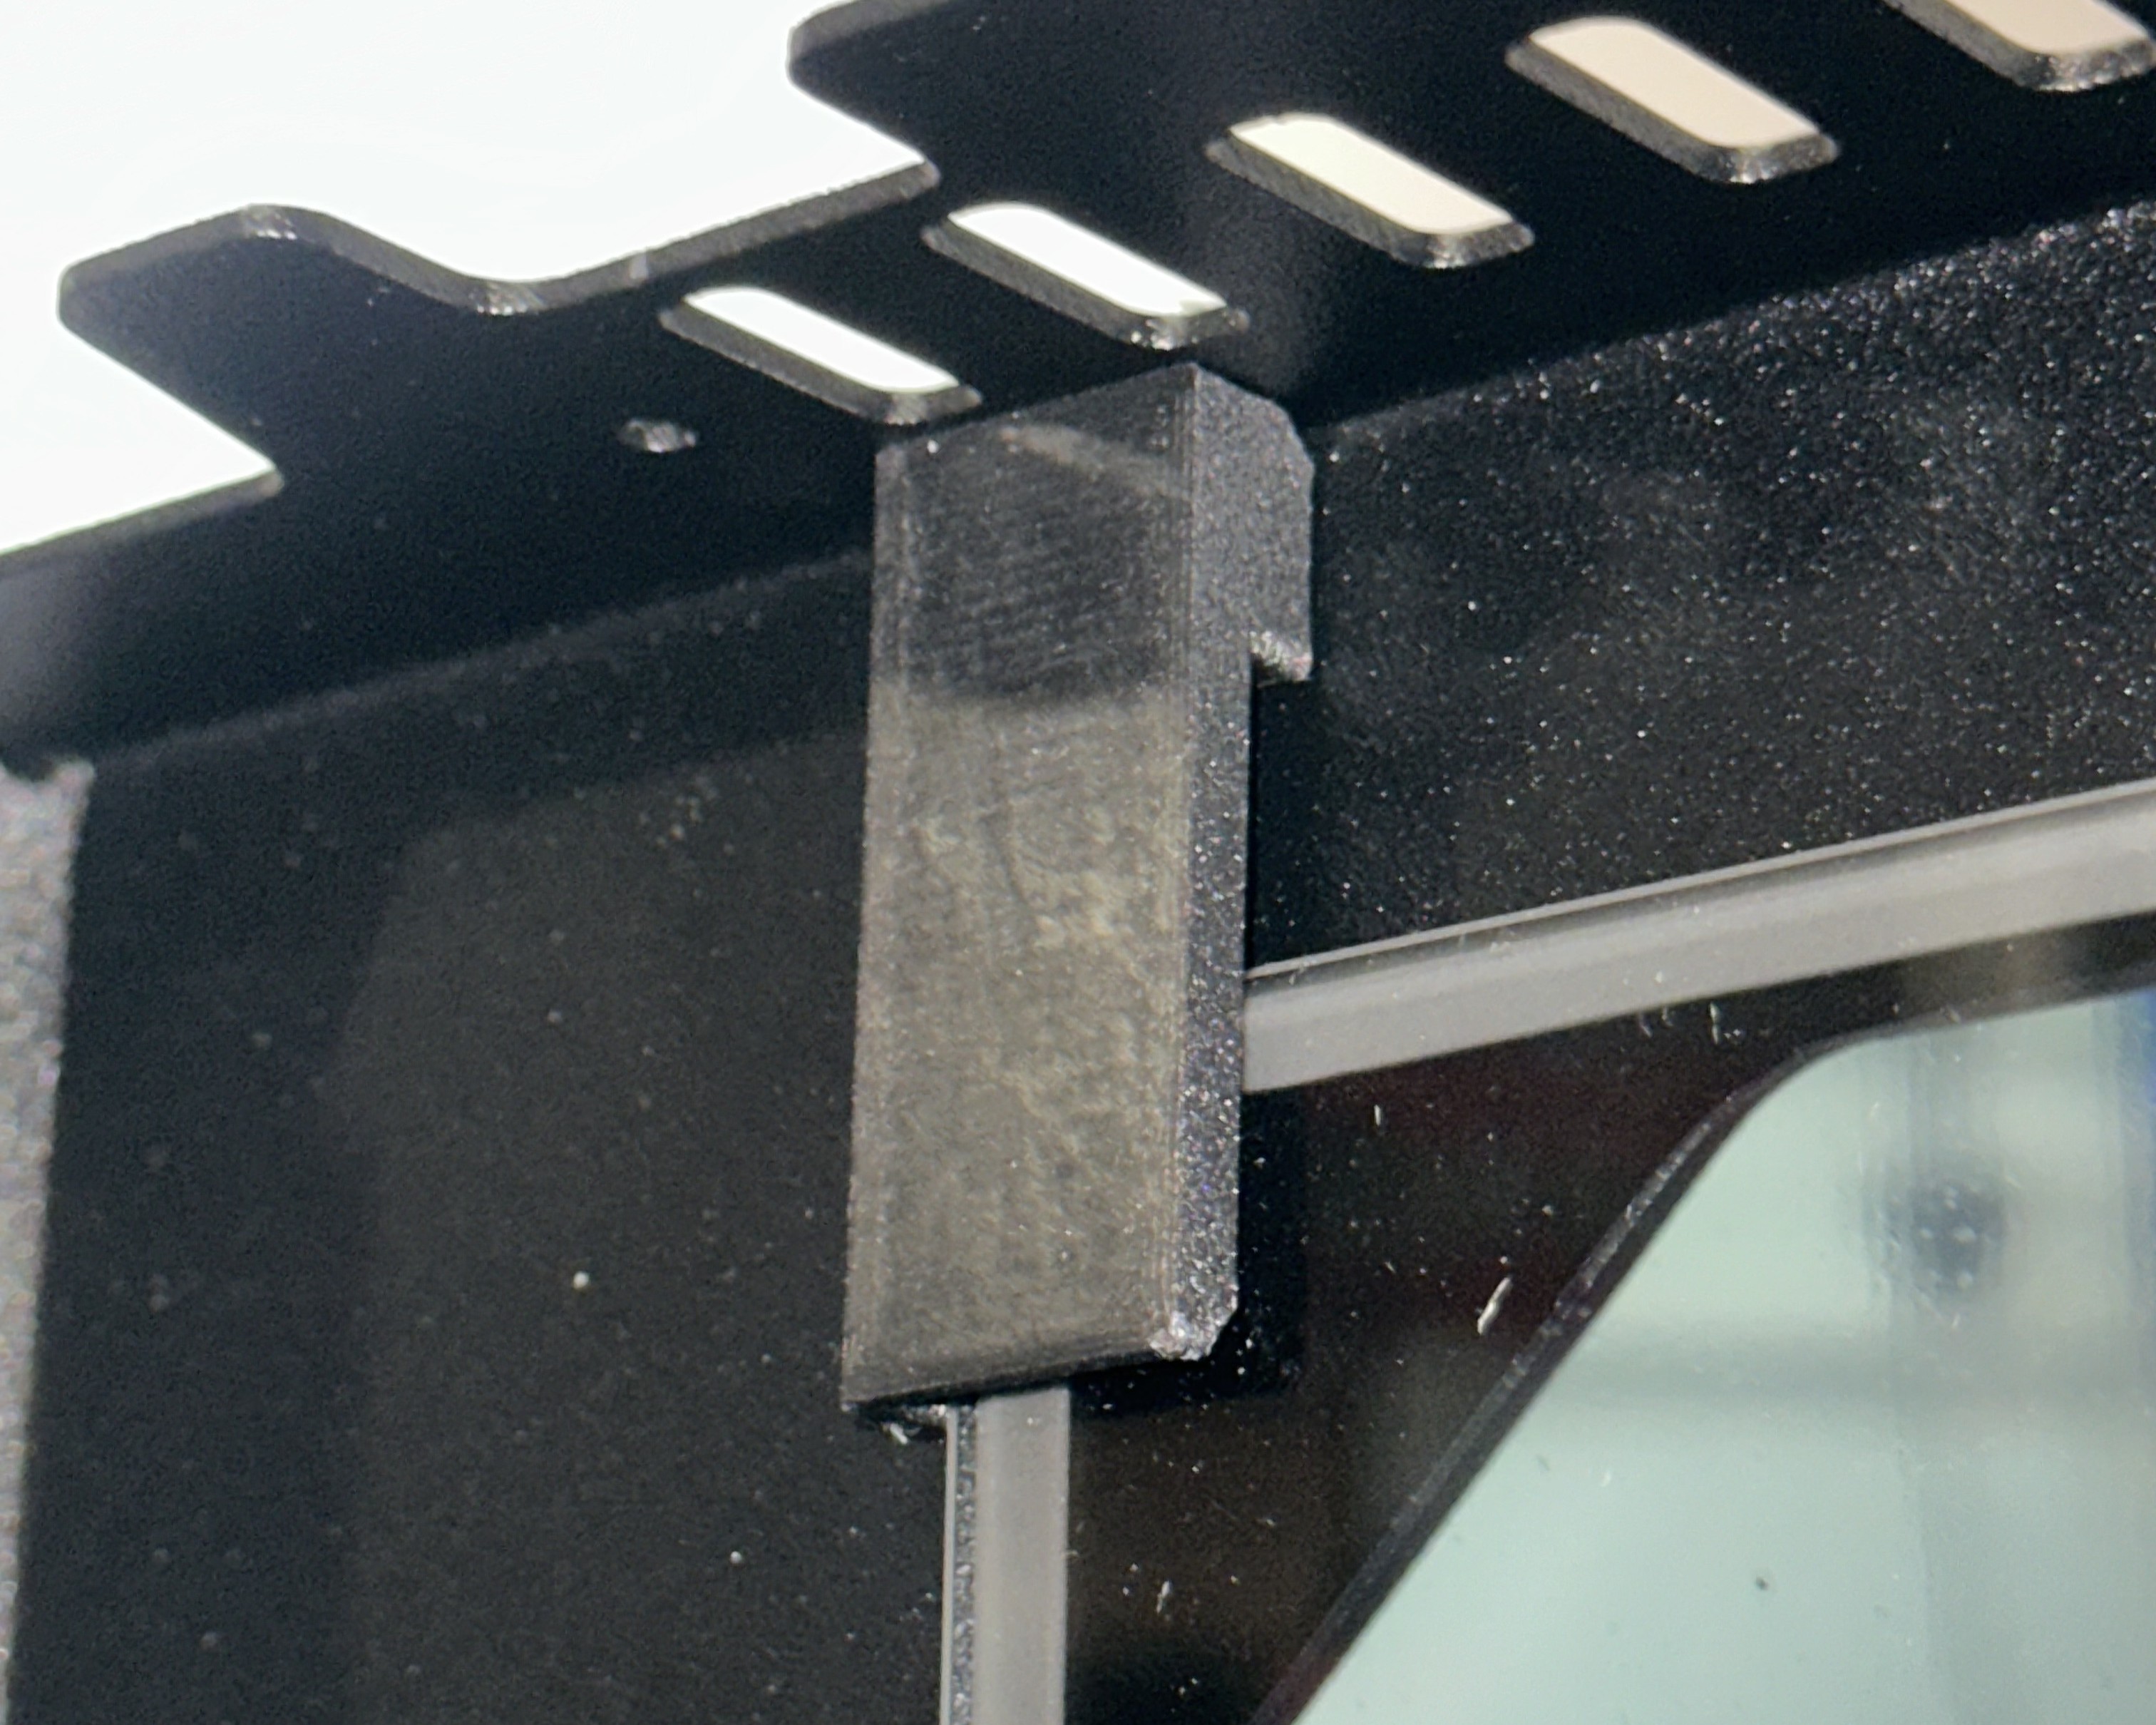
If glass has fallen off or shifted, verify the brackets are installed correctly before reassembling. Check both the inner and outer glass panels.
- Look at both bottom corners. The shorter brackets belong on the bottom. Confirm they are oriented to support the glass.
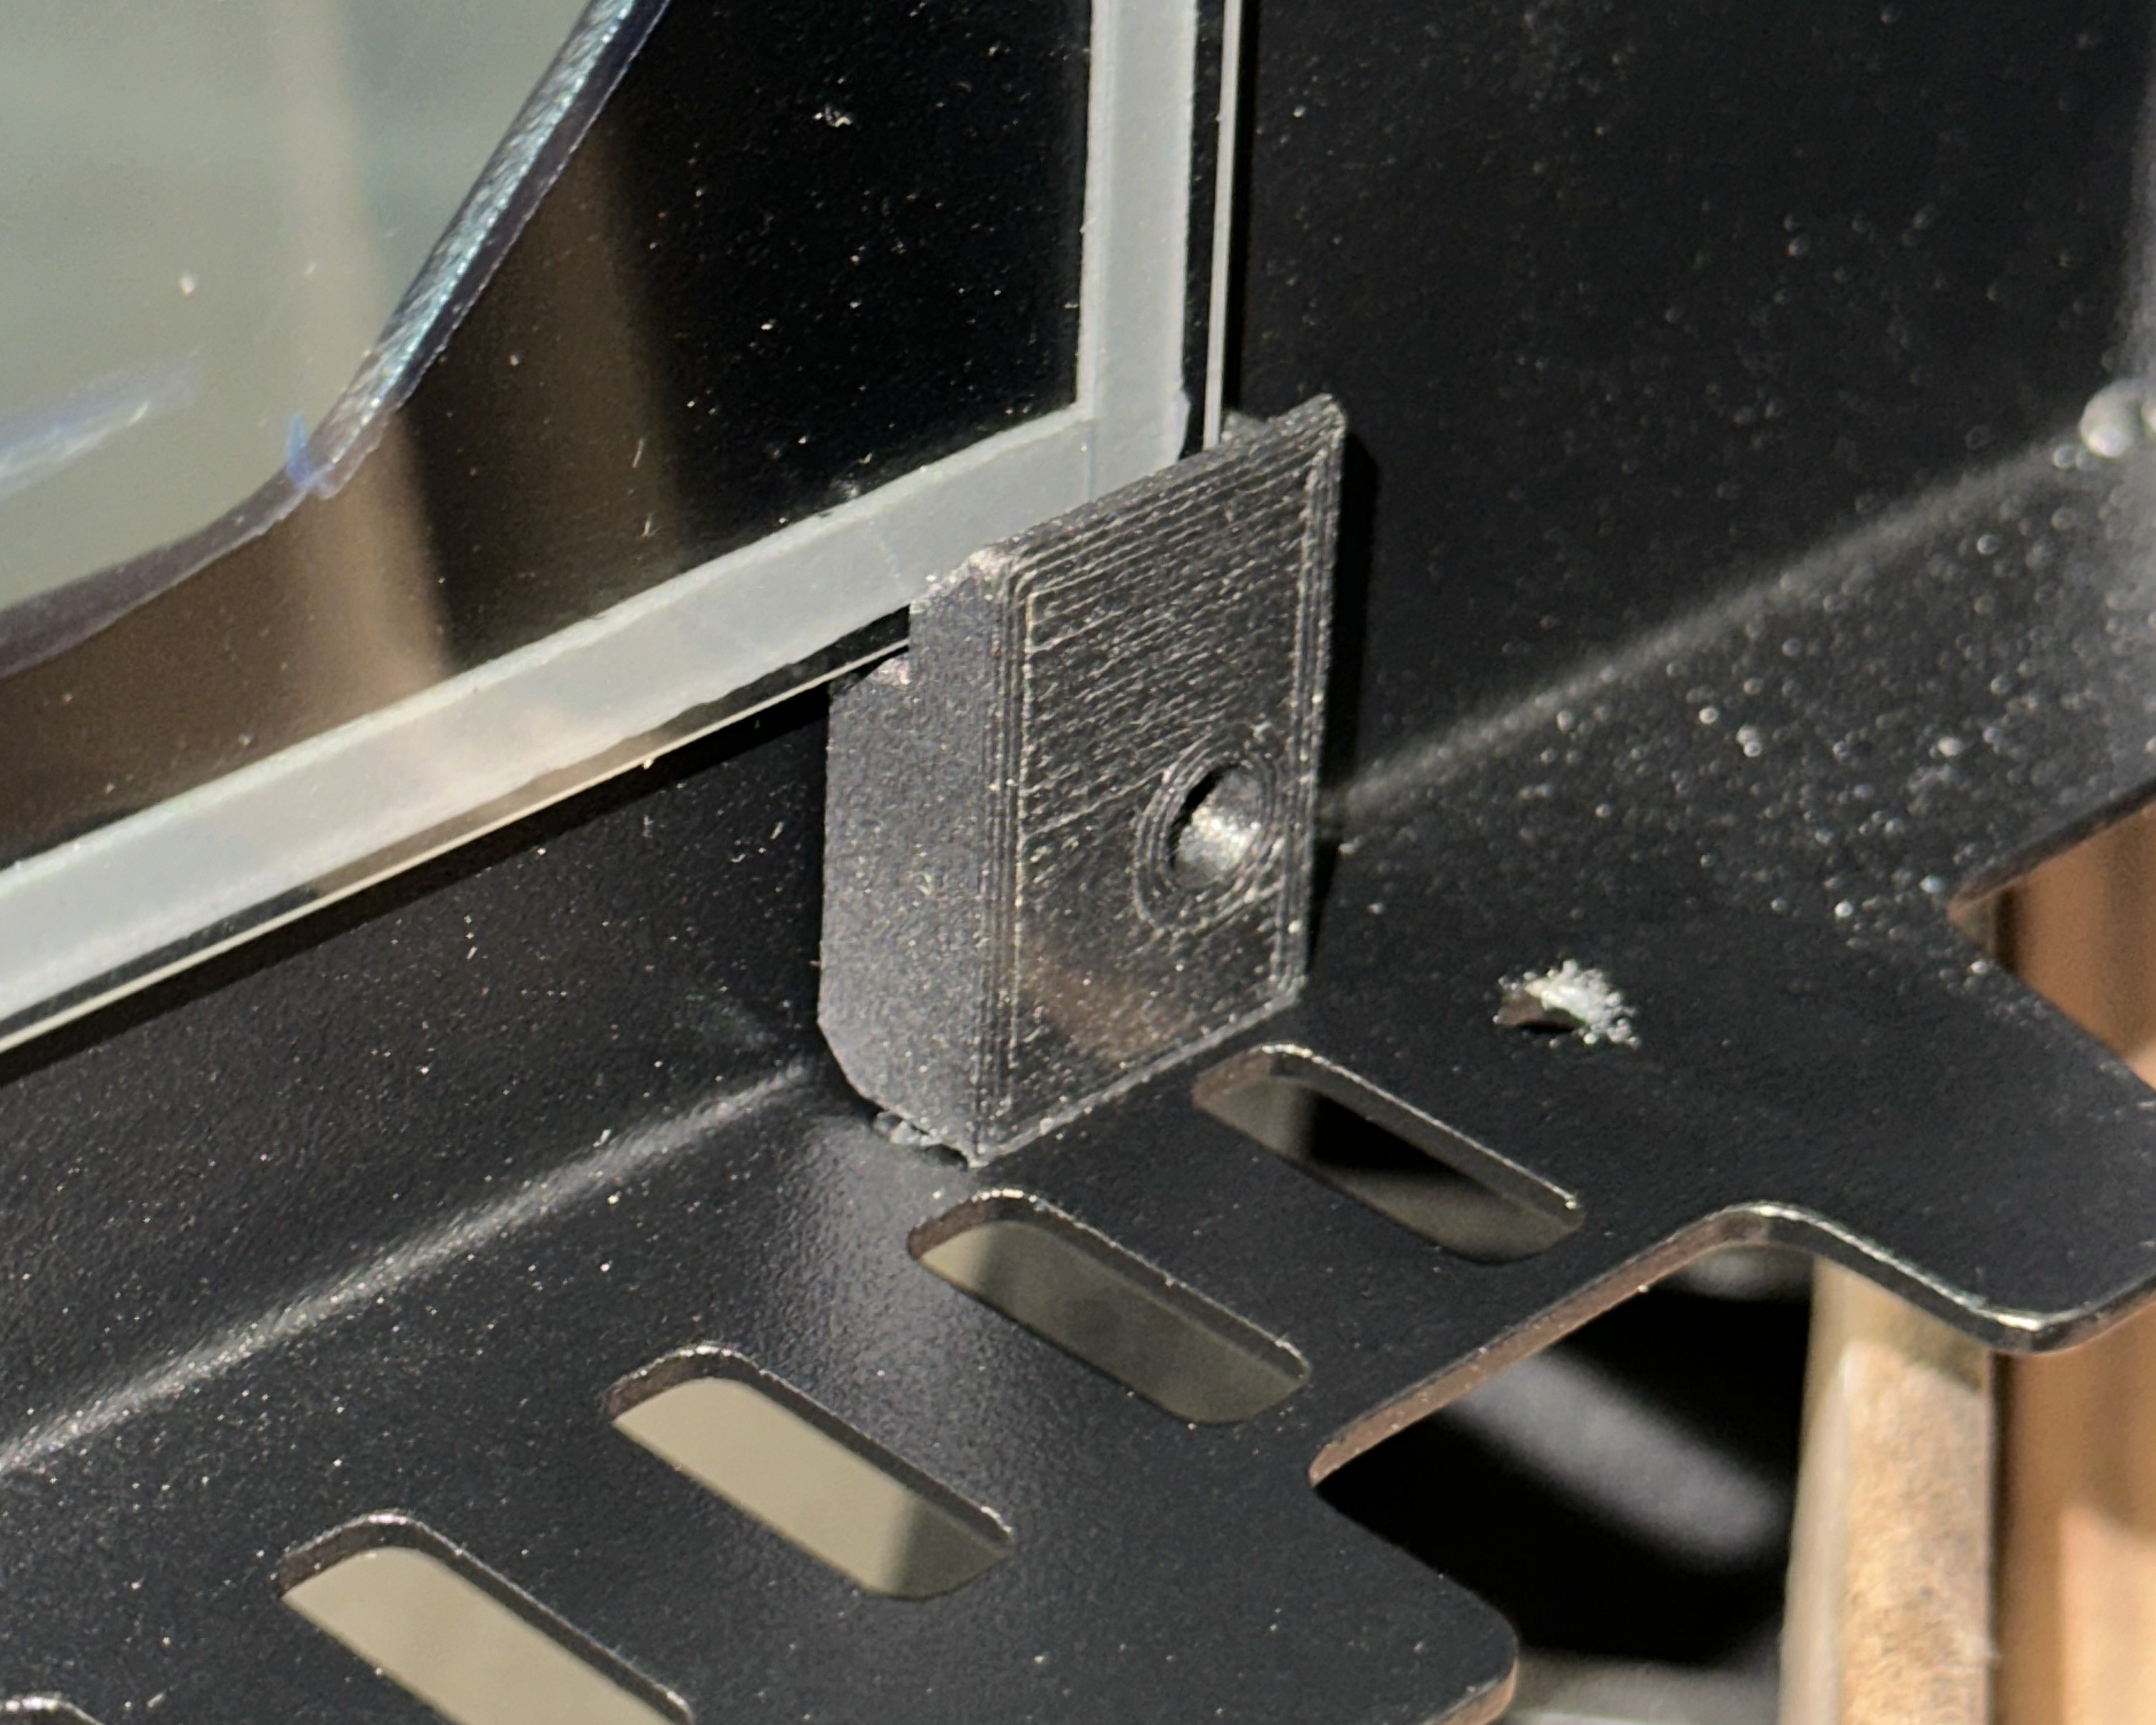
- Look at both top corners. The longer brackets belong on the top. Confirm they are oriented to support the glass.
3. Reinstalling or Adjusting Glass
Pick the scenario that matches what you found.
Scenario A: Glass secure, brackets correct
If the glass is properly seated and the brackets are in the correct positions, skip to Reinstalling the Inner Door Panel.
Scenario B: Glass shifted, brackets correct
- Hold the glass firmly in the center with one hand. With the PH1 Phillips screwdriver, slightly loosen the 4 top bracket screws - just enough that the brackets can move. Do not remove them.
- Still holding the glass, slightly loosen the 4 bottom bracket screws the same way.
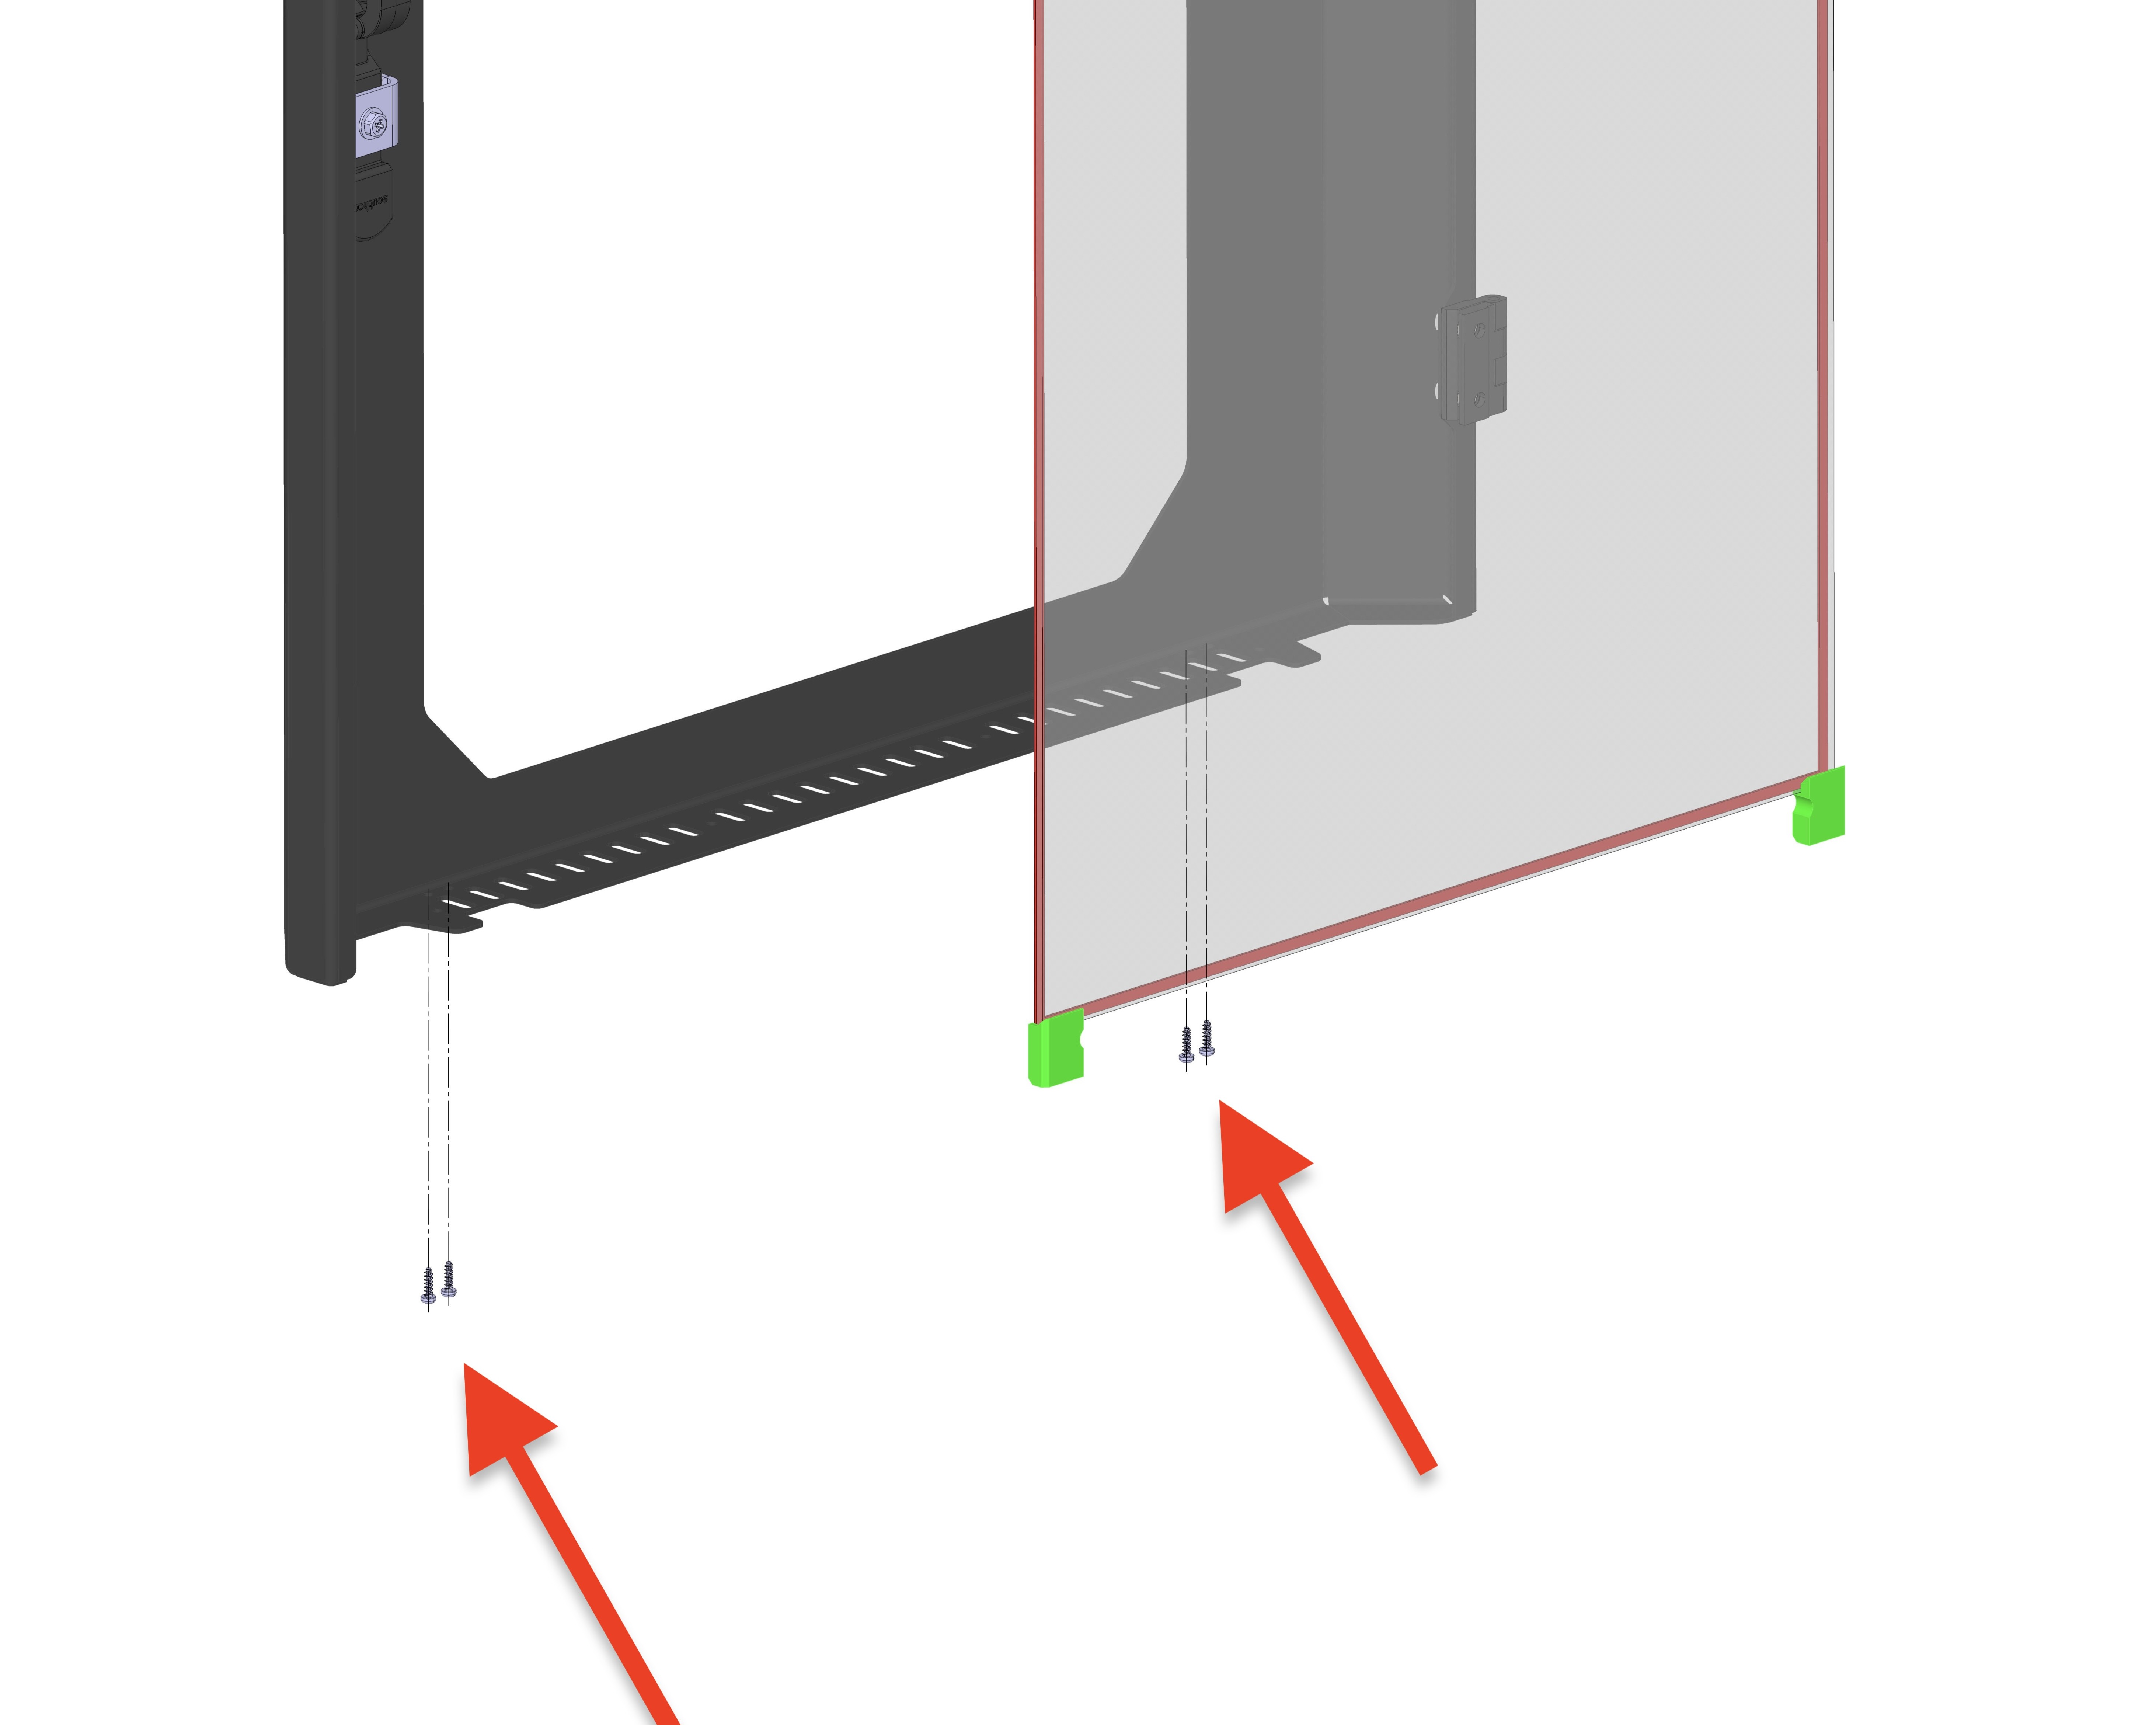
- Keep holding the glass and center it in the frame with even spacing on all edges.
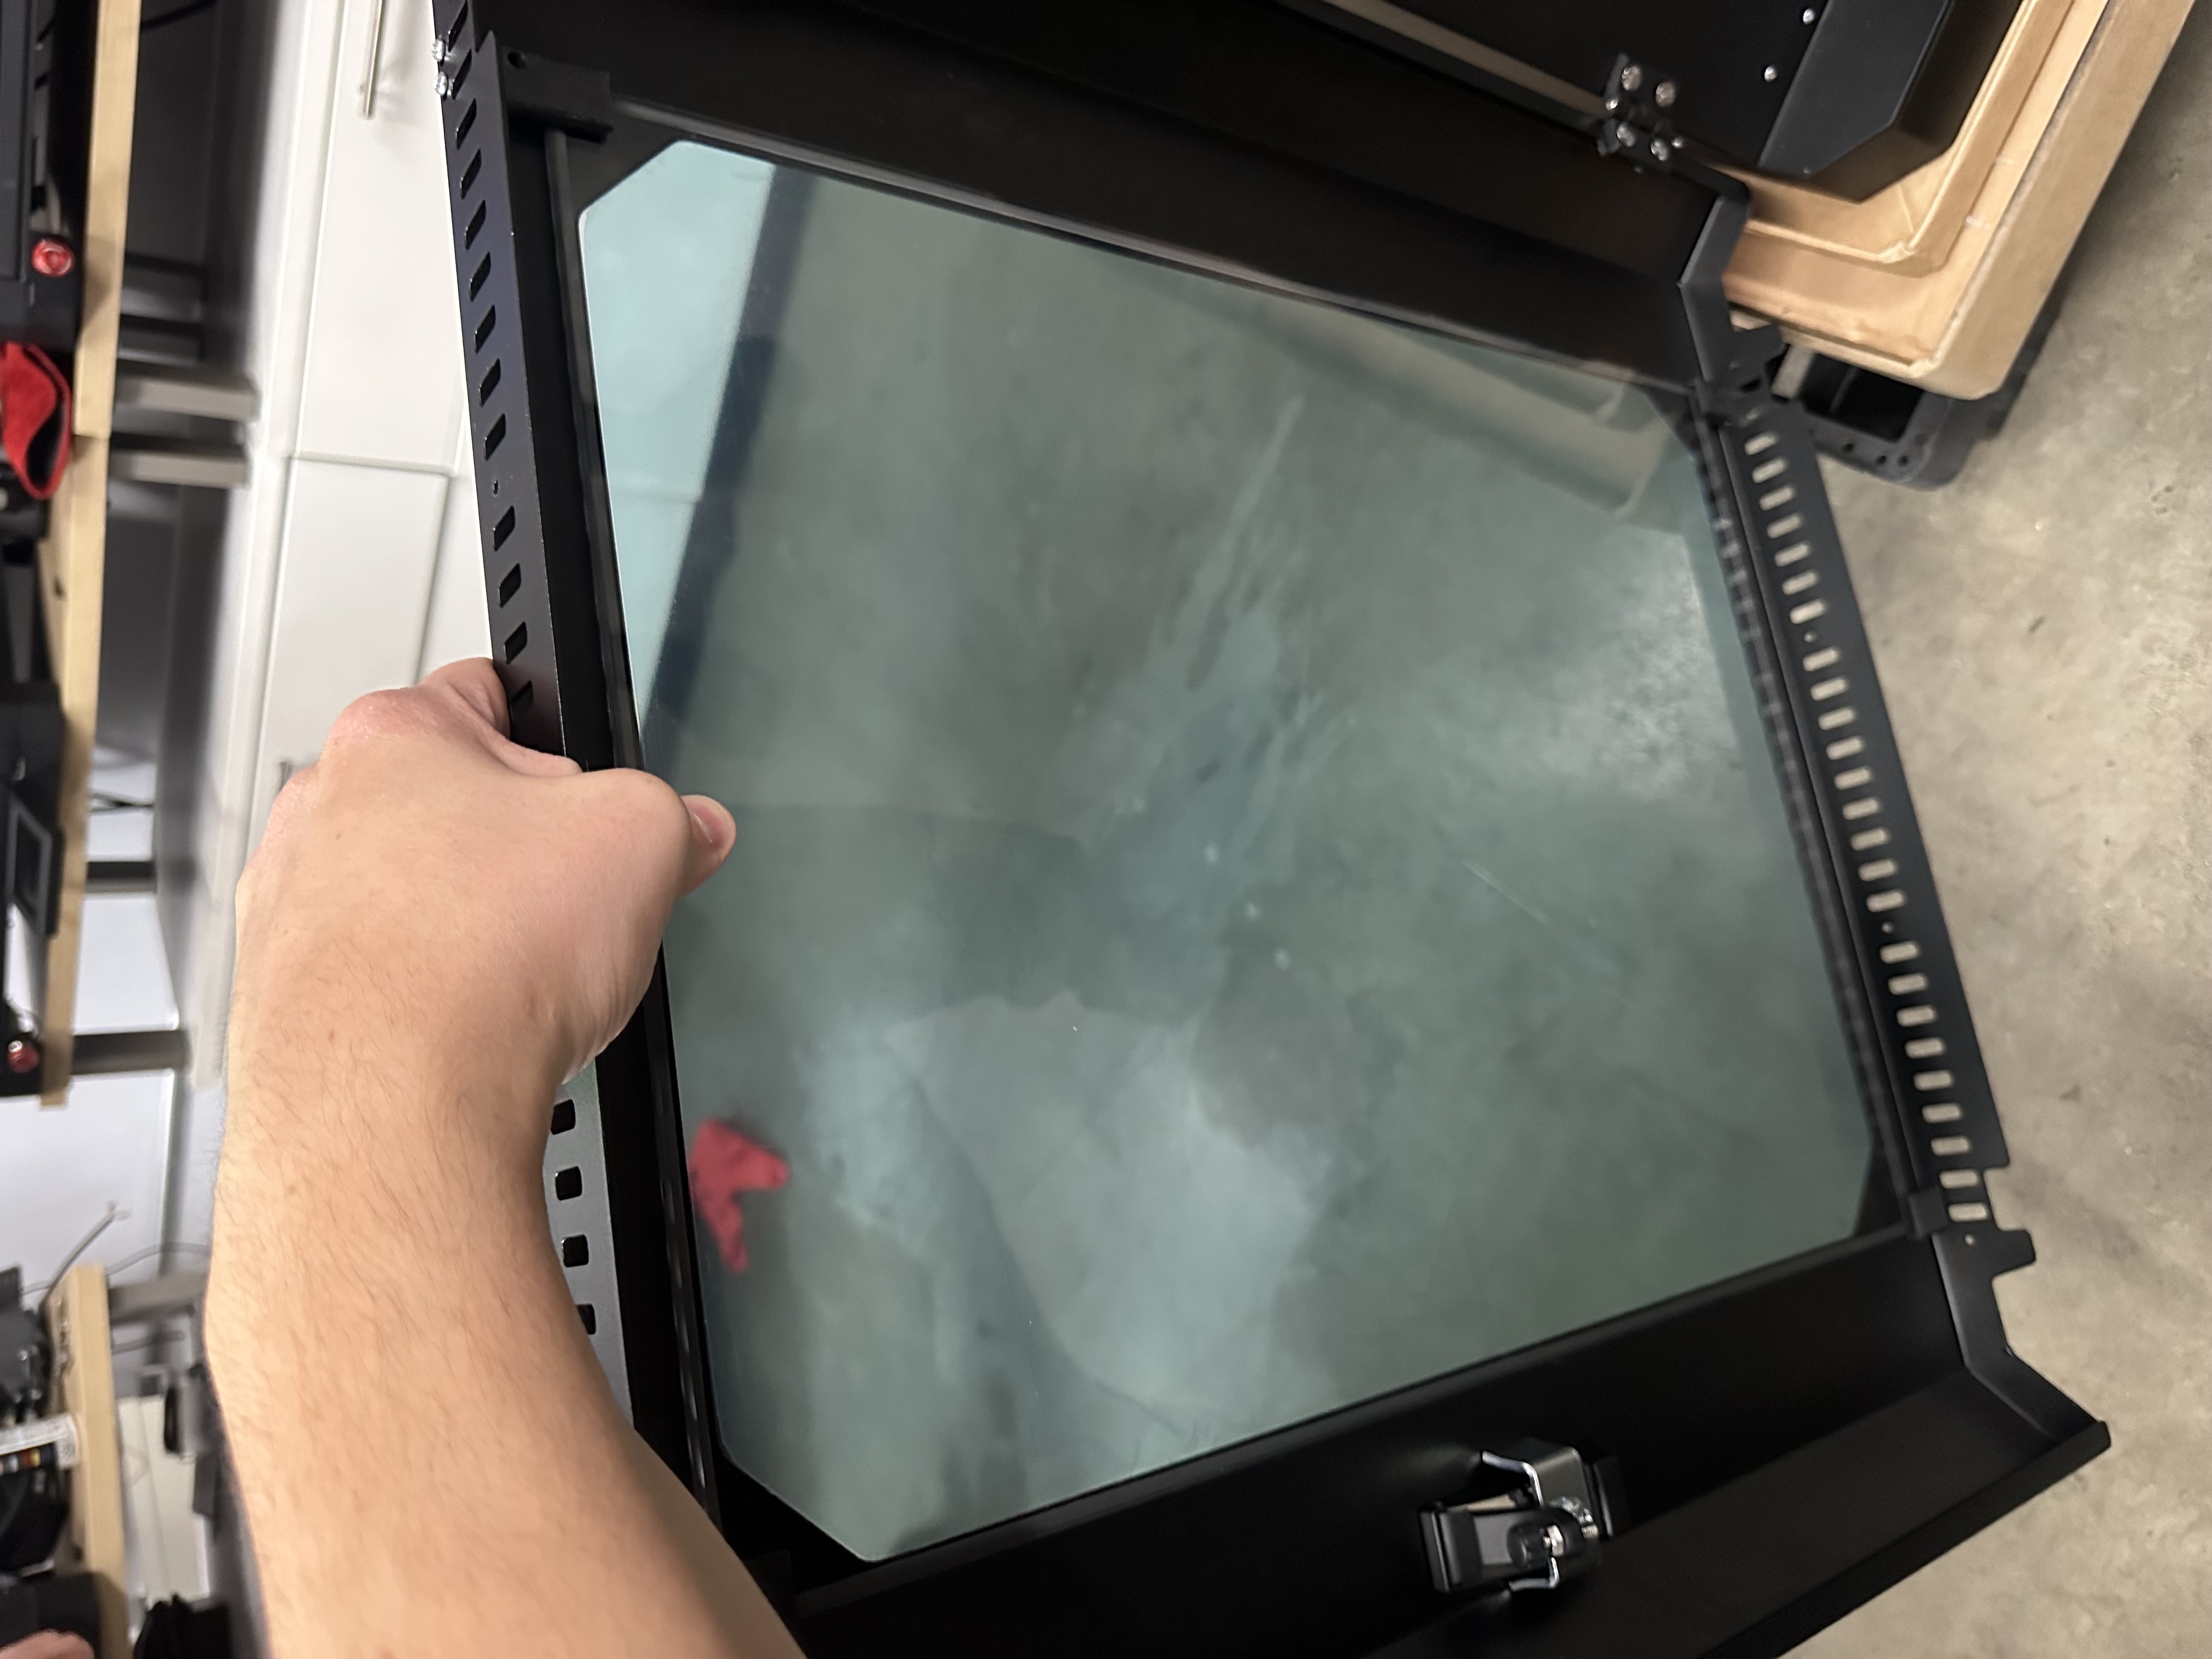
- While holding the glass in position, tighten the top bracket screws, then the bottom bracket screws. Confirm the glass is secure. Continue to Reinstalling the Inner Door Panel.
Scenario C: Brackets wrong or glass fell off
-
If glass is still attached, hold it in the center. With the PH1 Phillips screwdriver, remove the 4 bottom bracket screws first, then the 4 top bracket screws, and take off the brackets. Set the glass on a clean, padded surface.
-
Sort the brackets into two groups: shorter (bottom corners) and longer (top corners). Keep the screws organized by position.
-
Install the shorter brackets on both bottom corners. Insert the screws but leave them snug, not fully tight, so the brackets can still move. Verify orientation against your reference from step 5.
-
Set the glass into the bottom brackets. Hold it at the top center and make sure it seats fully in the bottom bracket channels.
-
While holding the glass, place the longer brackets on both top corners and start their screws without fully tightening. Verify the glass is centered with even spacing all around.
- Tighten the top bracket screws fully, then the bottom bracket screws. Confirm the glass does not rattle or shift and the gaps are even.
4. Reinstalling the Inner Door Panel
- Align the inner panel with the outer shell and insert it straight in. It should sit flush with the outer shell.
Top screws first
Installing the top screws first holds the panel aligned while you start the bottom screws.
-
Insert and tighten all 4 top hex screws with the 2 mm hex screwdriver until fully seated.
-
Insert and tighten all 4 bottom hex screws until fully seated.
-
Open and close the door several times. Check that the glass is quiet and secure, the inner panel sits flush, the gaps are even, and the latch engages properly.
Troubleshooting
FAQ
Support
If you could not find an answer here, reach out to our support team.