¶ Introduction
The first layer is crucial for successful 3D printing. If the nozzle is too high, the part may not stick to the build plate, potentially coming off and damaging your machine. Conversely, if the nozzle is too close, it may clog, result in inaccurate dimensions, or even damage your machine. Therefore, achieving the perfect first layer is essential.
¶ Importance of the First Layer
A properly calibrated first layer ensures:
- Adhesion: The part sticks well to the build plate.
- Accuracy: Dimensional accuracy is maintained throughout the print.
- Prevention of Damage: Avoids potential damage to the nozzle and machine.
¶ Auto-Calibration
Your 22IDEX V3 is capable of full auto-calibration, making the process of setting the first layer height straightforward. Running the auto-calibration ensures that your first layer height is set perfectly or very close to perfect. For accurate detection, the nozzle must be very clean to properly sense the build plate contact.
¶ Manual Adjustments
Even with auto-calibration, fine adjustments may be necessary. Here's how to manually adjust the first layer:
-
Start with a Test Print:
- Begin a print with a wide skirt or brim, or a simple test cube, to verify the first layer quality.
-
Observing the First Layer:
- Too High: Extruded lines are too high with visible gaps between them.
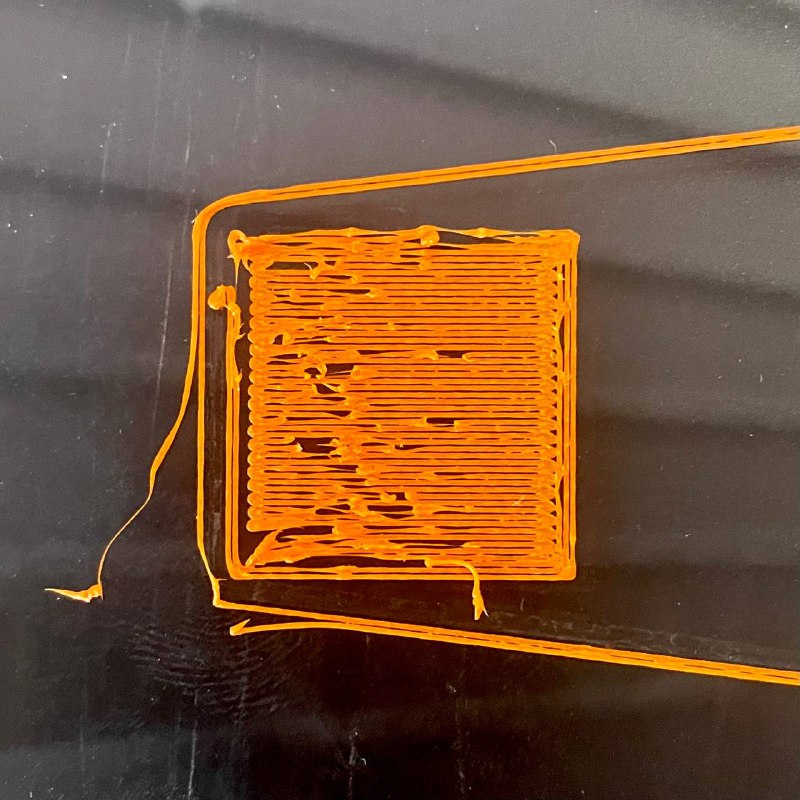
- Too Low: Lines are too close, forming waves.
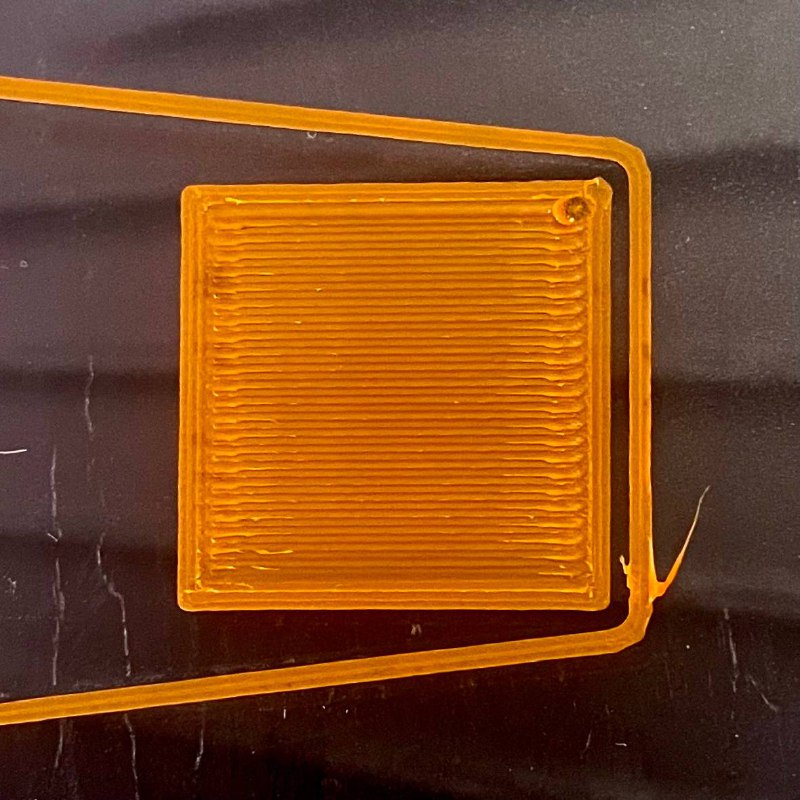
- Perfect: Smooth layer with no gaps between the lines.
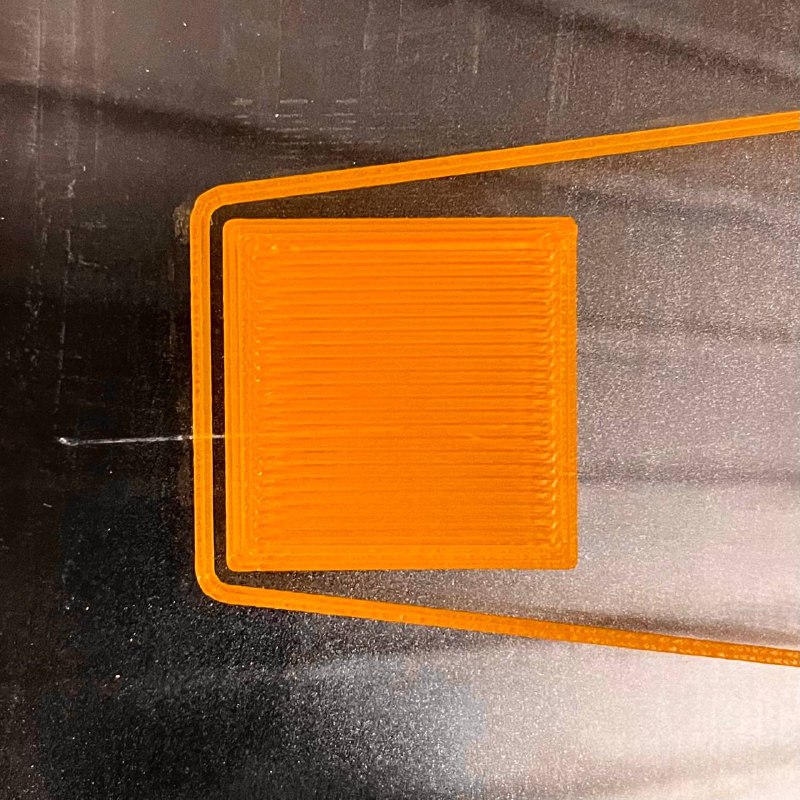
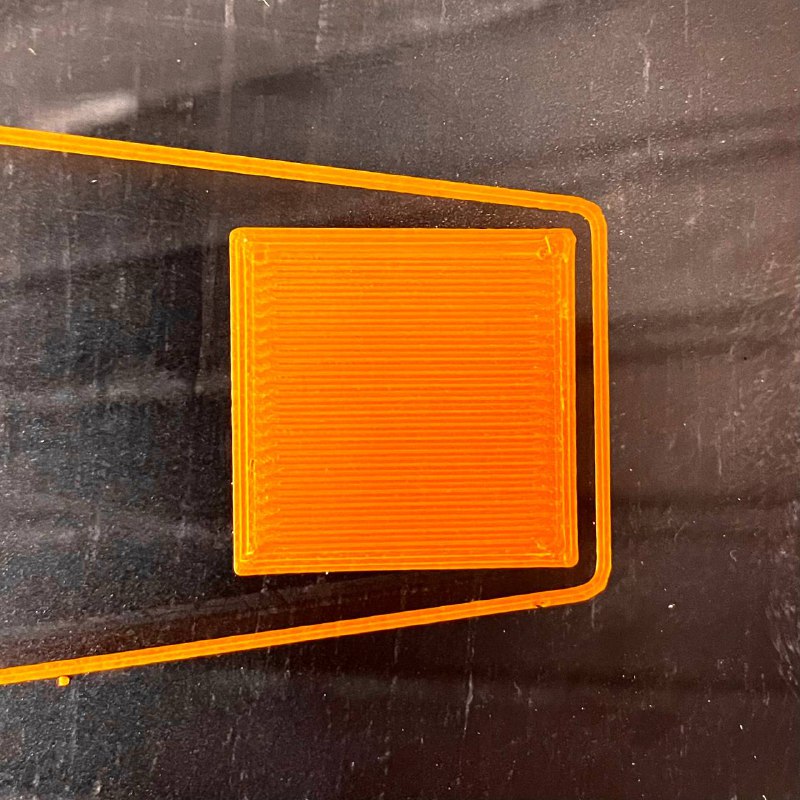
- Too High: Extruded lines are too high with visible gaps between them.
-
Adjusting Z-Offset:
- Use Z-babystepping in the web interface in
Satustab.
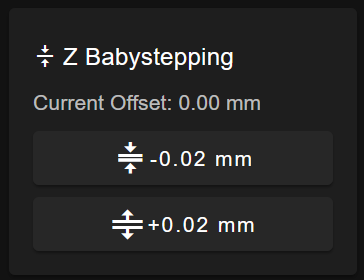
- Nozzle Too Close: Increase Z-Offset by clicking
+0.02 mm. - Nozzle Too Far: Decrease Z-Offset by clicking
-0.02 mm. - Adjust during the first layer and leave it for the rest of the print.
- Use Z-babystepping in the web interface in
-
Saving the Z-Offset:
- After adjusting, save the Z-Offset by going to
Dashboard > Macros > Save Current Z-Offset.
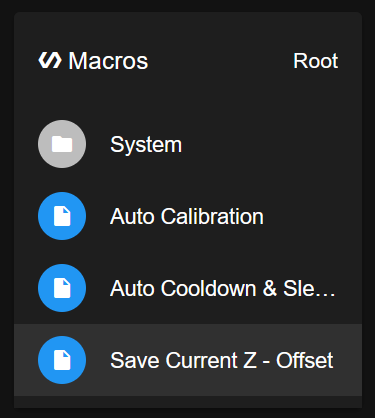
- Alternatively, at the end of the print, you will be prompted to save the Z-Offset if changed during the print.
- After adjusting, save the Z-Offset by going to
¶ Left-Hand Side vs. Right-Hand Side Inconsistencies
If you’re printing in Standard Mode and notice that the left-hand side of your print is at a different height than the right-hand side, this indicates that one time Mesh Bed Correction is required.
¶ Adjustments for Mirror and Duplicate Modes
Printing in Mirror or Duplicate mode presents unique challenges for first-layer adhesion due to the large build area and the physics of the printer. While the 22IDEX features a precision-machined build plate, minor height variations across its expanse are inevitable. These can be influenced by the underlying carbon plate and thermal expansion/contraction of the frame and motion system (X and Y axes) at high temperatures. Considering layer heights are usually a few hundred microns, those errors will be building up might be causing Nozzles deviation during printing.
Mesh Bed Leveling (MBL) is designed to compensate for such variations, but its application differs between Mirror and Duplicate modes:
- Mirror Mode: Mesh Bed Leveling is active but primarily applies corrections based on the left toolhead (T0). The right toolhead (T1) benefits indirectly from these corrections, but may not be perfectly compensated across the entire right side of the bed.
- Duplicate Mode: Mesh Bed Leveling is disabled by default. If it were active, applying the left toolhead's compensation profile to the right toolhead could potentially worsen the first layer on the right side.
¶ Recommended Solution: Using a Raft
The simplest and most reliable method to ensure a good first layer in Mirror or Duplicate mode is to use a raft.
- Enable Raft: In your slicer settings (e.g., PrusaSlicer), enable the raft option, typically configured for 3-4 layers.
- Benefits: The raft creates a perfectly flat and level foundation directly on the build plate, effectively negating minor height inconsistencies across the bed for the first layer of your actual parts. The raft layers are designed for easy separation.
- Trade-off: Using a raft will add approximately 5 to 15 minutes to your total print time, depending on the footprint of your parts.
Tip: Using a raft is highly recommended for large parts or when maximum reliability is desired in Mirror/Duplicate modes, saving time and potential frustration compared to manual adjustments.
¶ Advanced Solution: Manual First Layer Compensation (No Raft)
If you prefer not to use a raft, you can manually compensate for height differences during the first layer. This method requires careful observation and adjustment.
Warning: This is an advanced technique requiring active monitoring during the first layer. Incorrect adjustments can lead to poor adhesion or nozzle collisions.
- Start Print: Begin your print in Mirror Mode. Duplicate mode is less suitable for this technique as MBL is fully disabled.
- Observe First Layer: Closely watch both toolheads as they print the first layer (e.g., the skirt or initial lines of the parts). Determine which toolhead (Left/T0 or Right/T1) is printing closer to the build plate.
- Adjust Z-Offset (Babystepping):
- Access the Z-babystepping controls in the
Statustab of the web interface.
- Use the
+0.02 mmor-0.02 mmbuttons to adjust the overall Z-height until the nozzle that was originally closer is printing a perfect first layer (smooth, no gaps, not squished). - At this point, the other nozzle will be printing too high, likely leaving gaps between lines.
- Access the Z-babystepping controls in the
- Adjust Flow Rate for the Higher Nozzle:
- Identify the extruder corresponding to the nozzle that is now printing too high (Extruder 0 for T0/Left, Extruder 1 for T1/Right).
- In the
Statustab, locate the Flow Rate adjustment for that specific extruder.
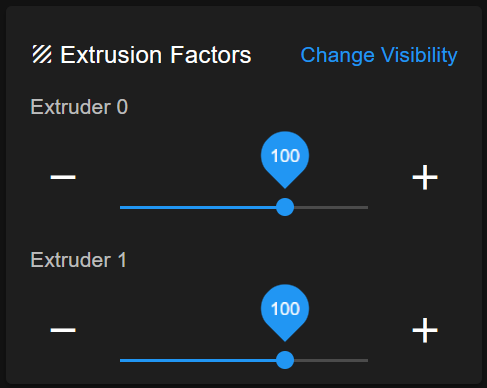
- Increase the flow rate (also known as Extrusion Multiplier) for that extruder incrementally (e.g., try
105%,110%,115%) until its first layer lines fuse correctly without gaps. This pushes more plastic to compensate for the higher nozzle height for the first layer only.
- Automatic Reset: The adjusted Flow Rate percentage will automatically revert to
100%after the first layer is completed. Subsequent layers will build upon the compensated first layer.
Info: This technique leverages Z-babystepping for the primary height correction and temporary first-layer flow rate adjustment to compensate for the remaining difference on the secondary toolhead.
¶ Handling Persistent Inconsistencies
- If you consistently observe significant height differences between the nozzles before starting a print, ensure both nozzles are perfectly clean and run the full Auto-Calibration routine again.
- If first layer issues persist specifically from left-to-right across the bed even in Standard Mode, it indicates a need to perform the Mesh Bed Correction procedure.
¶ Conclusion
Achieving the perfect first layer is essential for successful 3D printing, especially in demanding modes like Mirror and Duplicate. With the auto-calibration capabilities of the 22IDEX V3 and the adjustment techniques outlined (using rafts or manual compensation), you can ensure optimal first layer performance. If you face persistent difficulties, don't hesitate to contact support for assistance.