¶ Brief Overview
Regular and correct lubrication of your Vision Miner 22IDEX 3D printer's components is key to ensuring its smooth, quiet operation and longevity. This guide explains how and when to lubricate the Z-axis lead screws, X and Y-axis linear guides, and extruder gears. It's important to distinguish between issues resolved by lubrication and those indicating mechanical misalignment.
¶ Introduction
Lubricating the moving parts of the printer helps reduce friction, prevent premature wear, and eliminate squeaks and other unusual noises. Before proceeding with lubrication, it's important to correctly diagnose the problem.
Important Distinction:
- Alignment Issues (Especially for Z-axis): If you notice the Z-axis motor "binding" or if axis movement is significantly difficult, particularly at the bottom part of its travel, lubrication will likely not solve the issue. This may indicate a problem with the alignment between the motor shaft and the linear guide. In such cases, performing a Z-axis Mechanical Alignment Calibration is necessary.
- Issues Resolved by Lubrication: If the Z-axis moves with difficulty or noise primarily above the midpoint of its travel, or if general stiffness, squeaking on the X and Y axes is observed, or for preventive maintenance of extruder gears – then lubrication is appropriate.
For all procedures, use the recommended type of grease.
¶ Recommended Lubricant
For lubricating printer components, Krytox is recommended.
¶ Tools & Materials
- High-Temperature Grease
- Lint-free cloths or paper towels
- Gloves
- Syringe (for extruder and X/Y linear guides; optional for Z-axis)
- Small needle/nozzle attachment for syringe (for X/Y linear guide carriages, if applicable)
¶ General Preparations
- Cleanliness: Before applying new grease, always thoroughly clean components of old grease, dust, and debris.
- Printer Power: Some steps (like running macros) require the printer to be powered on. For manual cleaning and grease application where immediate movement isn't required, it's recommended to power off the printer for safety.
¶ Lubrication Instructions
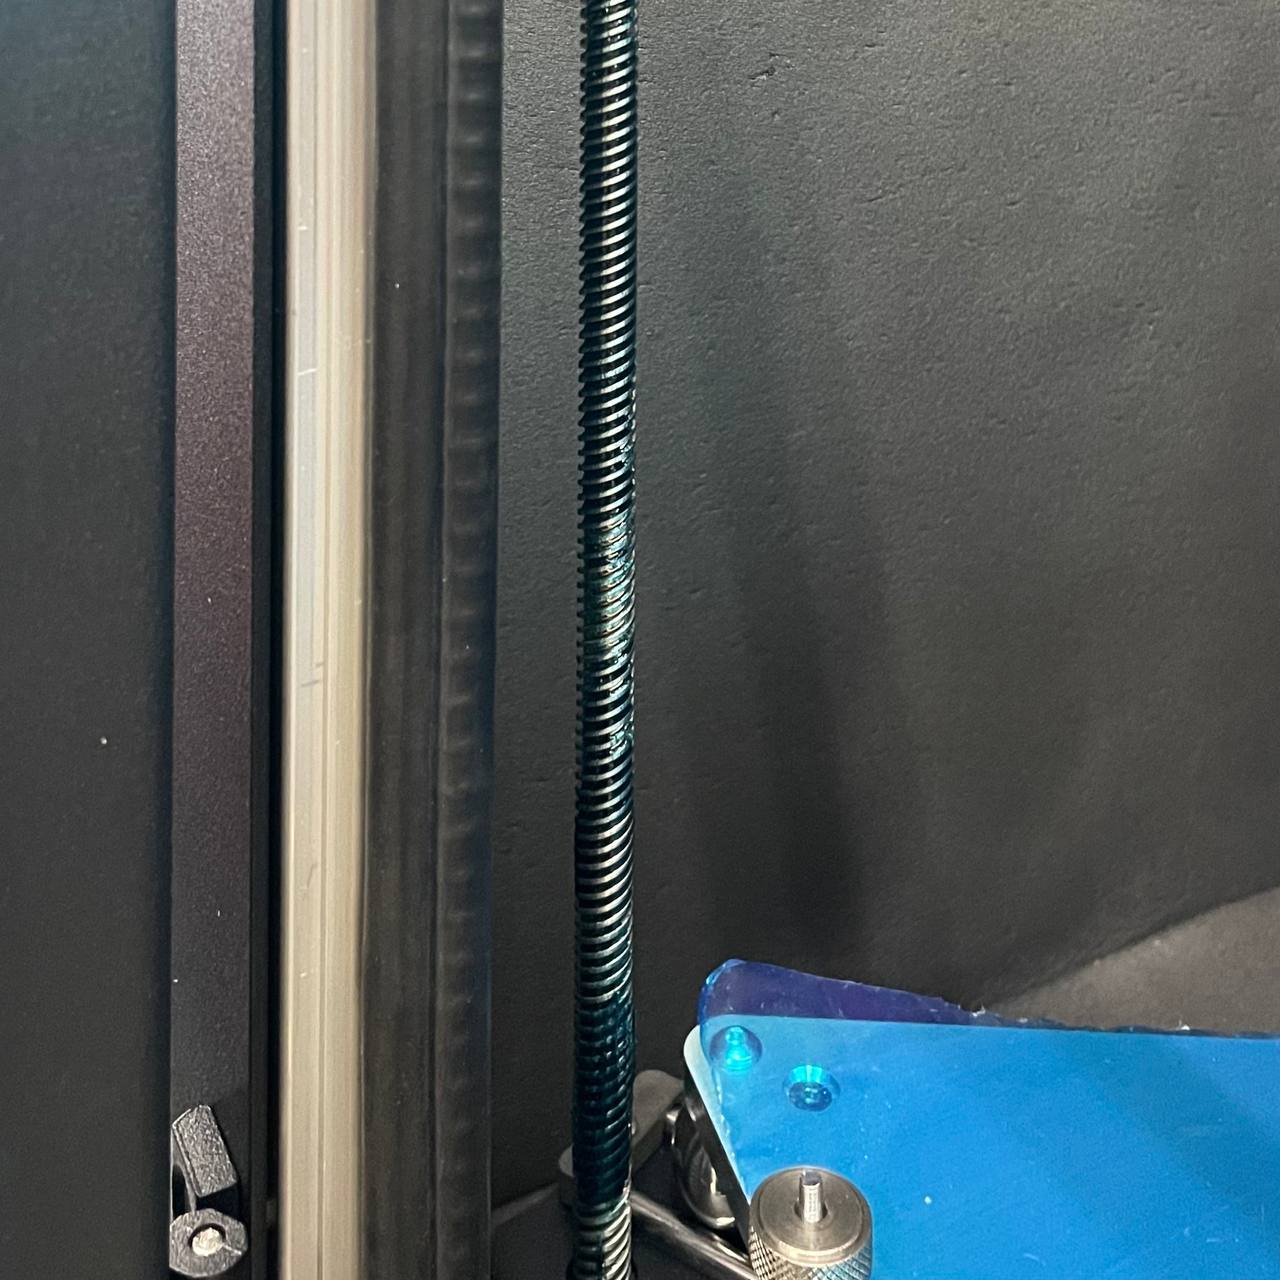
¶ 1. Z-axis Lead Screws
¶ 1.1 When to Lubricate Z-axis Lead Screws
- Lubricate if Z-axis movement becomes stiff, noisy, or uneven, especially above the midpoint of travel.
- If problems (binding, jamming) are observed primarily at the bottom part of the Z-axis travel, first check and perform the Z-axis Mechanical Alignment Calibration.
¶ 1.2 Cleaning the Lead Screws (Important First Step)
- Power off the printer and unplug it from the mains for safety.
- Place cloths or paper towels under and around the Z-axis lead screws to catch debris and old grease.
- Using a clean, lint-free cloth, thoroughly wipe down the entire length of both Z-axis lead screws, removing all old grease, dust, and grime. Repeat with clean cloths until they come away clean after wiping the screws.
¶ 1.3 Applying New Grease
- Place clean cloths beneath the lead screws.
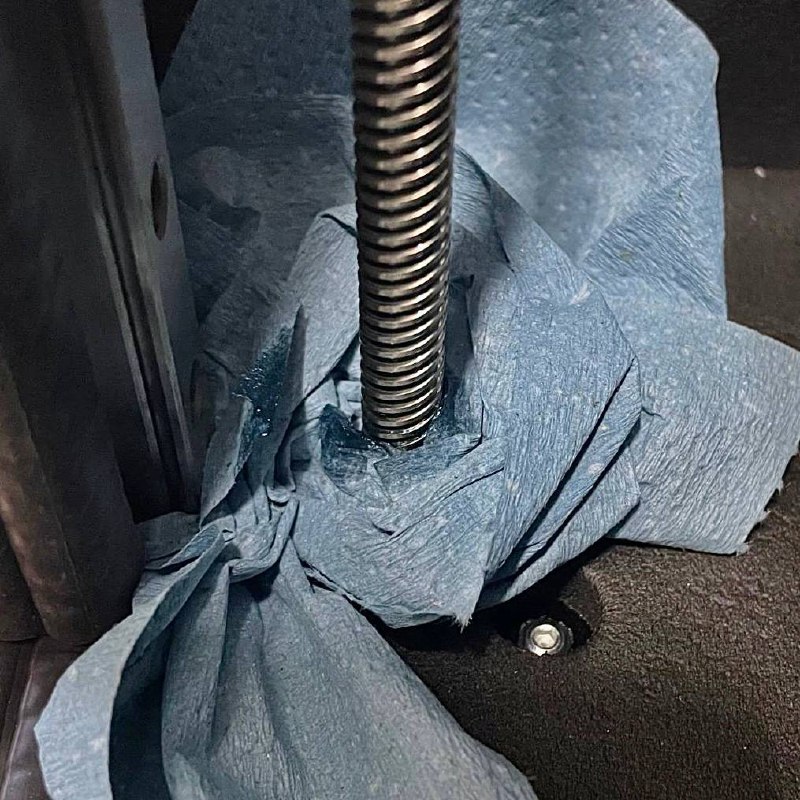
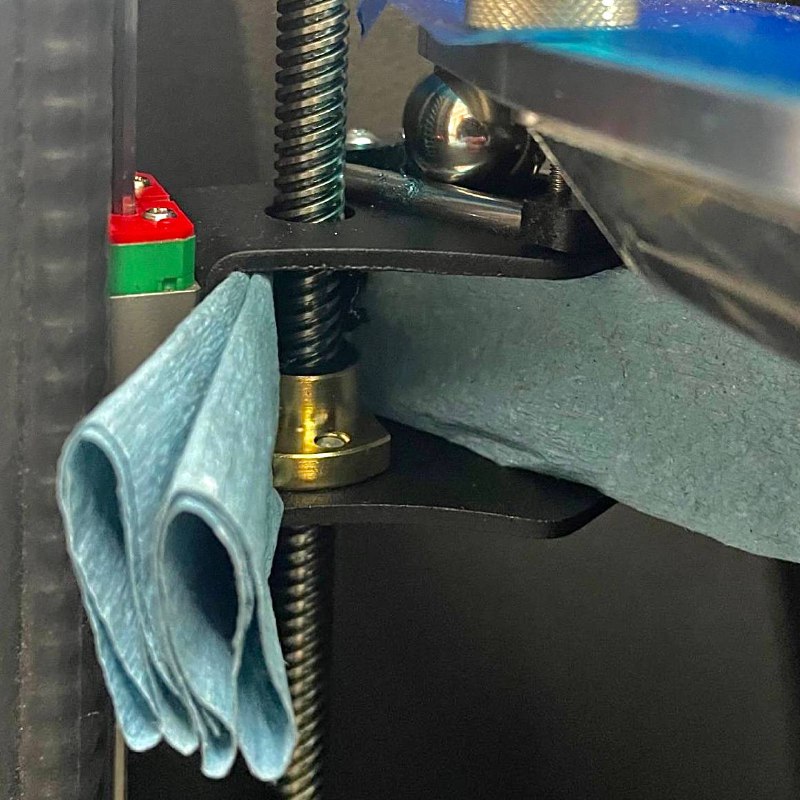
- Wearing gloves, apply a thin, even coat of high-temperature grease to the lower
~5-10 cmof each lead screw. You can use a syringe for precise application or apply it carefully with your fingers. A small amount is sufficient.
¶ 1.4 Distributing the Grease (Using the Lubrication Macro)
- Power on the printer.
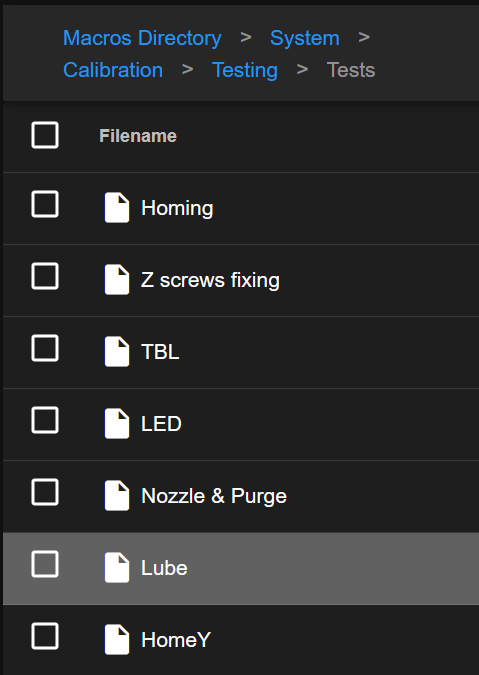
- On the web interface, navigate to
Macros > System > Calibration > Testing > Tests. - Select the
Lubemacro and run it.
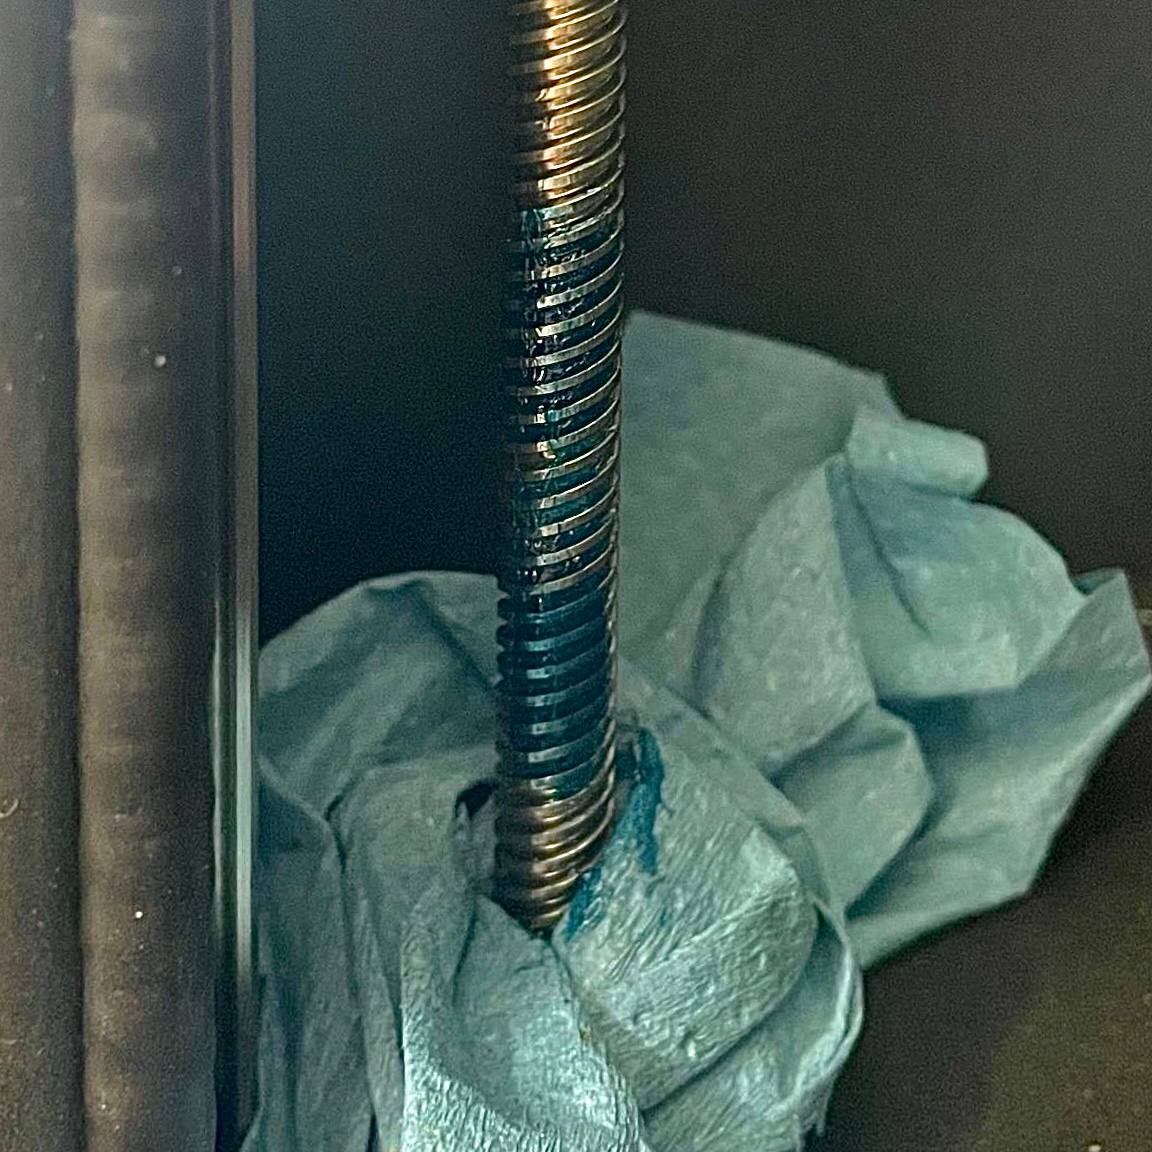
- The printer will move the Z-axis down and asking to apply the grease along the all screws.
- After applying the grease, the printer will move a Z-axis up and down to distribute the grease along the screws and nuts.
- To Stop the Macro:
- Press and hold one of the physical XU-axis endstop switches until the movement stops.
- Or Restar the printer
- Press and hold one of the physical XU-axis endstop switches until the movement stops.
- After distributing the grease, wipe off any excess that may have accumulated at the ends of the lead screws or on the nuts with a clean cloth.
¶ 2. X and Y-axis Linear Guides
¶ 2.1 Cleaning the Linear Guides
- Power off the printer.
- Using a clean, lint-free cloth, thoroughly wipe down the exposed surfaces of the X-axis and Y-axis linear rails where the bearing carriages travel. Remove all old lubricant, dust, and debris.
¶ 2.2 Applying and Distributing Grease (Syringe Method)
- Prepare a syringe with a small amount of high-temperature grease, fitted with a fine needle.
- Locate the small lubrication hole on the sides of the X-axis carriage and Y-axis carriages.
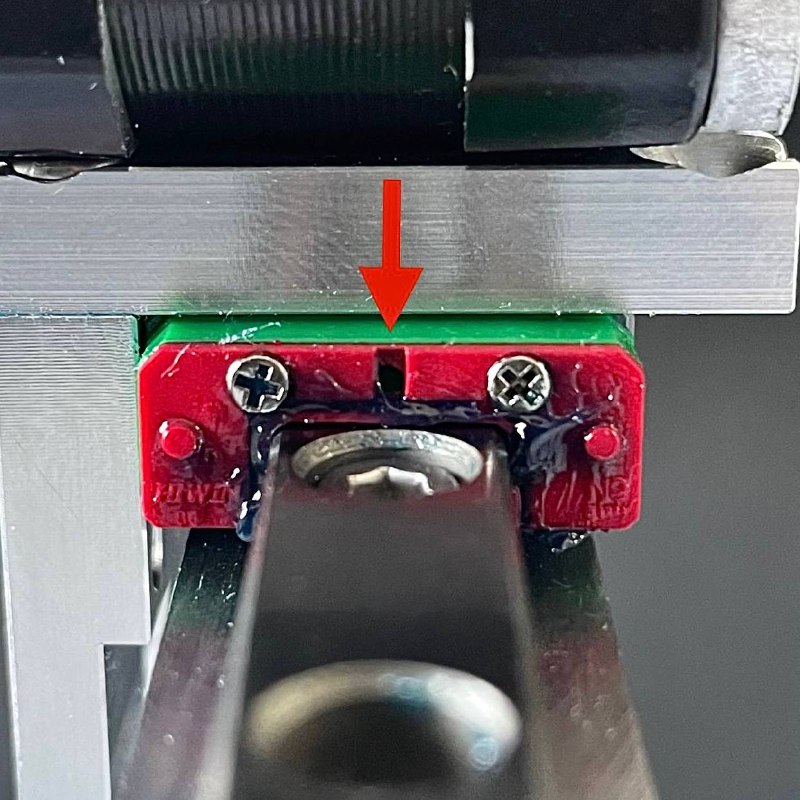
- Insert the tip of the syringe needle/nozzle approximately halfway into the lubrication hole on one side of a carriage.
- Dispense a small amount of grease.
- Repeat the process on the other side.
- Repeat for all X and Y carriages that require lubrication.
- Manually (and gently) move the X-carriage and Y-carriage back and forth several times along their full range of motion. This will distribute the grease evenly within the internal bearings of the carriages.
- Wipe off any excess grease that may have emerged from the carriages or lubrication ports with a clean cloth.
(Alternative if no syringe: Apply a very thin film of grease to the cleaned rails, move carriages to distribute, then wipe off significant excess.)
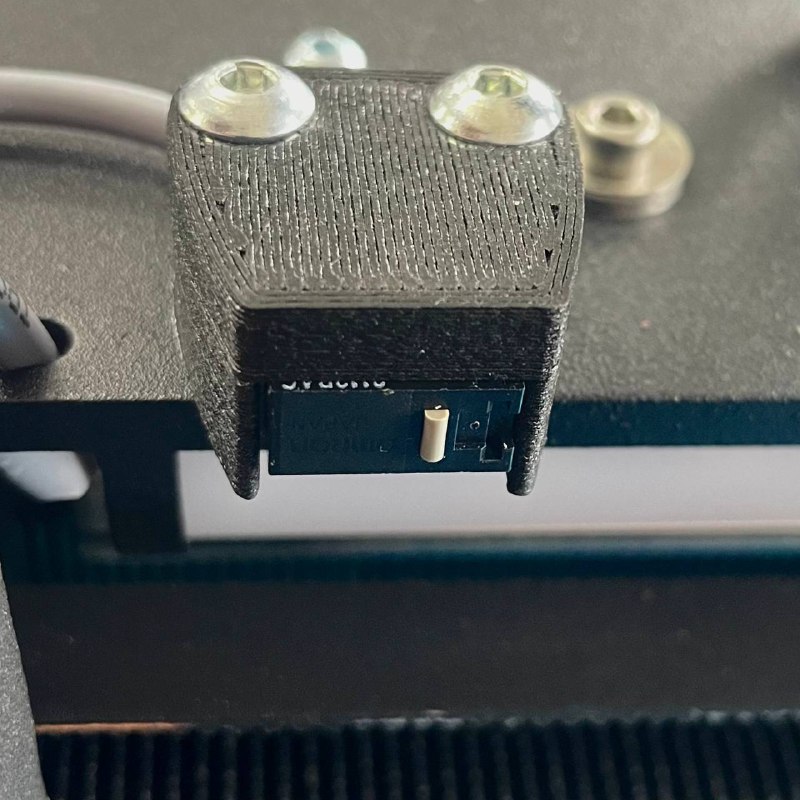
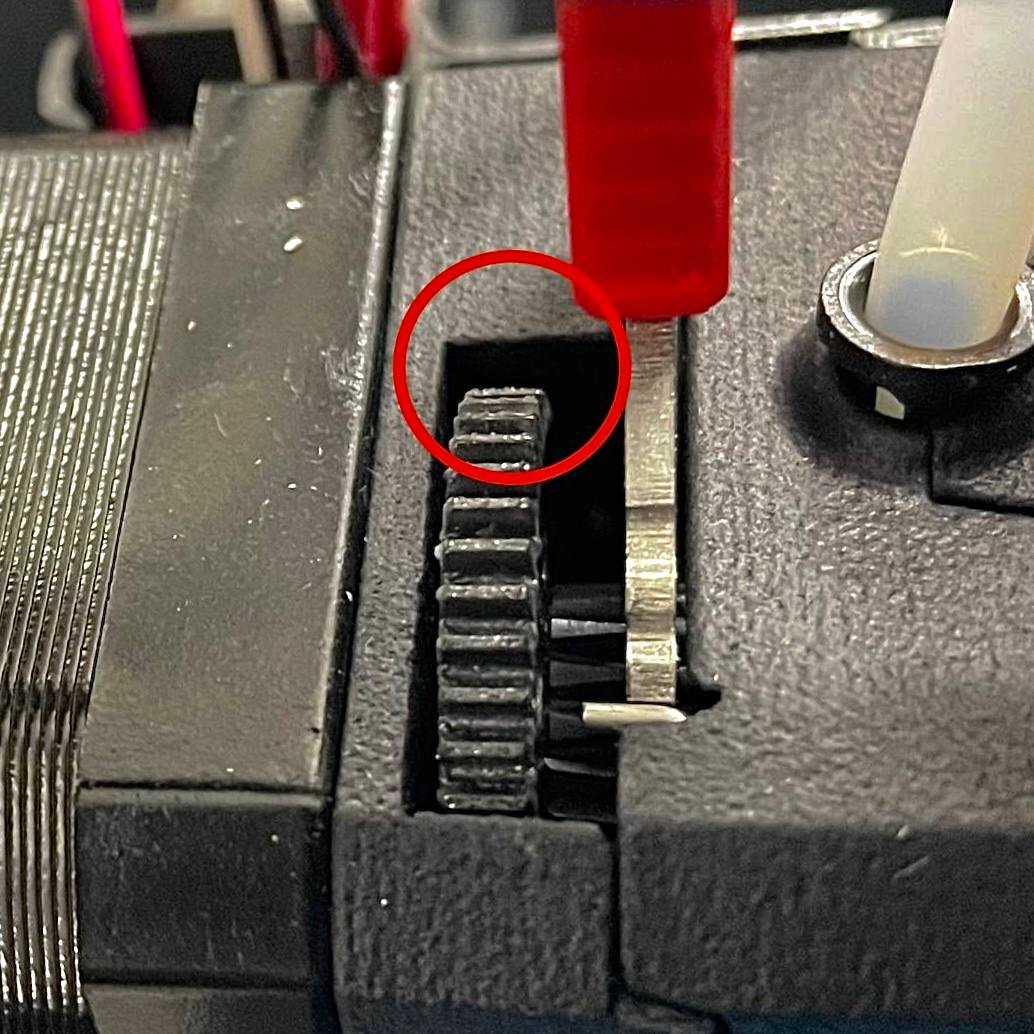
¶ 3. Extruder Gears
- Gain access to the extruder gears (T0 or T1).
- Identify the main drive gear from above.
- Using a syringe (or a small, clean applicator like a toothpick), apply a very small amount of high-temperature grease to the teeth on the right side of the upper gear.
- On the printer's interface, navigate to the
Dashboardtab. - Select the appropriate toolhead (T0 or T1).
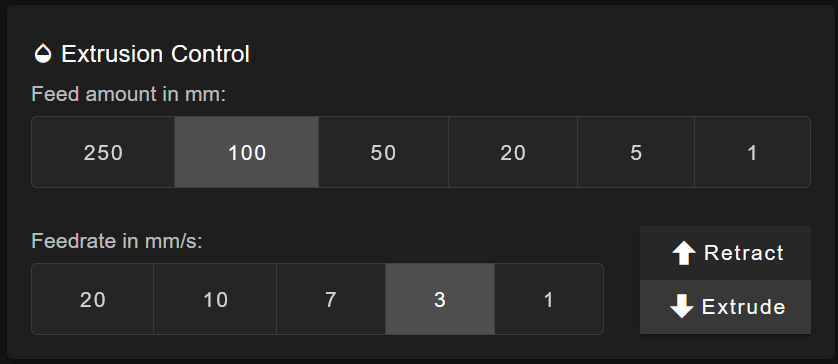
- Initiate filament extrusion at a slow speed (e.g.,
3 mm/s) by pressingExtrude. The gears will rotate, distributing the grease.
- (If the hotend is cold and extrusion is prevented, you may first need to enable cold extrusion. Open the G-code console and send the command
M302 P1, then press Enter. After this, try initiating extrusion again.)
- (If the hotend is cold and extrusion is prevented, you may first need to enable cold extrusion. Open the G-code console and send the command
- Wipe off any excess grease.
¶ Symptoms After Lubrication
After proper cleaning and lubrication, the movement of components should be smoother and quieter.
¶ When Lubrication Doesn't Help
- Important: If problems (especially severe binding, jamming, or consistent issues in specific locations of travel) persist despite thorough cleaning and lubrication, it may indicate a deeper mechanical issue. This could be component misalignment, worn bearings, damaged parts, or issues with axis concentricity (especially for the Z-axis, as noted earlier).
¶ Conclusion & Further Assistance
Timely and correct lubrication ensures the reliable and long-lasting operation of your printer. If you have performed all steps, but issues persist, or if you suspect wear or damage to parts, please seek assistance.