¶ Belts Removal / Installation
The Vision Miner 22 IDEX 3D printer has four belts in total:
- Two belts for Y-axis movement (on the sides) control the central rail movement, on which both heads are placed.
- One belt for the X-axis controls the left head position.
- One belt for the U-axis controls the right head position.
Important: Power Off the machine before this manipulations and unplug the cord from the mains.
Tools: Hex 2mm driver & pliers
¶ Y-Axis Belt Removal
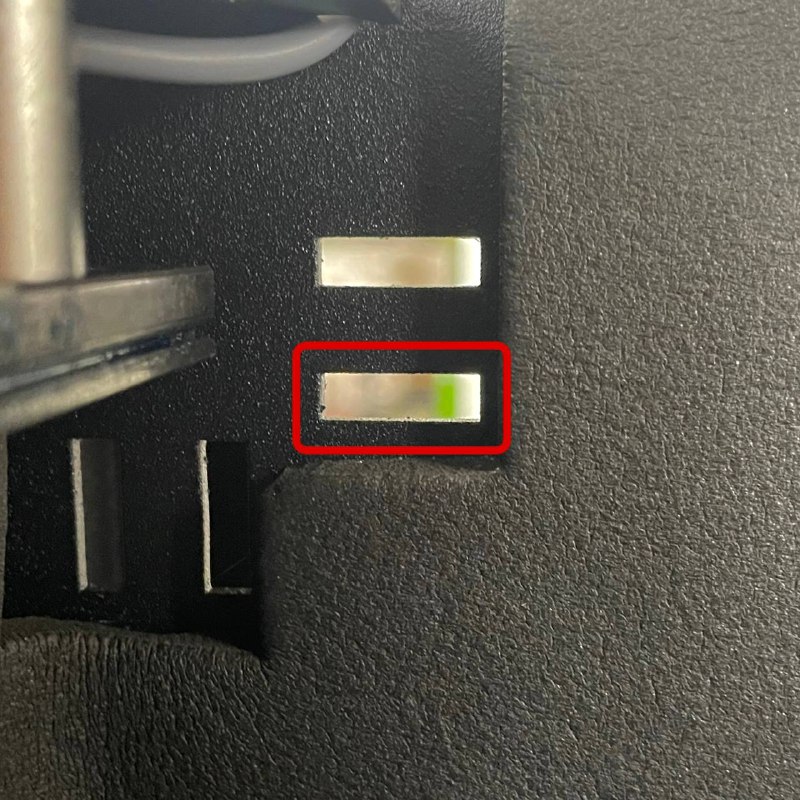
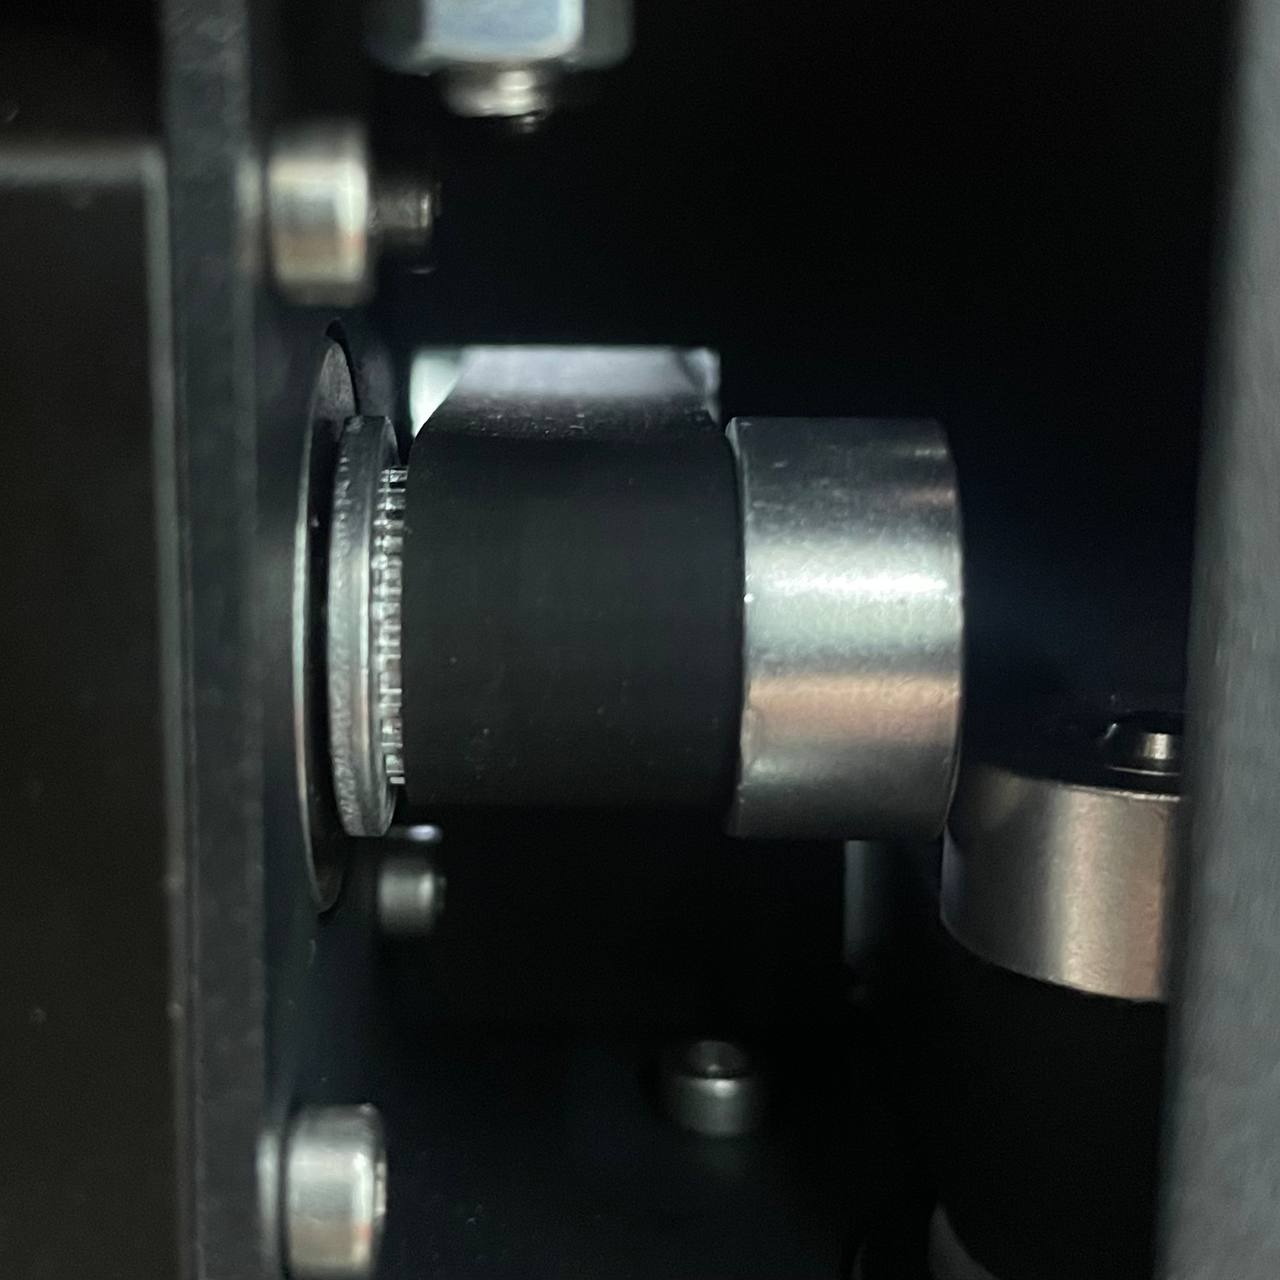
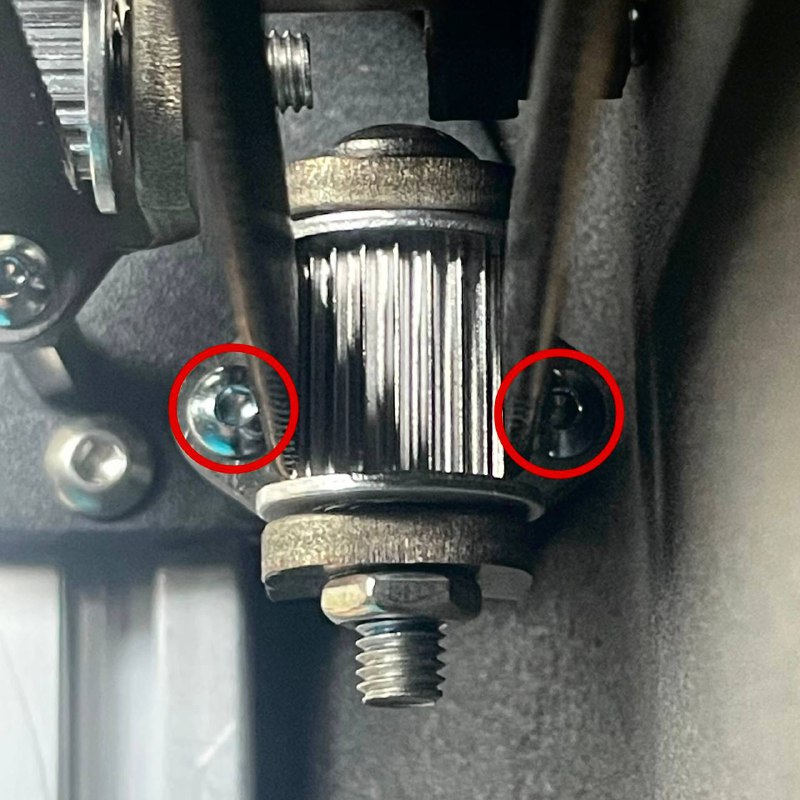
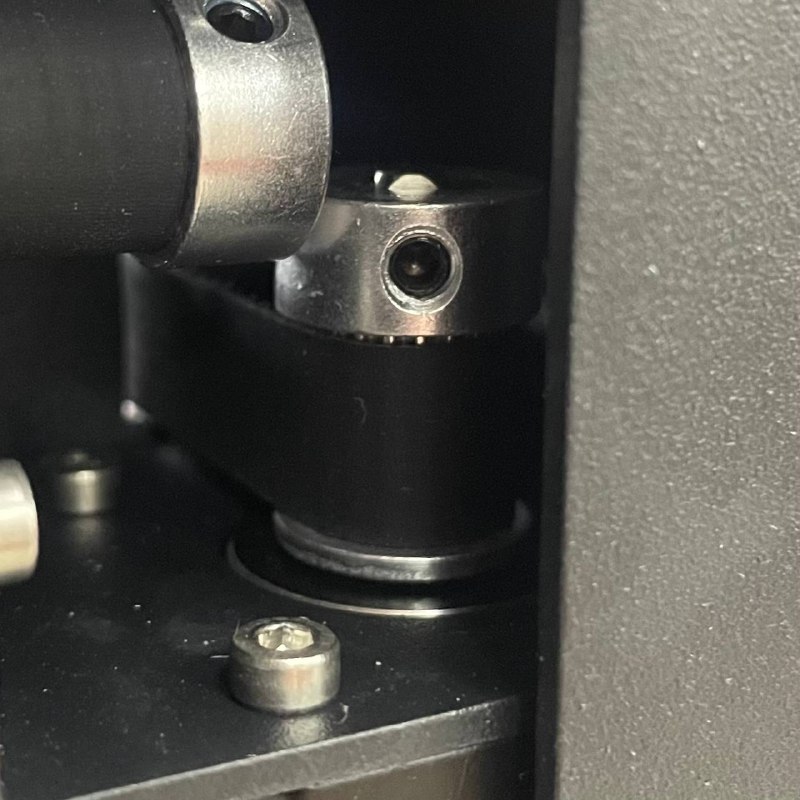
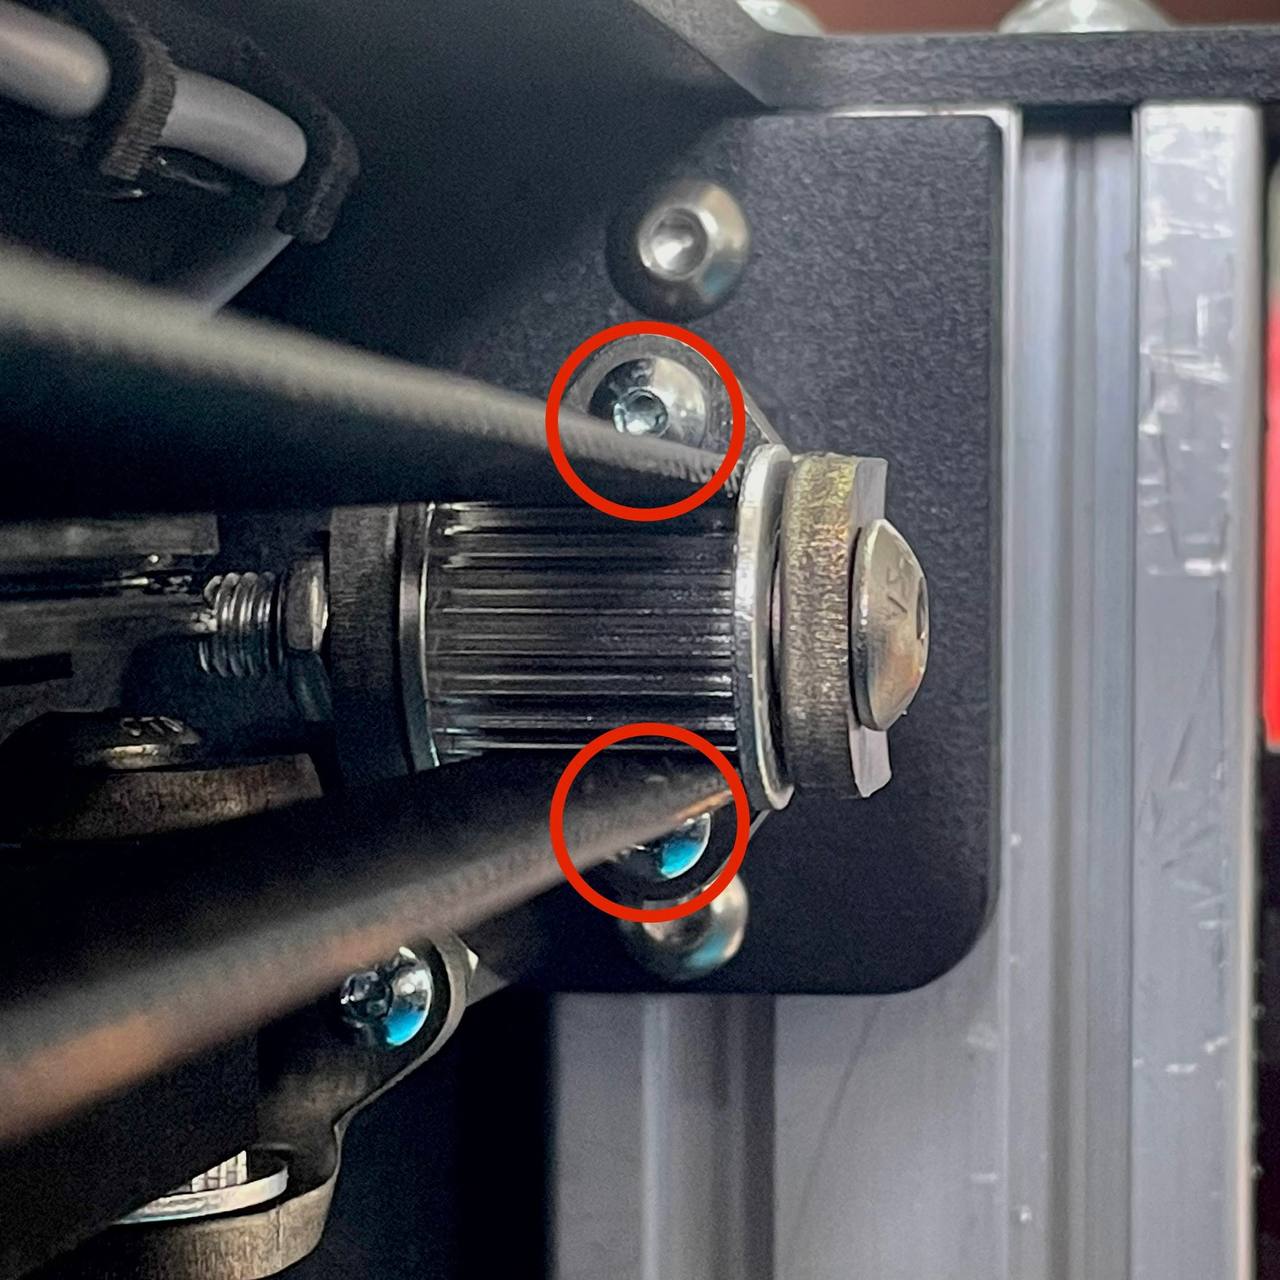
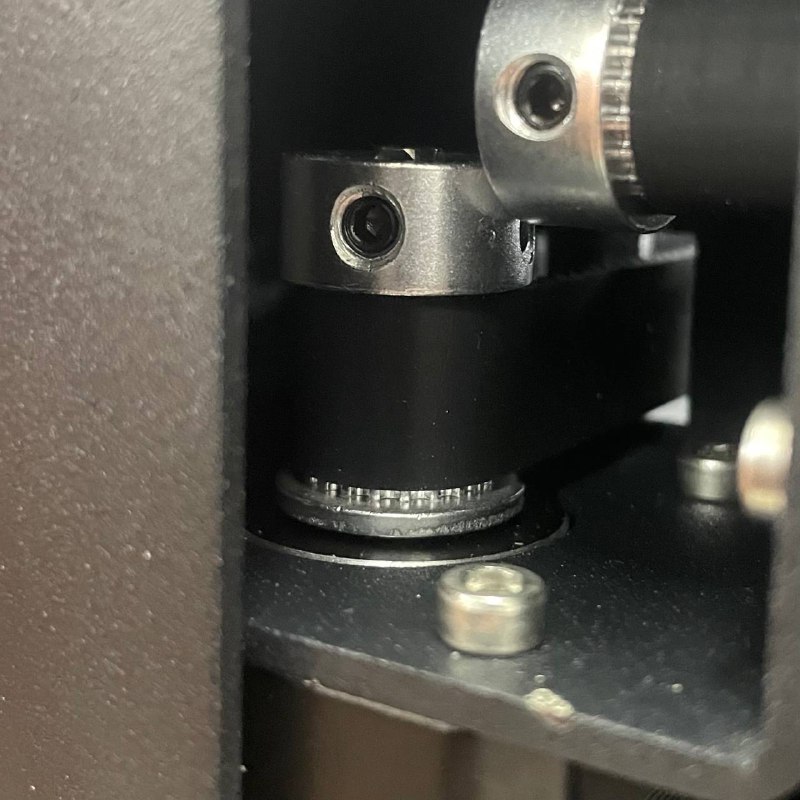
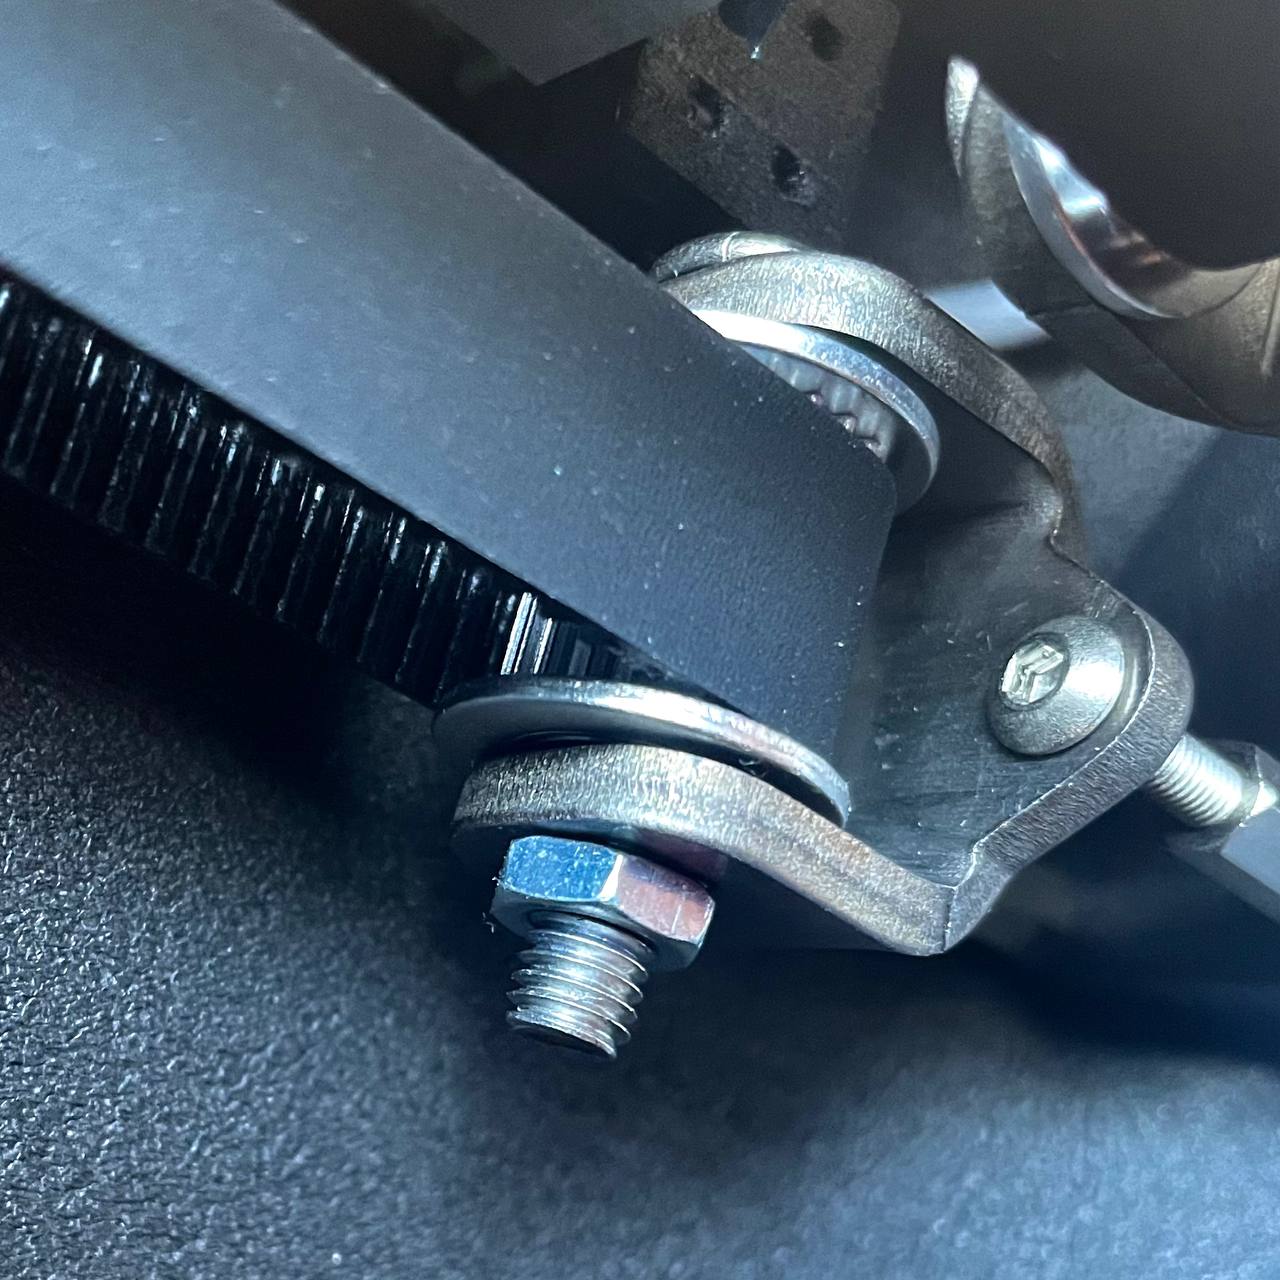
1. Release Belt Tension:
- Rotate the two tension screws in the front corners to release the target belt tension. You need two closest screws placed vertically for horizontal roller. Do not try to rotate nuts - they are suppoused to be fixed.
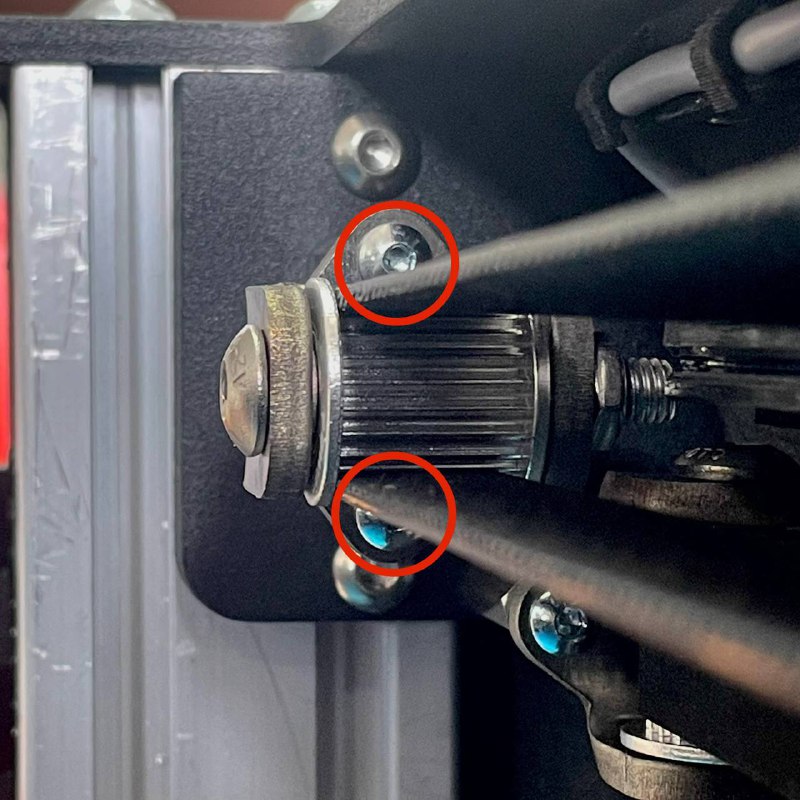
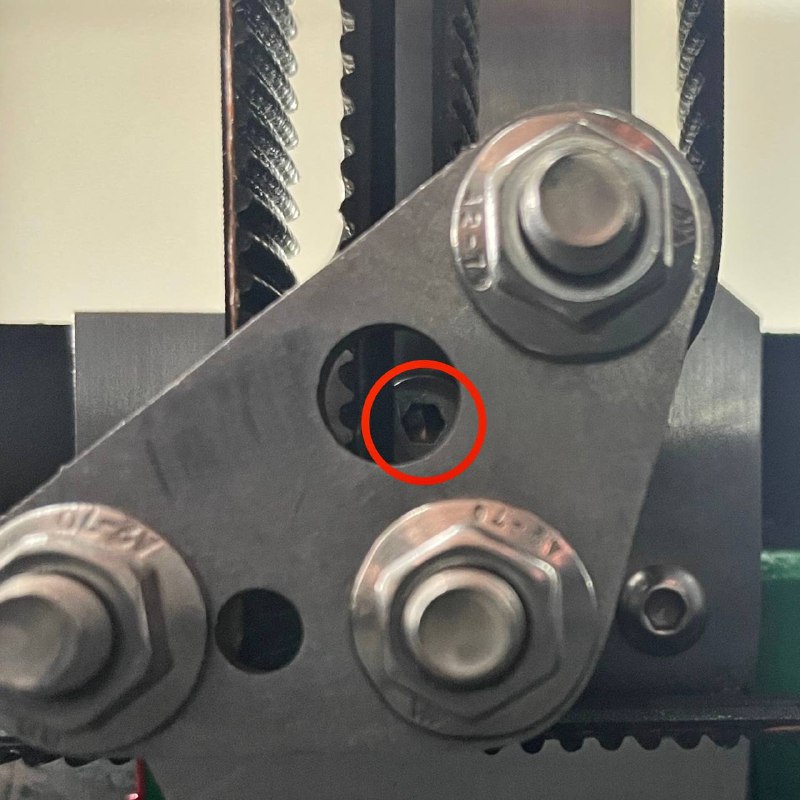
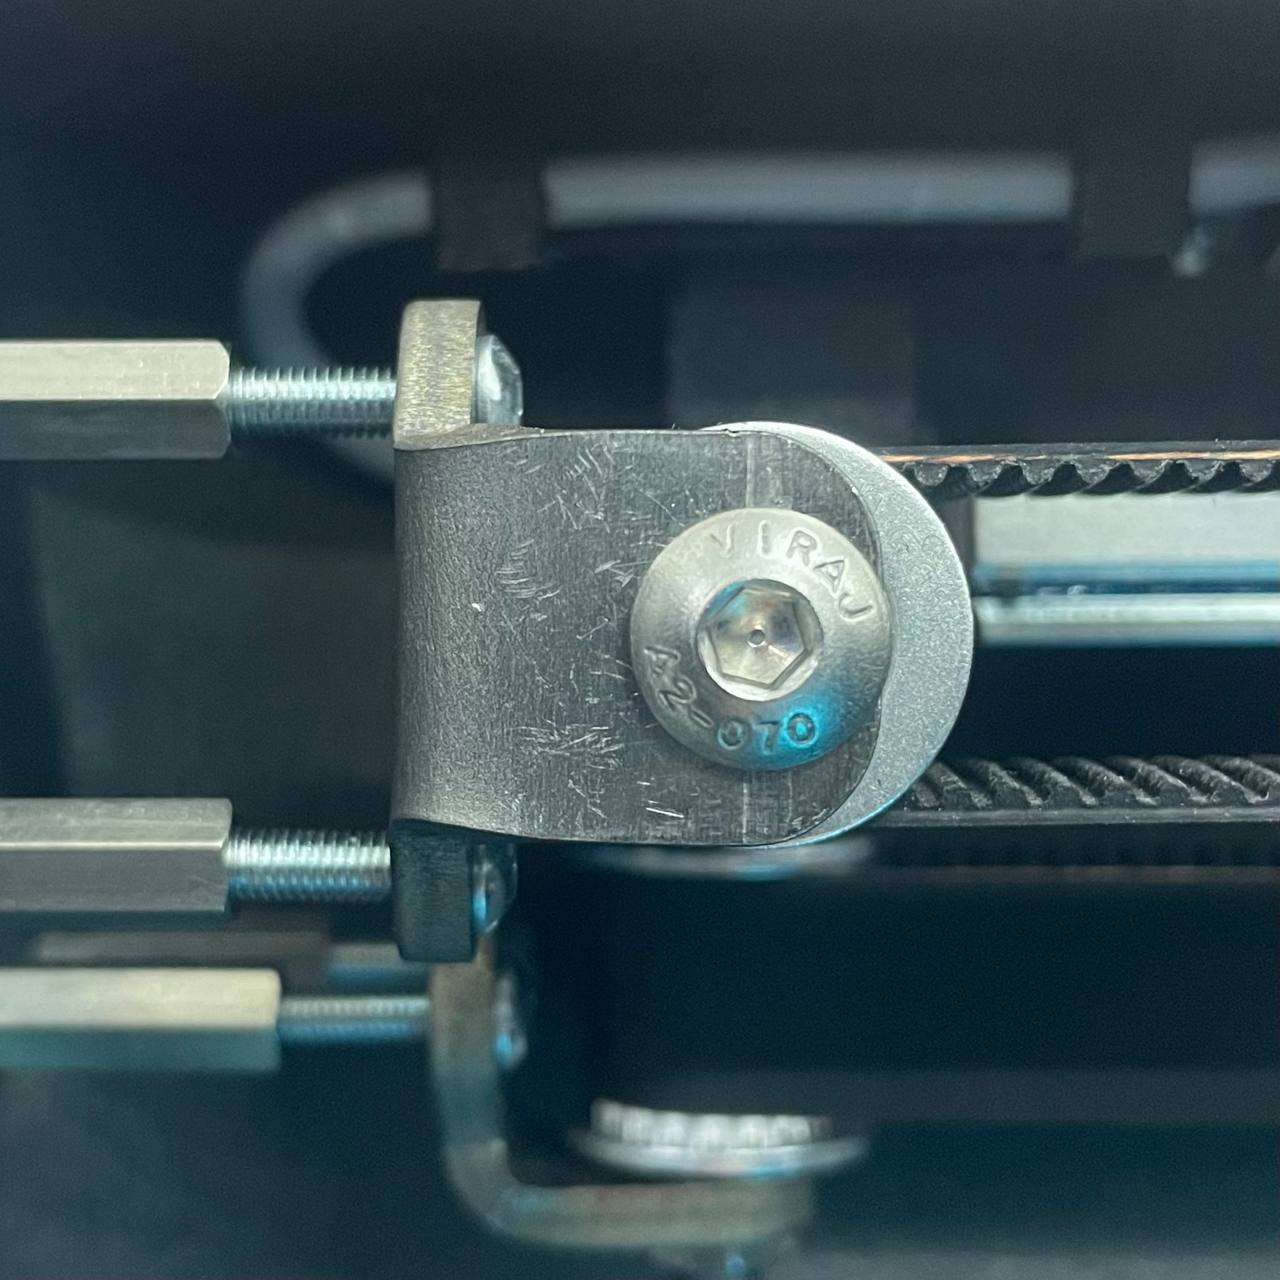
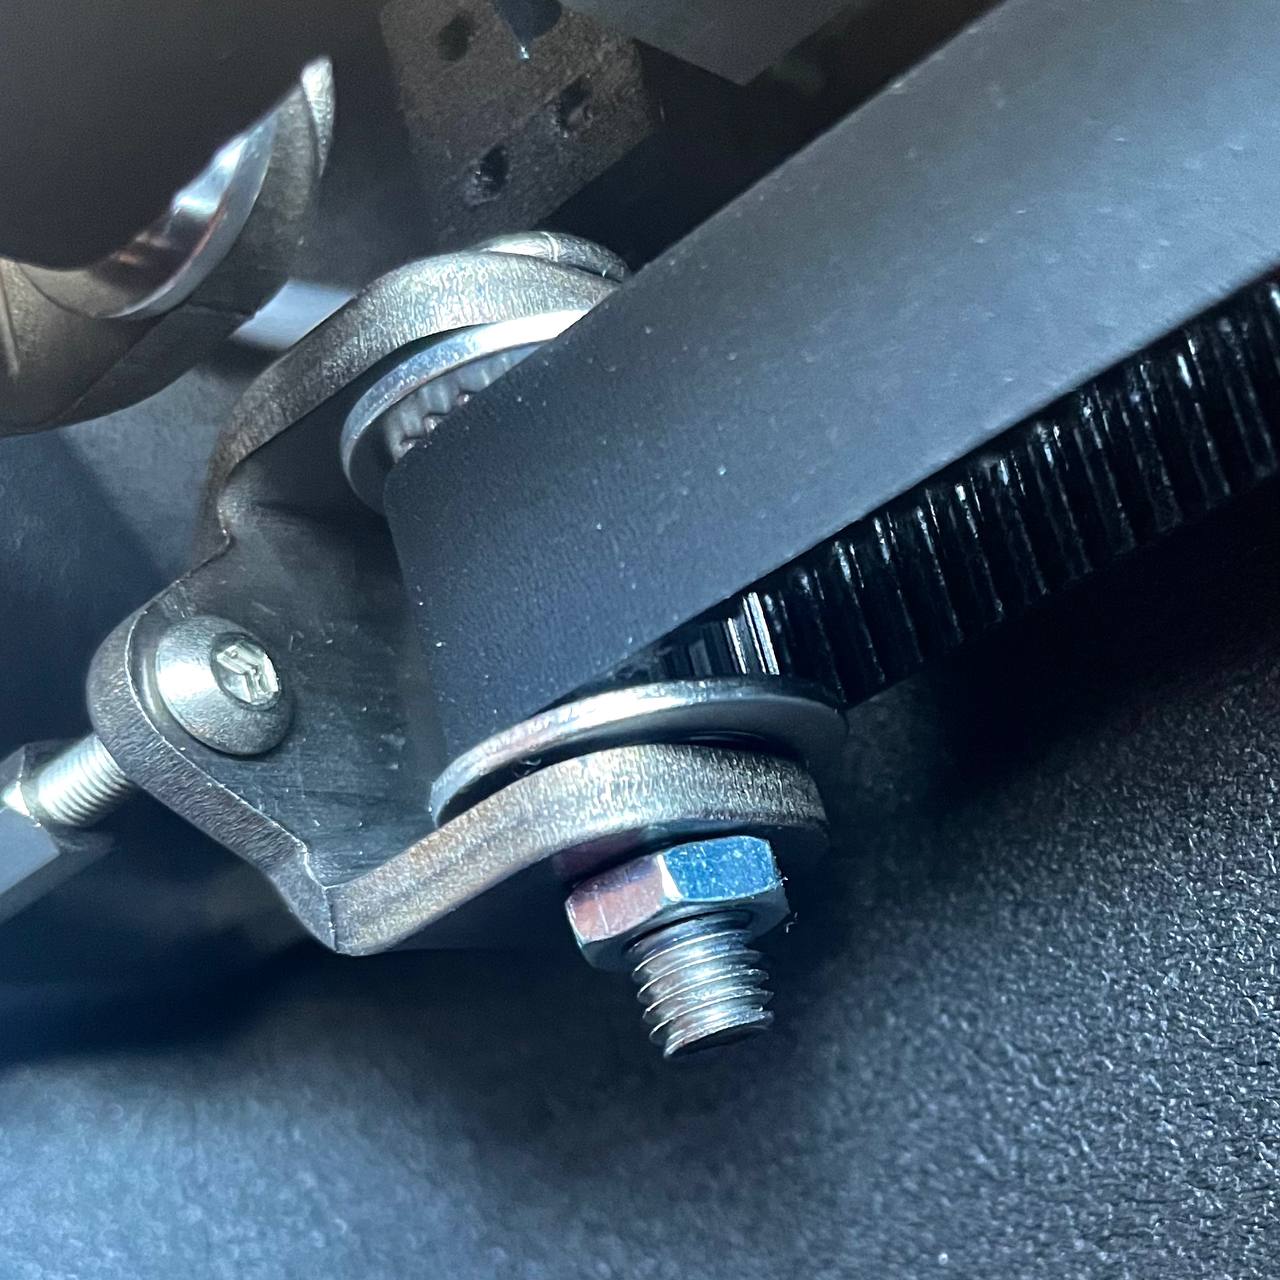
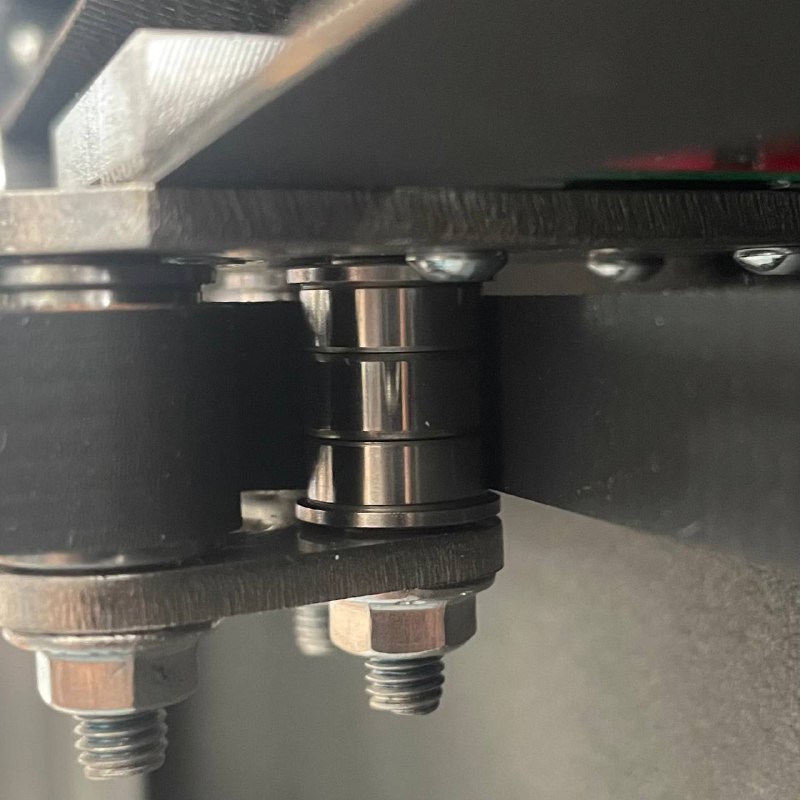
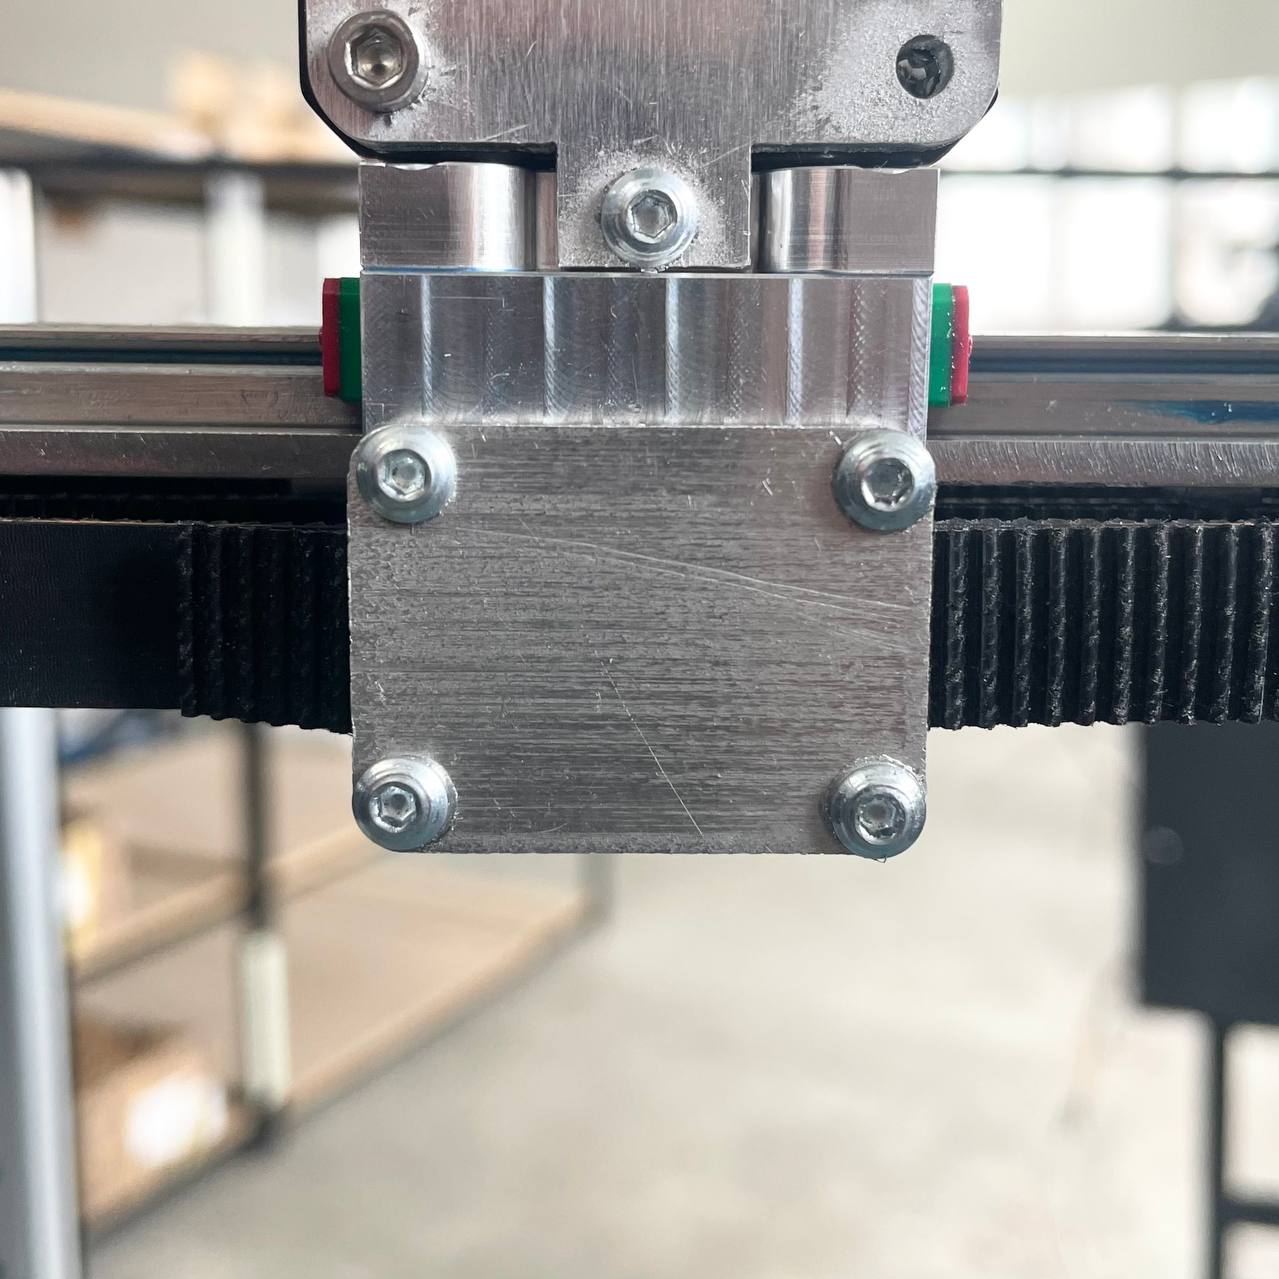
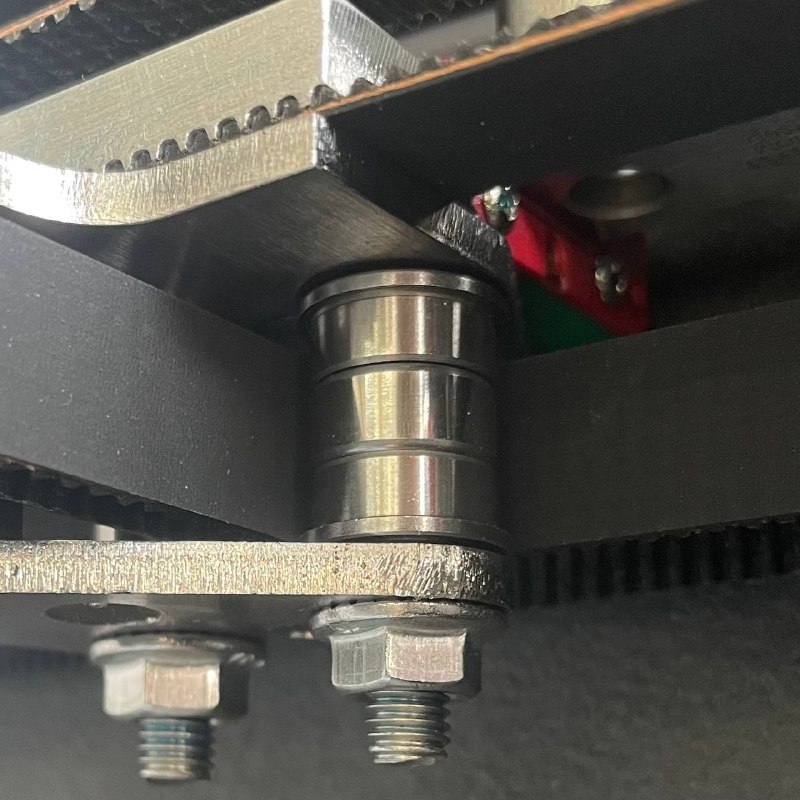
2. Locate and Untighten Fixing Plate:
- On the side of the central rail, find the fixing plate (just above the upper part of the belt) and untighten the screw from the bottom side accessible through the service hole until the edges of the belt are released.
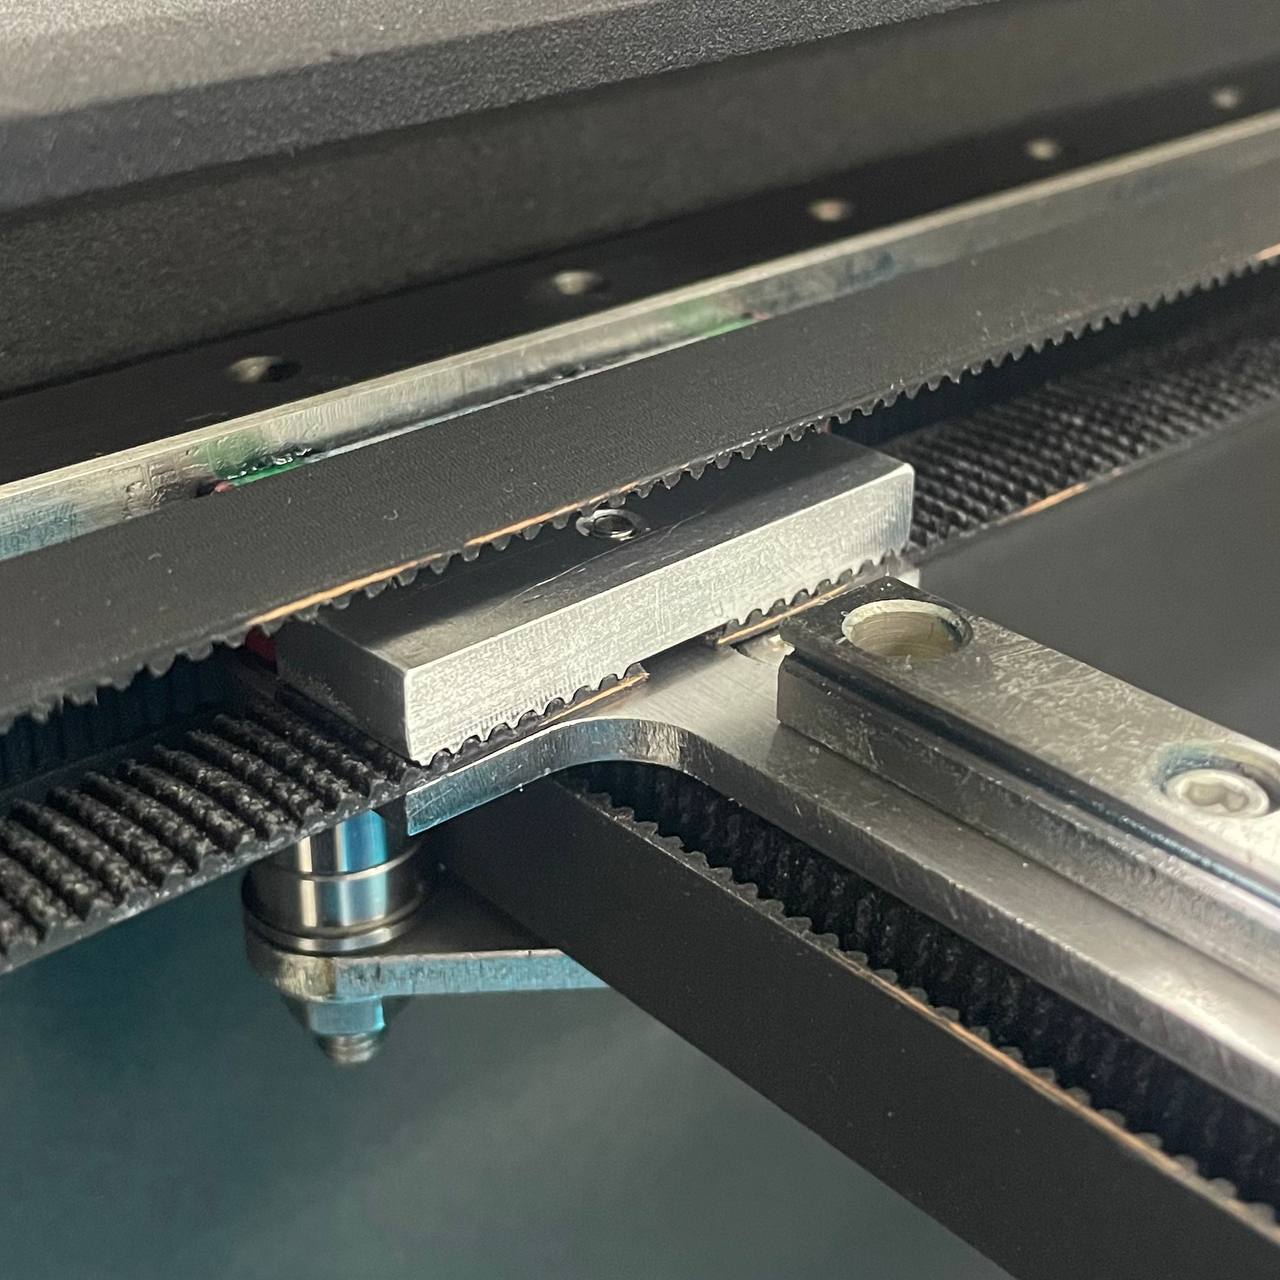
3. Remove Belt:
- Remove the belt from the fixing plate, tension, and motor rollers.
¶ Y-Axis Belt Installation
1. Prepare the Belt:
- Ensure the belt is the appropriate length, not damaged, and clean.
2. Release Tension Roller Screws:
- Release the tension roller screws almost to the end. You need horisontal roller in the upper front corner corresponding side.
3. Slide Belt into Position:
- Slide one side of the belt, with the toothed surface up, into the horizontal bottom slot on the far side of the machine.
- Wrap it around the Y-axis motor roller and slide it back.
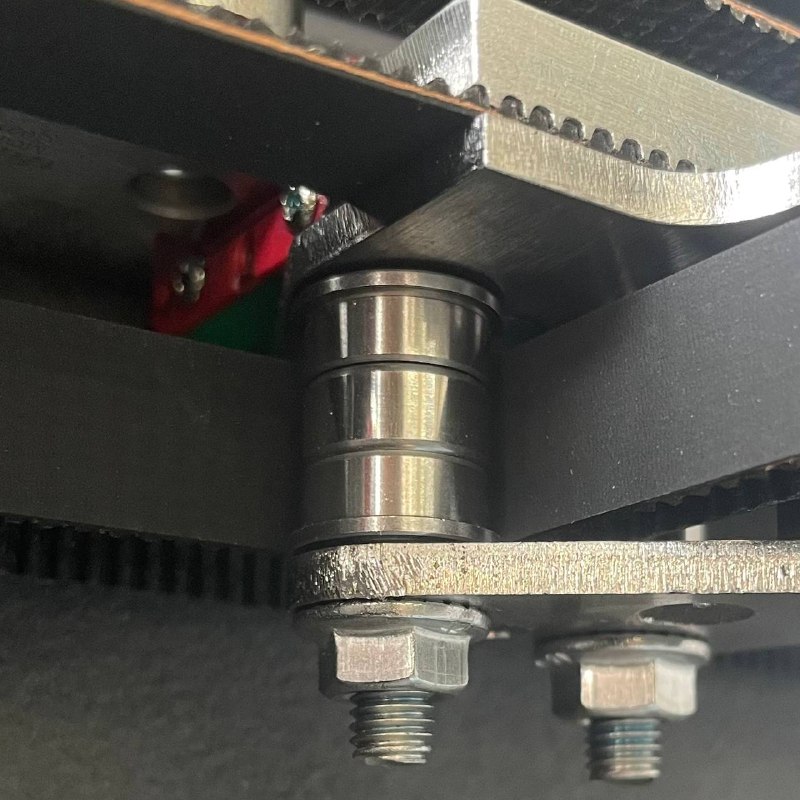
4. Wrap Belt around Tension Roller:
- On the opposite side of the belt, slide it from the bottom around the tension roller (you need horisontal one) at the front machine corner.
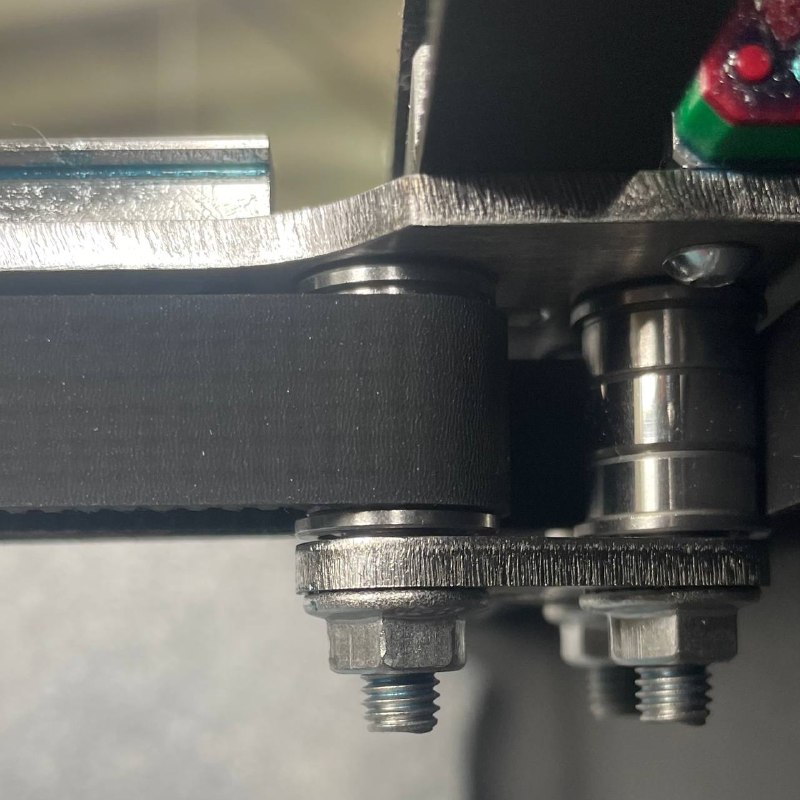
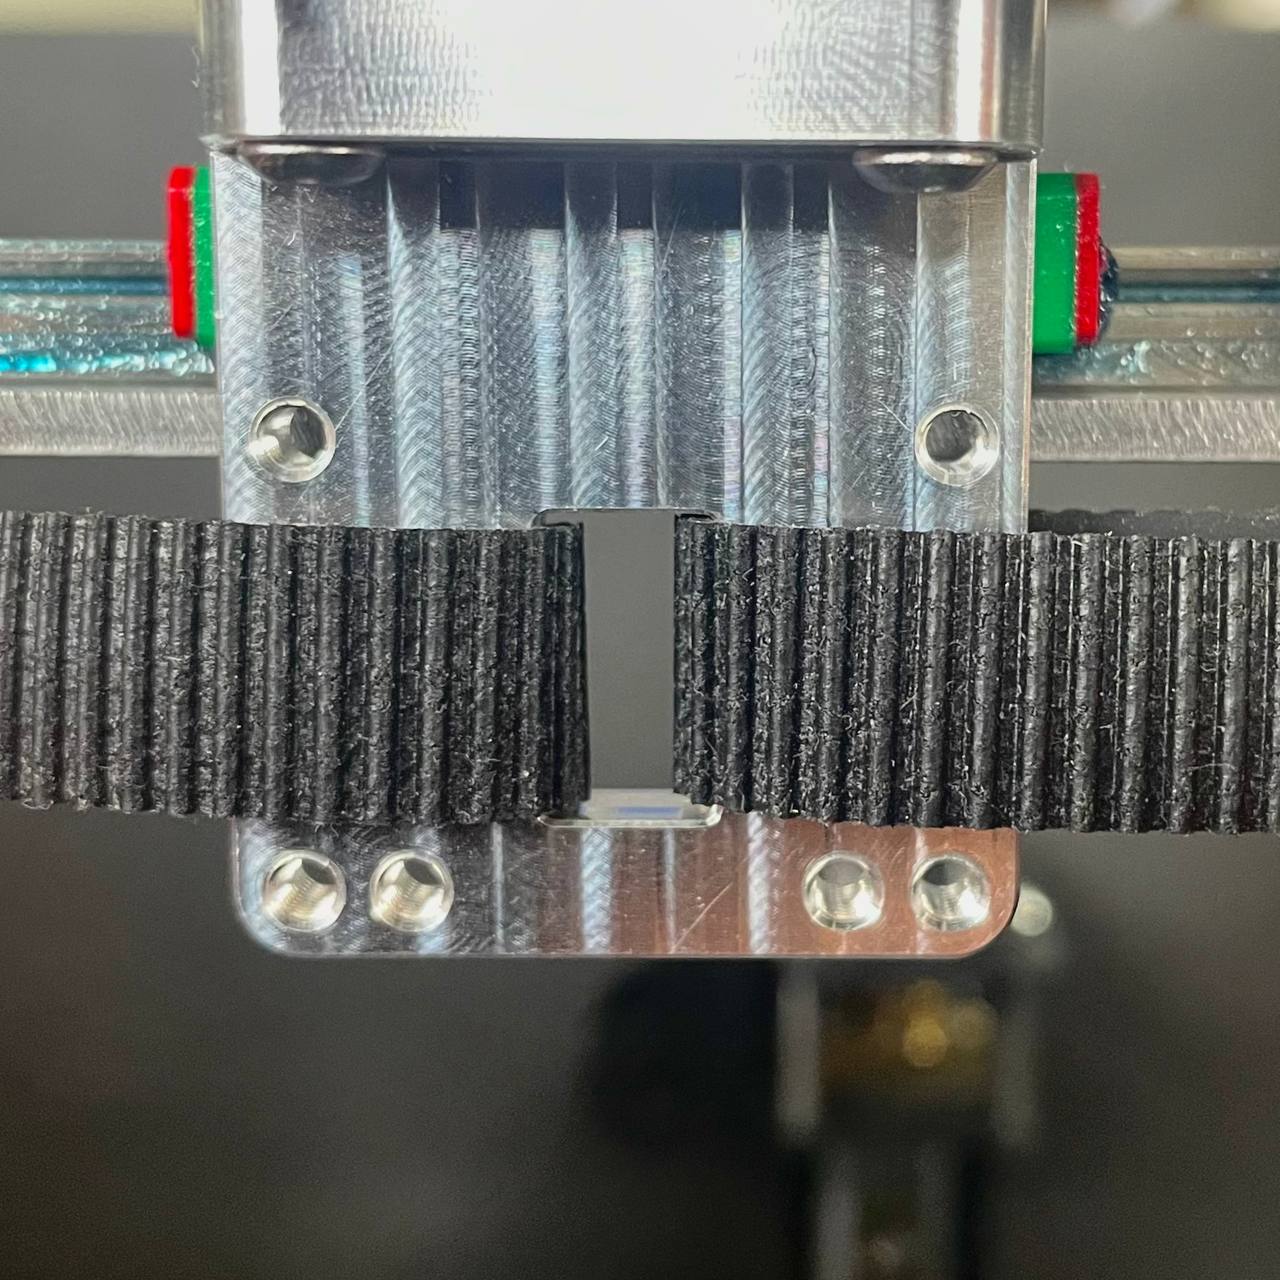
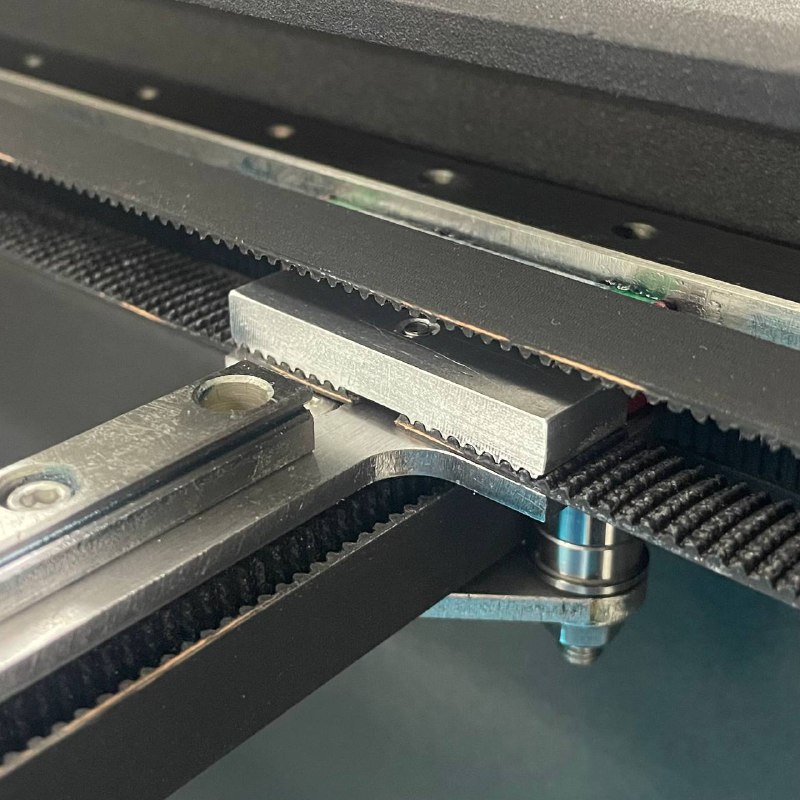
5. Secure Belt on Central Rail:
- Meet the belt sides at the top of the central rail and place them under the fixing plate.
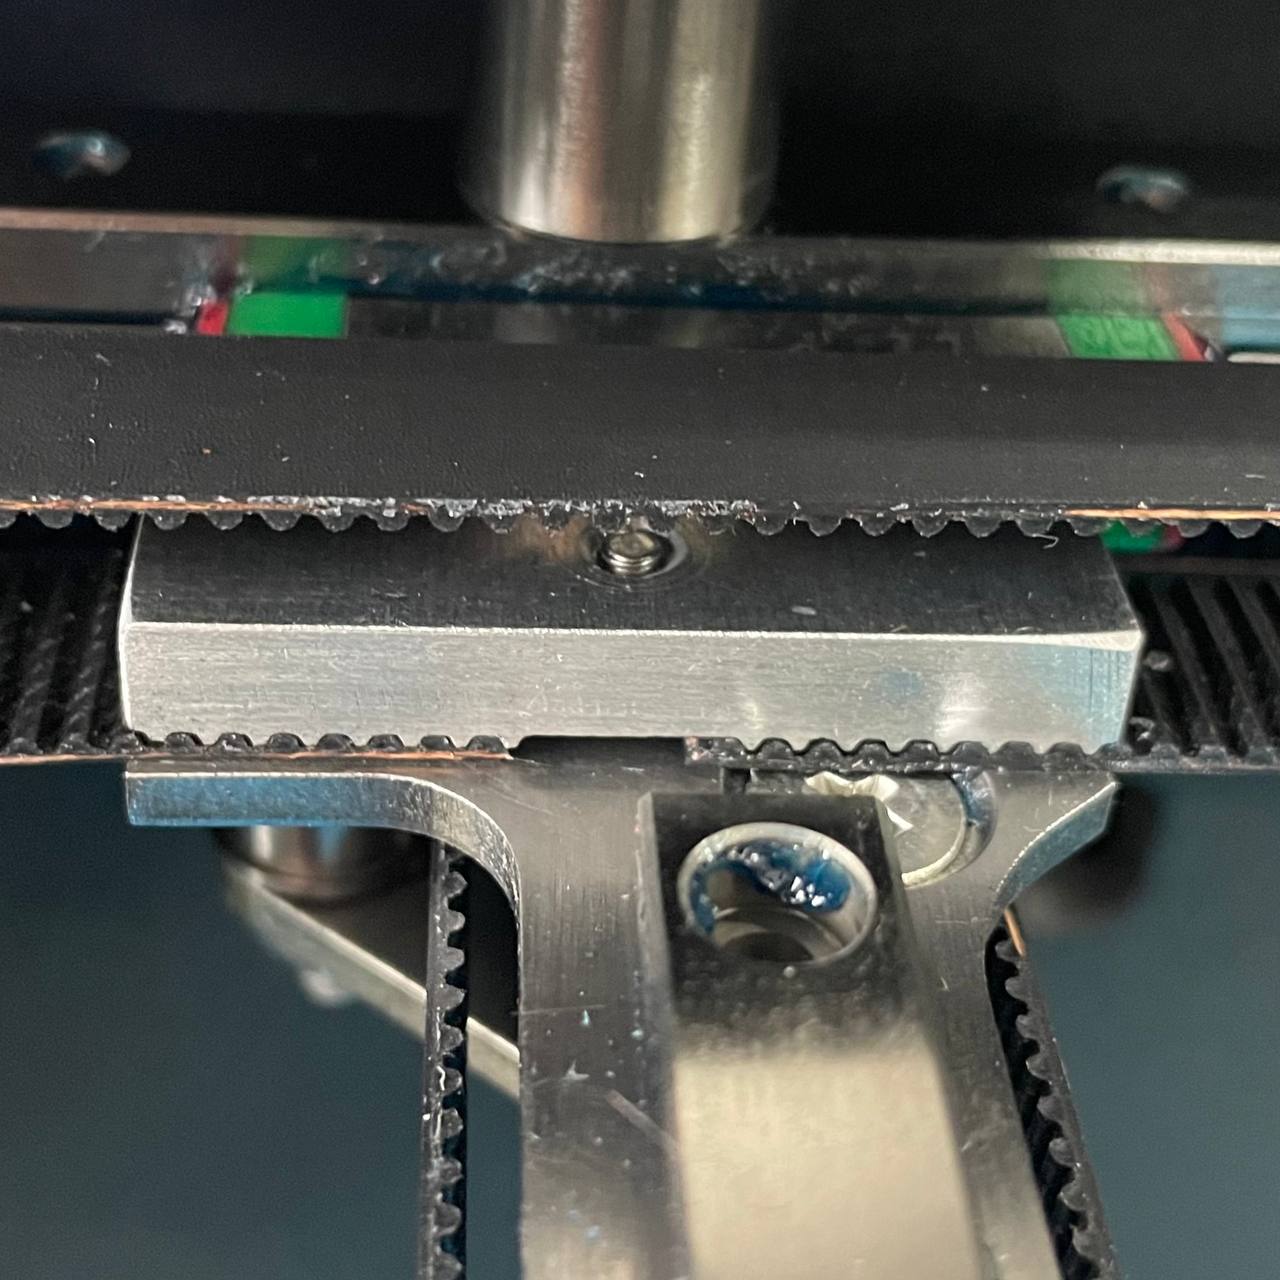
- Cut it if needed to achieve maximum tension at this point.
- Tighten the fixing screw.
6. Set Belt Tension:
- Adjust the belt tension according to the instructions provided here.
¶ X-Axis Belt Removal
Note: For this operation, you must first remove the left head hot end and fan shroud.
-
Release Belt Tension:
- Rotate the two tension screws in the left front corner to release the target belt tension. Use the two screws placed horizontally for the vertical roller. Do not try to rotate the nuts as they are supposed to be fixed.
- Rotate the two tension screws in the left front corner to release the target belt tension. Use the two screws placed horizontally for the vertical roller. Do not try to rotate the nuts as they are supposed to be fixed.
-
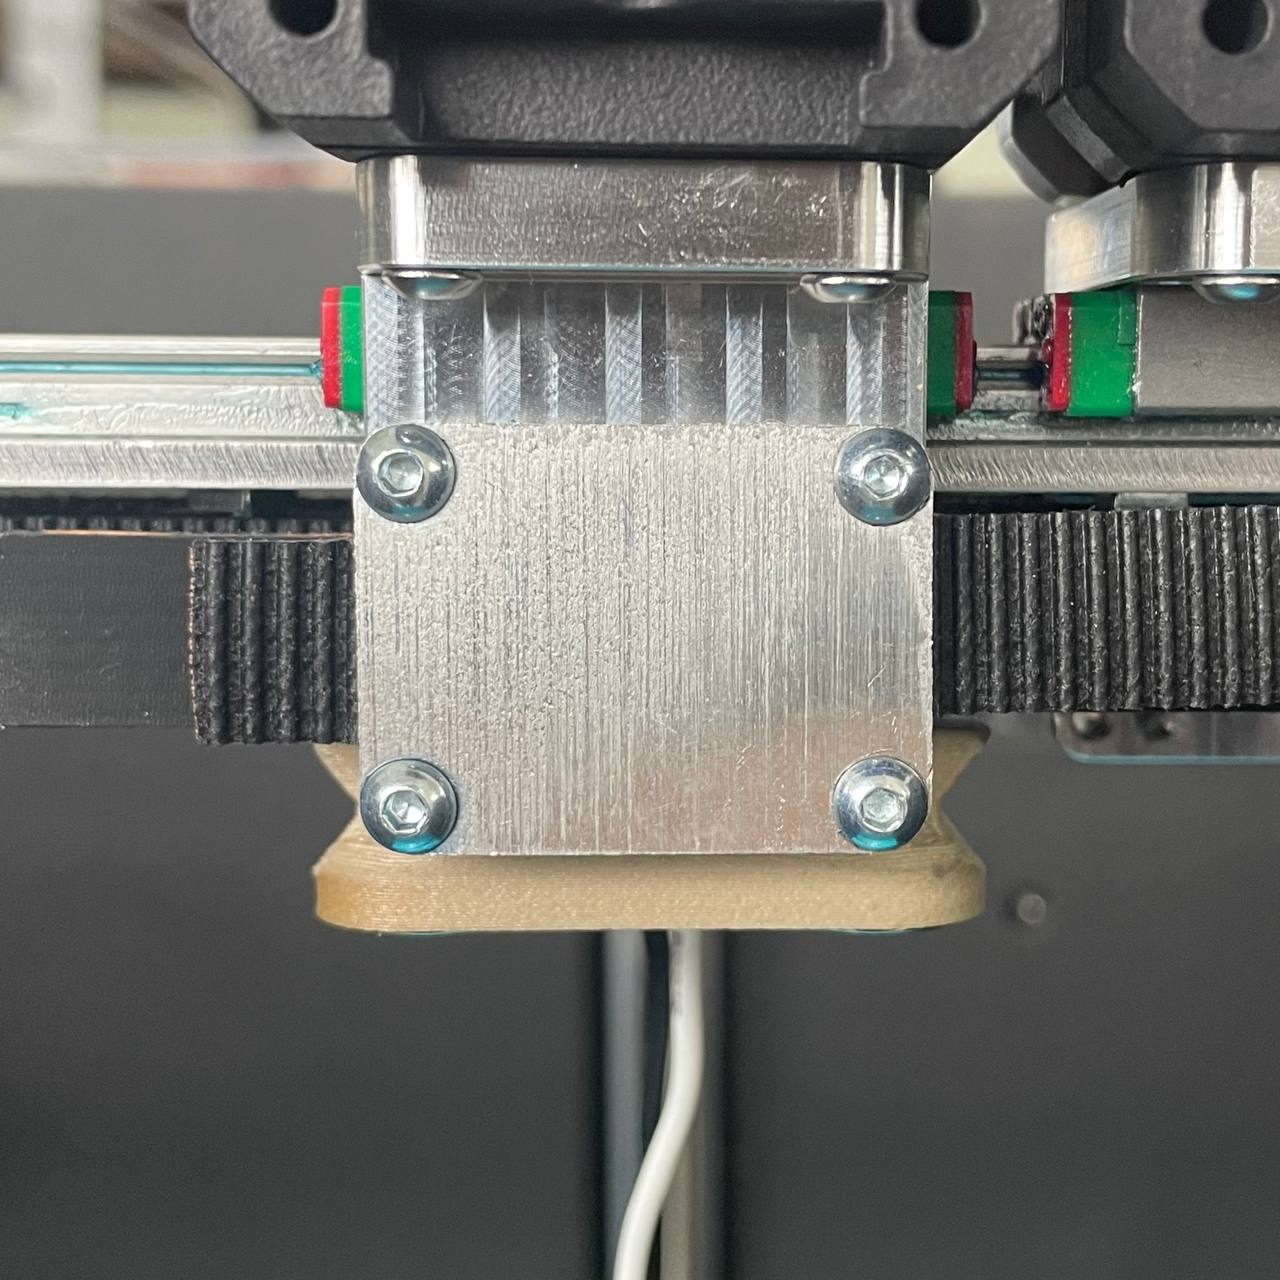
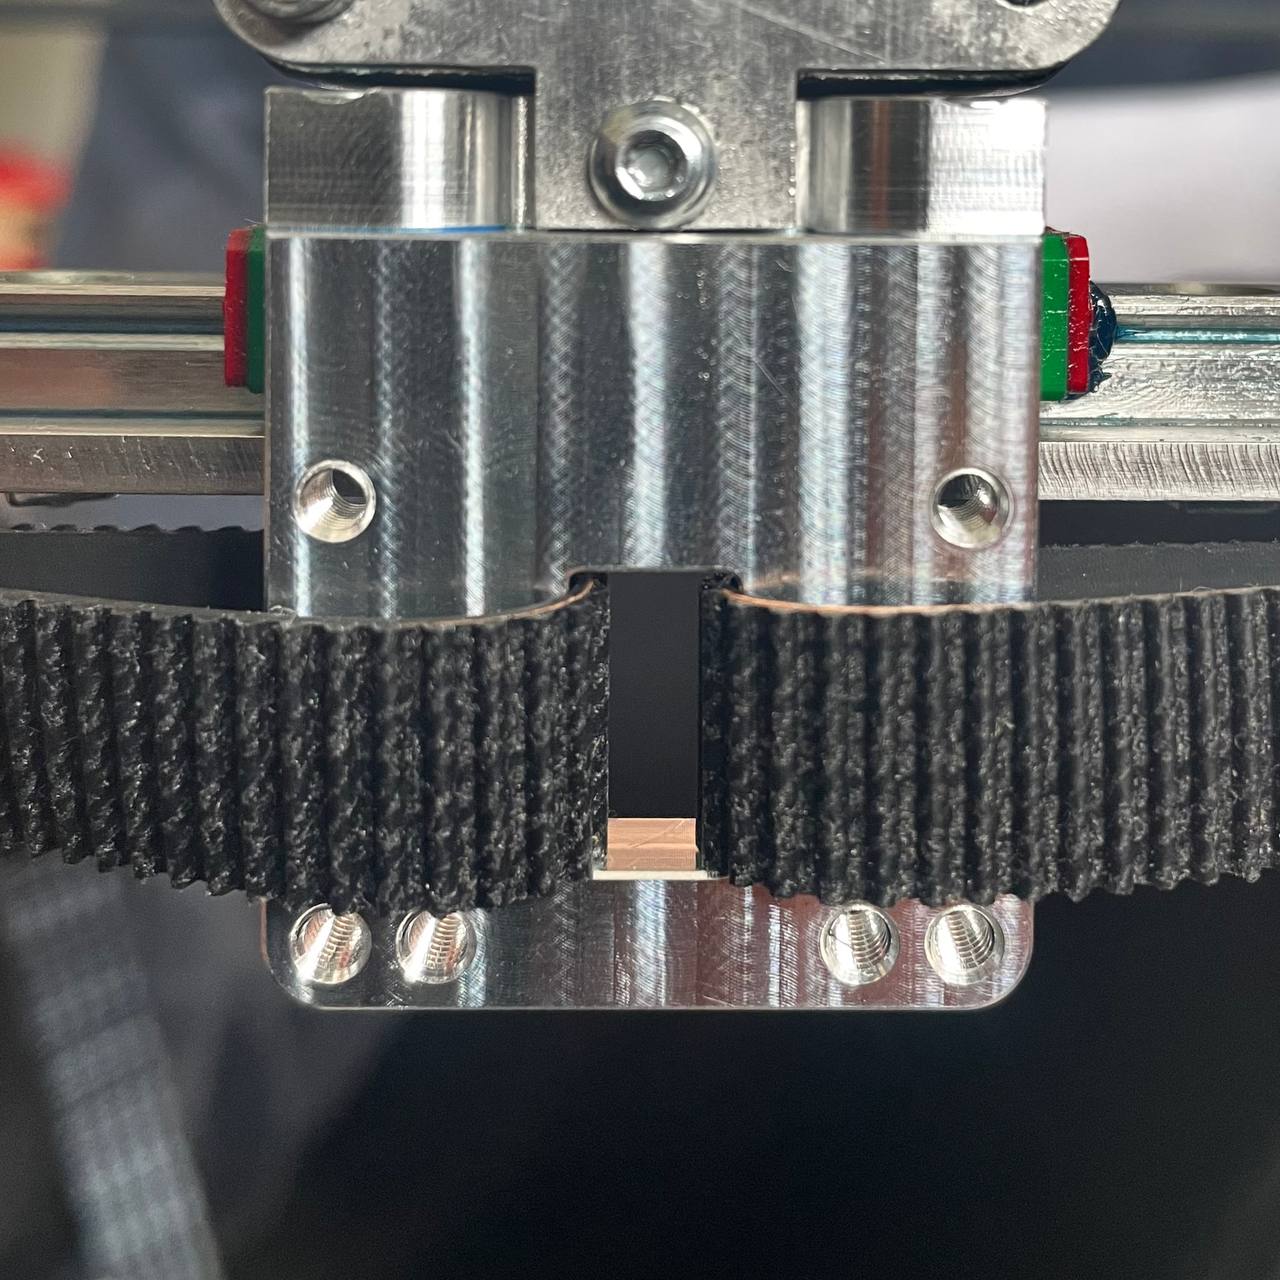
Remove Fixing Plate:
- Unscrew four screws on the fixing plate just under the left head filament feeding block and remove it.
- Unscrew four screws on the fixing plate just under the left head filament feeding block and remove it.
-
Release Belt from Fixing Plate:
- Release the belt from the fixing plate.
-
Remove Belt from Rollers:
- Pull out the belt from all rollers, being especially careful with the motor's roller.
- Pull out the belt from all rollers, being especially careful with the motor's roller.
¶ X-Axis Belt Installation
-
Prepare the Belt:
- Ensure the belt is the appropriate length, not damaged, and clean.
-
Release Tension Roller Screws:
- Release the tension roller screws almost to the end. Use the two screws placed horizontally for the vertical roller at the left upper corner of the printing chamber.
- Release the tension roller screws almost to the end. Use the two screws placed horizontally for the vertical roller at the left upper corner of the printing chamber.
-
Slide Belt into Position:
- Wrap belt toothed surface inside around tension roller - vertical one at the printer's chamber left front upper corner.
- Wrap belt toothed surface inside around tension roller - vertical one at the printer's chamber left front upper corner.
- Pull right side to back machine side and slide it through vertical slot.

- Wrap it around motor roller toothed surface inside and slide it back into the machine.
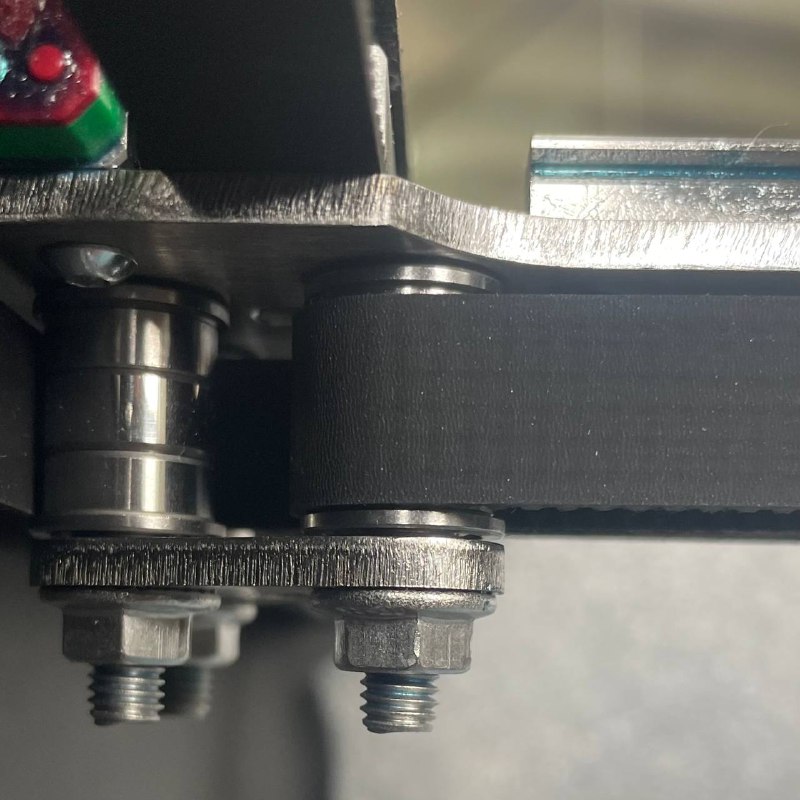
- Slide both ends between two rollers on the left side of central rail.
- Left side of the belt move to the opposite side of central rail and wrap it around closest on that side roller.
- Meet sides of the belt at the left head, slide them into the fixing hinges free sides to you.
- Put fixing plate on position with two screws from one side and tighten them not too much, just to fix one belt side.
- Put other two screws on position and screw it a bit without tightening, or fixing belt side.
- Pull released belt side with pliers to achieve maximum affordable tension.
- Tighten all four fixing screws.
- Set Belt Tension:
- Adjust the belt tension according to the instructions provided here.
¶ U-Axis Belt Removal
-
Release Belt Tension:
- Rotate the two tension screws in the right front corner to release the target belt tension. Use the two screws placed horizontally for vertical roller. Do not try to rotate the nuts as they are supposed to be fixed.
- Rotate the two tension screws in the right front corner to release the target belt tension. Use the two screws placed horizontally for vertical roller. Do not try to rotate the nuts as they are supposed to be fixed.
-
Untighten Fixing Plate Screws:
- Untighten the screws on the fixing plate just on back side of the right head hotend.
- Untighten the screws on the fixing plate just on back side of the right head hotend.
-
Release Belt from Fixing Plate:
- Release the belt from the fixing plate.
-
Remove Belt from Rollers:
- Pull out the belt from all rollers, being especially careful with the motor's roller.
- Pull out the belt from all rollers, being especially careful with the motor's roller.
¶ U-Axis Belt Installation
-
Prepare the Belt:
- Ensure the belt is the appropriate length, not damaged, and clean.
-
Release Tension Roller Screws:
- Release the tension roller screws almost to the end. Use the two screws placed horizontally for vertical roller at the right upper corner of printing chamber.
- Release the tension roller screws almost to the end. Use the two screws placed horizontally for vertical roller at the right upper corner of printing chamber.
-
Slide Belt into Position:
- Wrap belt toothed surface inside around tension roller - vertical one at the printer's chamber right front upper corner.
- Wrap belt toothed surface inside around tension roller - vertical one at the printer's chamber right front upper corner.
- Pull left side to back machine side and slide it through vertical slot.

- Wrap it around motor roller toothed surface inside and slide it back into the machine.
- Slide both ends between two rollers on the right side of central rail.
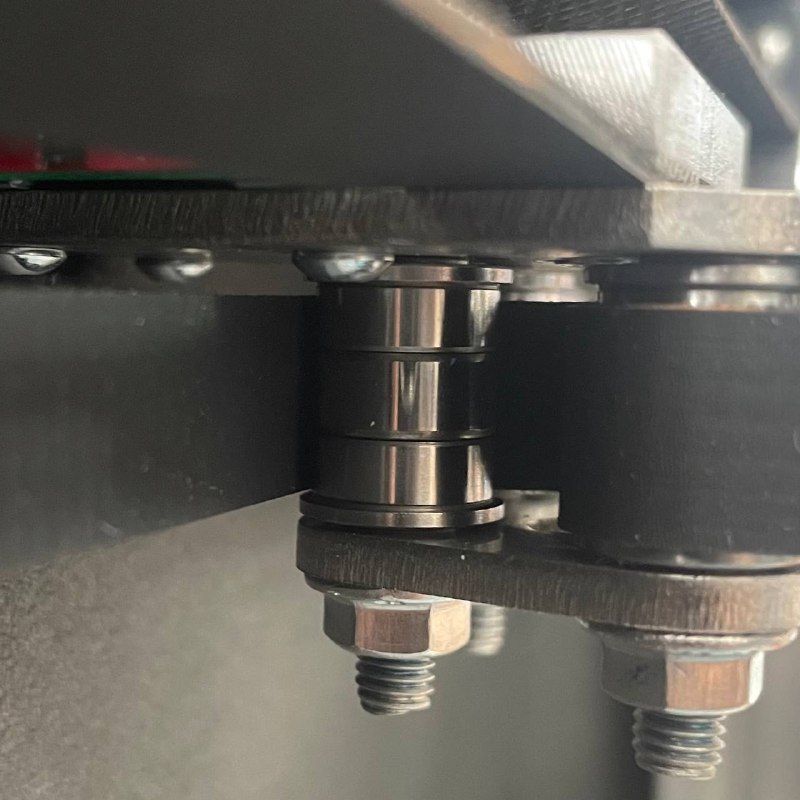
- Right side of the belt move to the opposite side of central rail and wrap it around closest on that side roller.
- Meet sides of the belt at the back on right head, slide them into the hinges free sides to printer's back.
- Put fixing plate on position with two screws from one side and tighten them not too much, just to fix one belt side.
- Put other two screws on position and screw it a bit without tightening, or fixing belt side.
- Pull released belt side with pliers to achieve maximum affordable tension.
- Tighten all four fixing screws.
- Set Belt Tension:
- Adjust the belt tension according to the instructions provided here.