Unclogging
Find and clear a clog in the nozzle, heat break, PTFE tube or extruder gears — cold pull, hot nozzle removal, flushing with fresh PEEK and gear cleaning.
Clogs can occur at various points in the filament path, including the nozzle, heat break, PTFE tube, and extruder gears. This guide will walk you through diagnosing and resolving clogs to ensure smooth filament extrusion.
Before you begin - safety and risk
Read the Safety - Before You Begin article to understand the hazards involved in working on the Vision Miner 22IDEX V4 - including electrical, thermal, mechanical, and chemical risks. All procedures in this wiki are provided as recommendations only. By choosing to follow any procedure, you do so at your own risk.
Common Clog Points
Clogs typically occur in four locations:
- Nozzle: The most common clog location, particularly when switching between high- and low-temperature materials.
- Heat Break: Clogs can form due to heat creep, where inadequate cooling allows filament to expand and block the path. A heat break that keeps clogging almost always points to a failed hotend cooling fan - check the fan first.
- PTFE Tube: Rarely clogs but can occur if molten filament retracts into the tube and solidifies.
- Extruder Gears: Can clog, especially when printing flexible materials or if molten filament reaches the gears, causing them to jam.
Tools and Materials
- Nozzle Torque Wrench 7mm
- Nozzle Cleaning Needle Set (0.3-0.4 mm)
- Gripping tool for the hotend
- A straight piece of fresh, raw PEEK filament (about 25 cm) for flushing the heat break
- Hotend Heat Break (if replacement is needed)
- Screwdrivers (for extruder disassembly)
- Camera or phone (for documenting wiring before disconnection)
1. Cold-pull the clog out
Before removing anything, pull as much of the clog out as possible with the filament itself. Cooler, firmer filament grabs the softened residue and drags it out - the same principle as a cold pull.
- If the clog happened mid-print, cancel or pause the print.
- Cool the hotend down to well below the printing temperature - hot enough for the plastic to soften, cool enough for the filament to stay firm. Roughly 100-150°C below the printing temperature works: if you were printing PEEK at 450°C, set about 300°C; for a material printed at 300°C, retract at about 250°C.
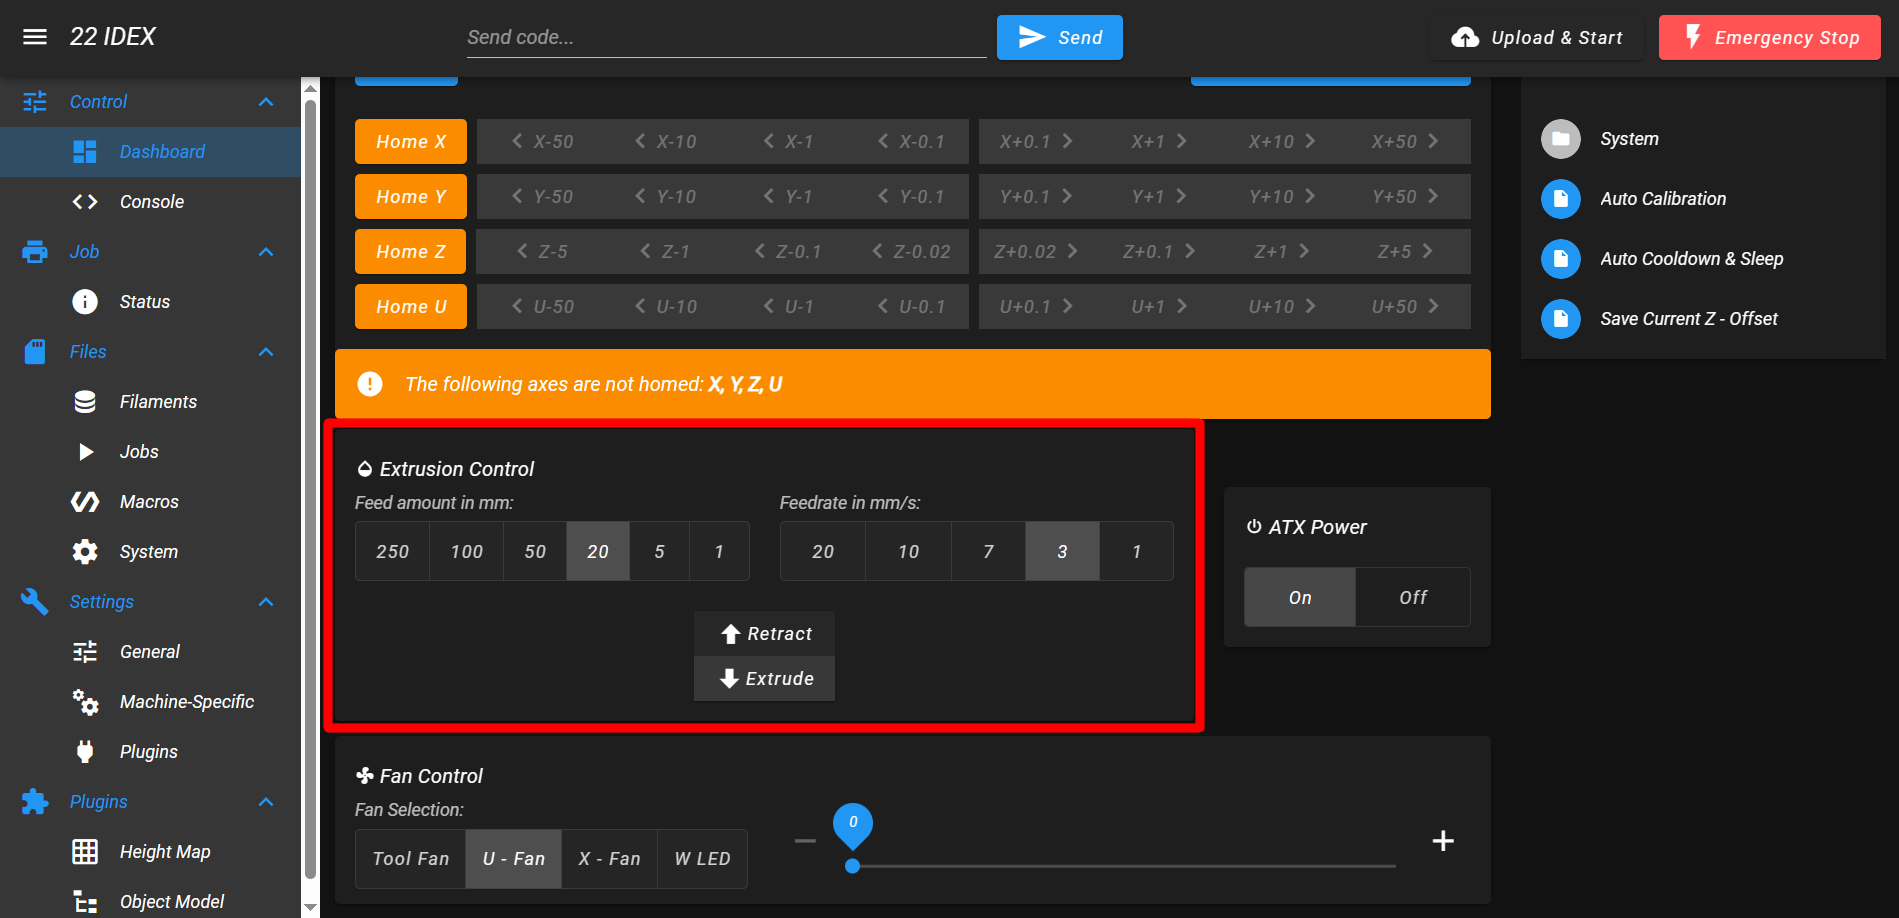
- Once the temperature settles, retract the filament using the Extrusion Control section of the Web Interface. Most of the softened residue comes out with it.
2. Remove the nozzle
Remove the nozzle hot, never cold
Never loosen the nozzle on a cold hotend - hardened plastic will seize the threads. The reduced temperature from the previous step (around 300°C) is hot enough; there is no need to heat back up to full printing temperature.
- Hold the hotend with a gripping tool to prevent it from spinning.
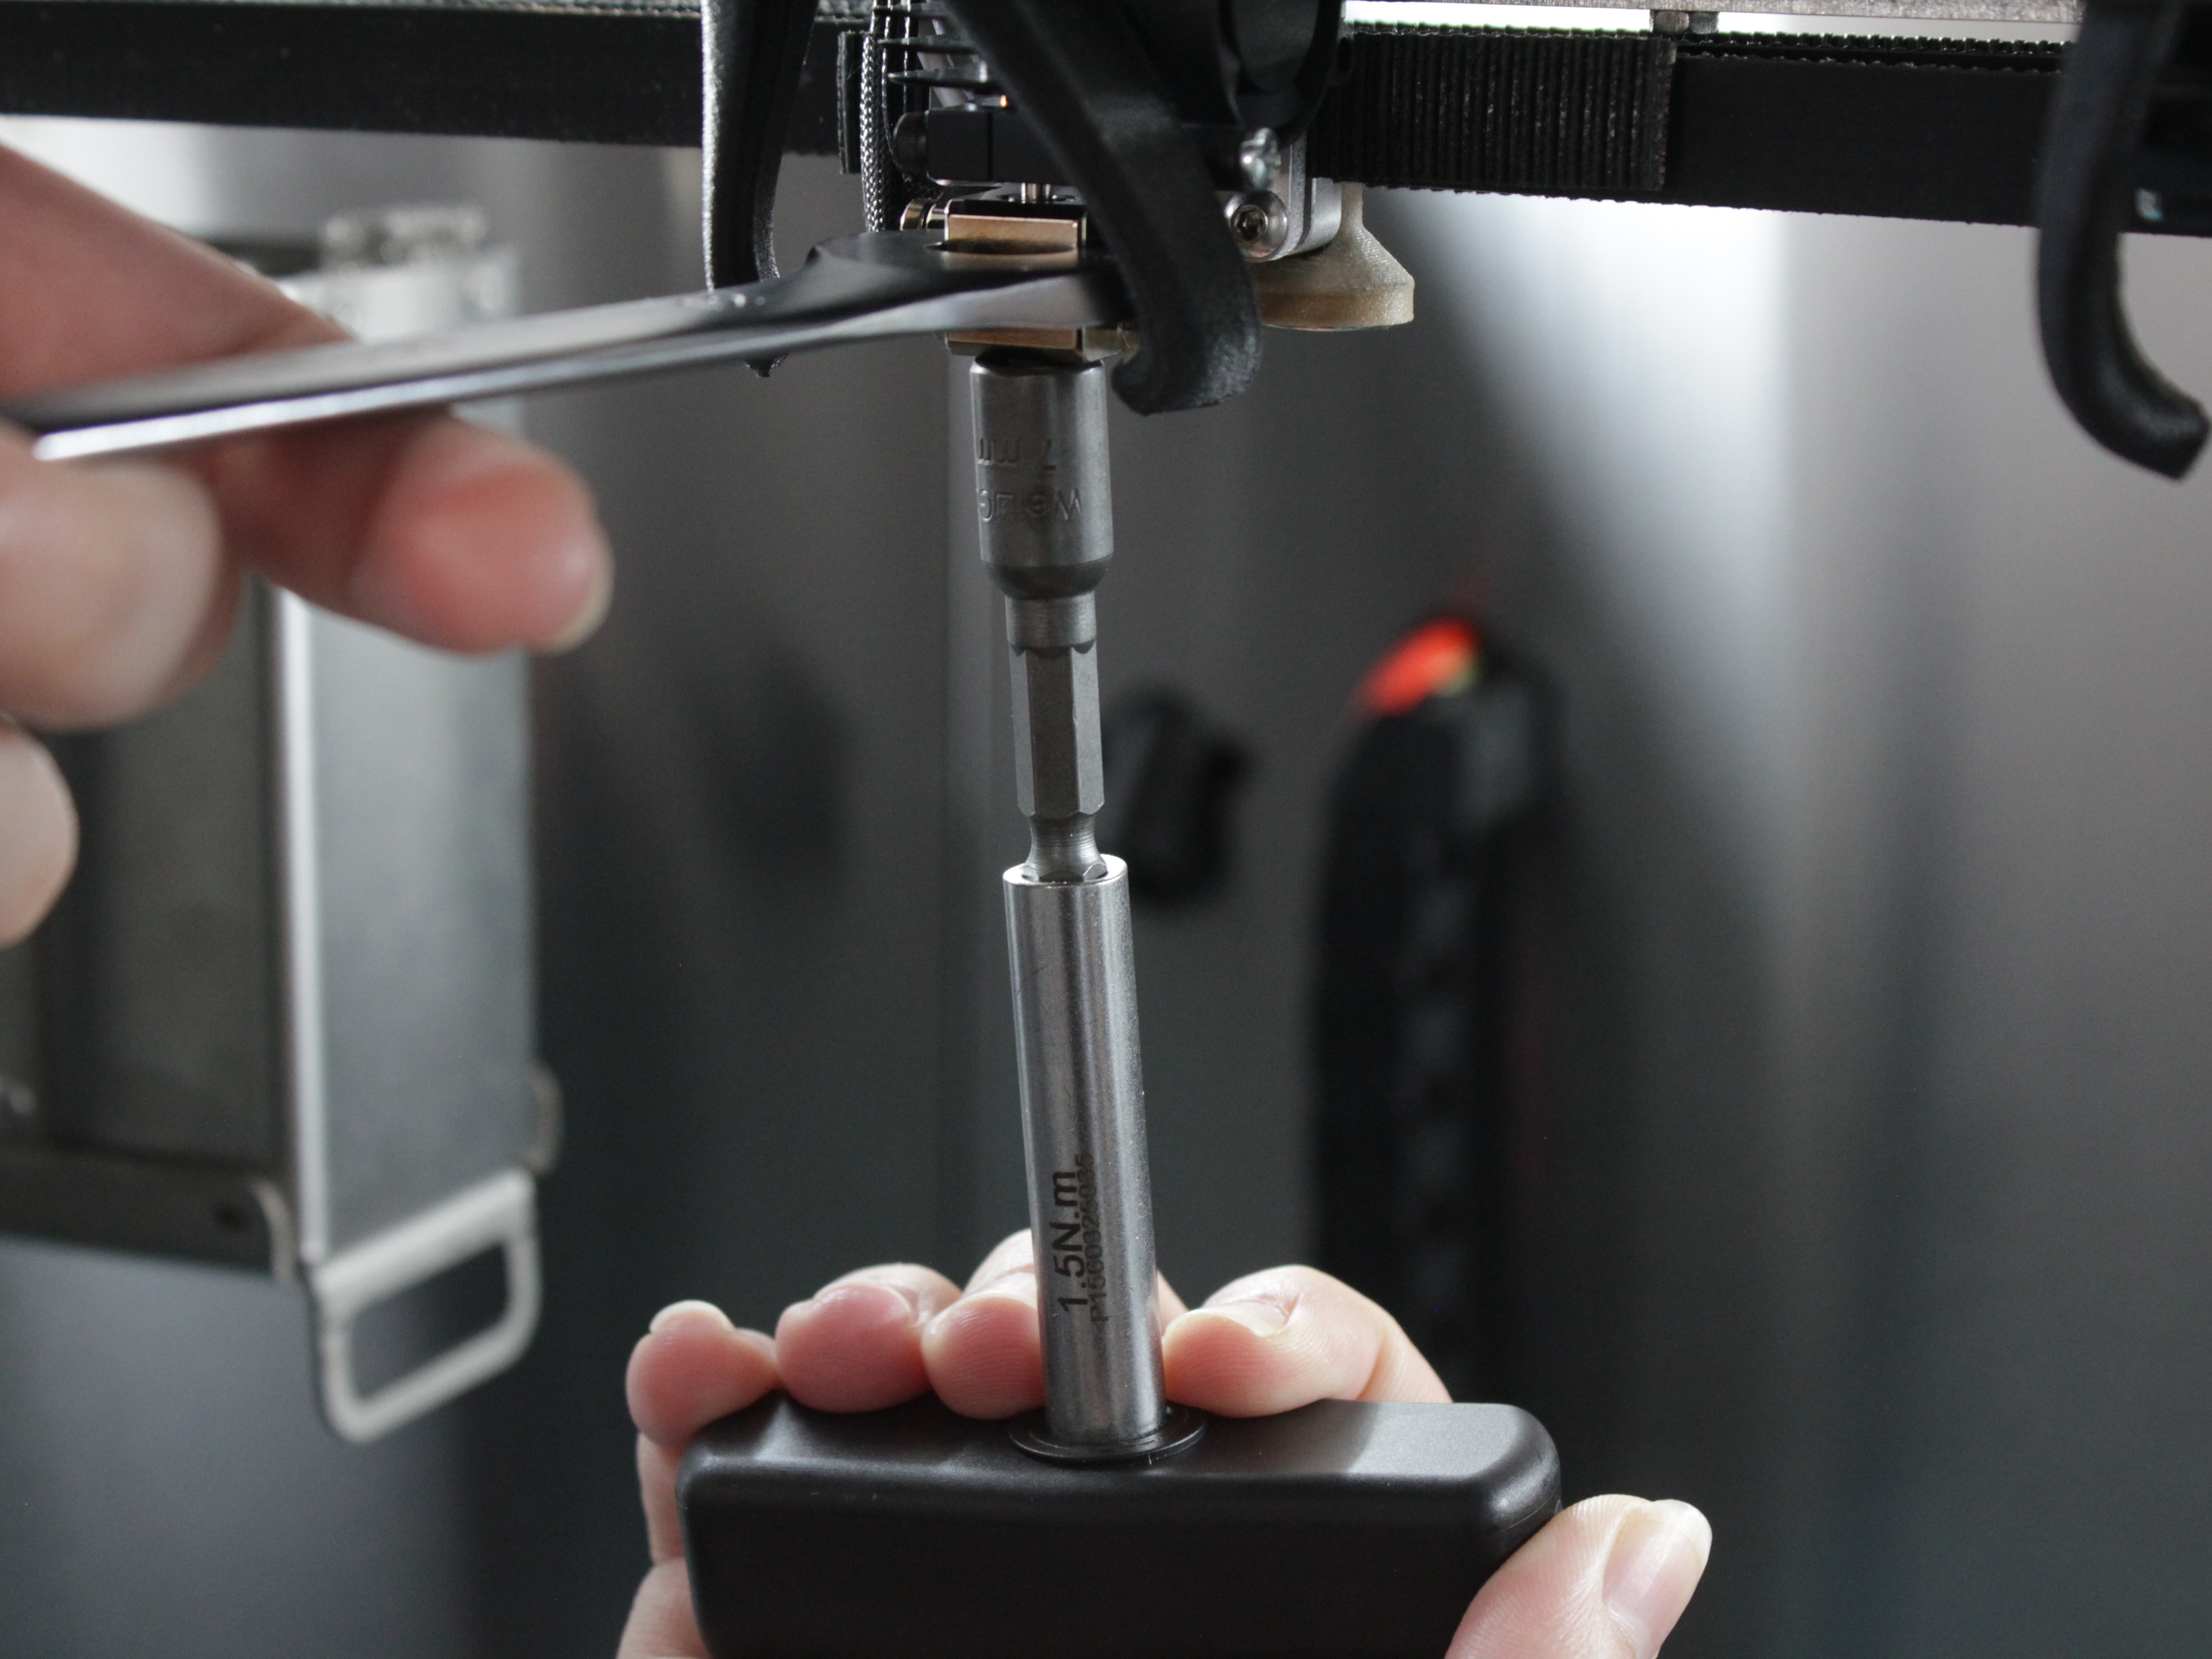
- Carefully loosen and remove the nozzle using the Nozzle Torque Wrench 7mm.
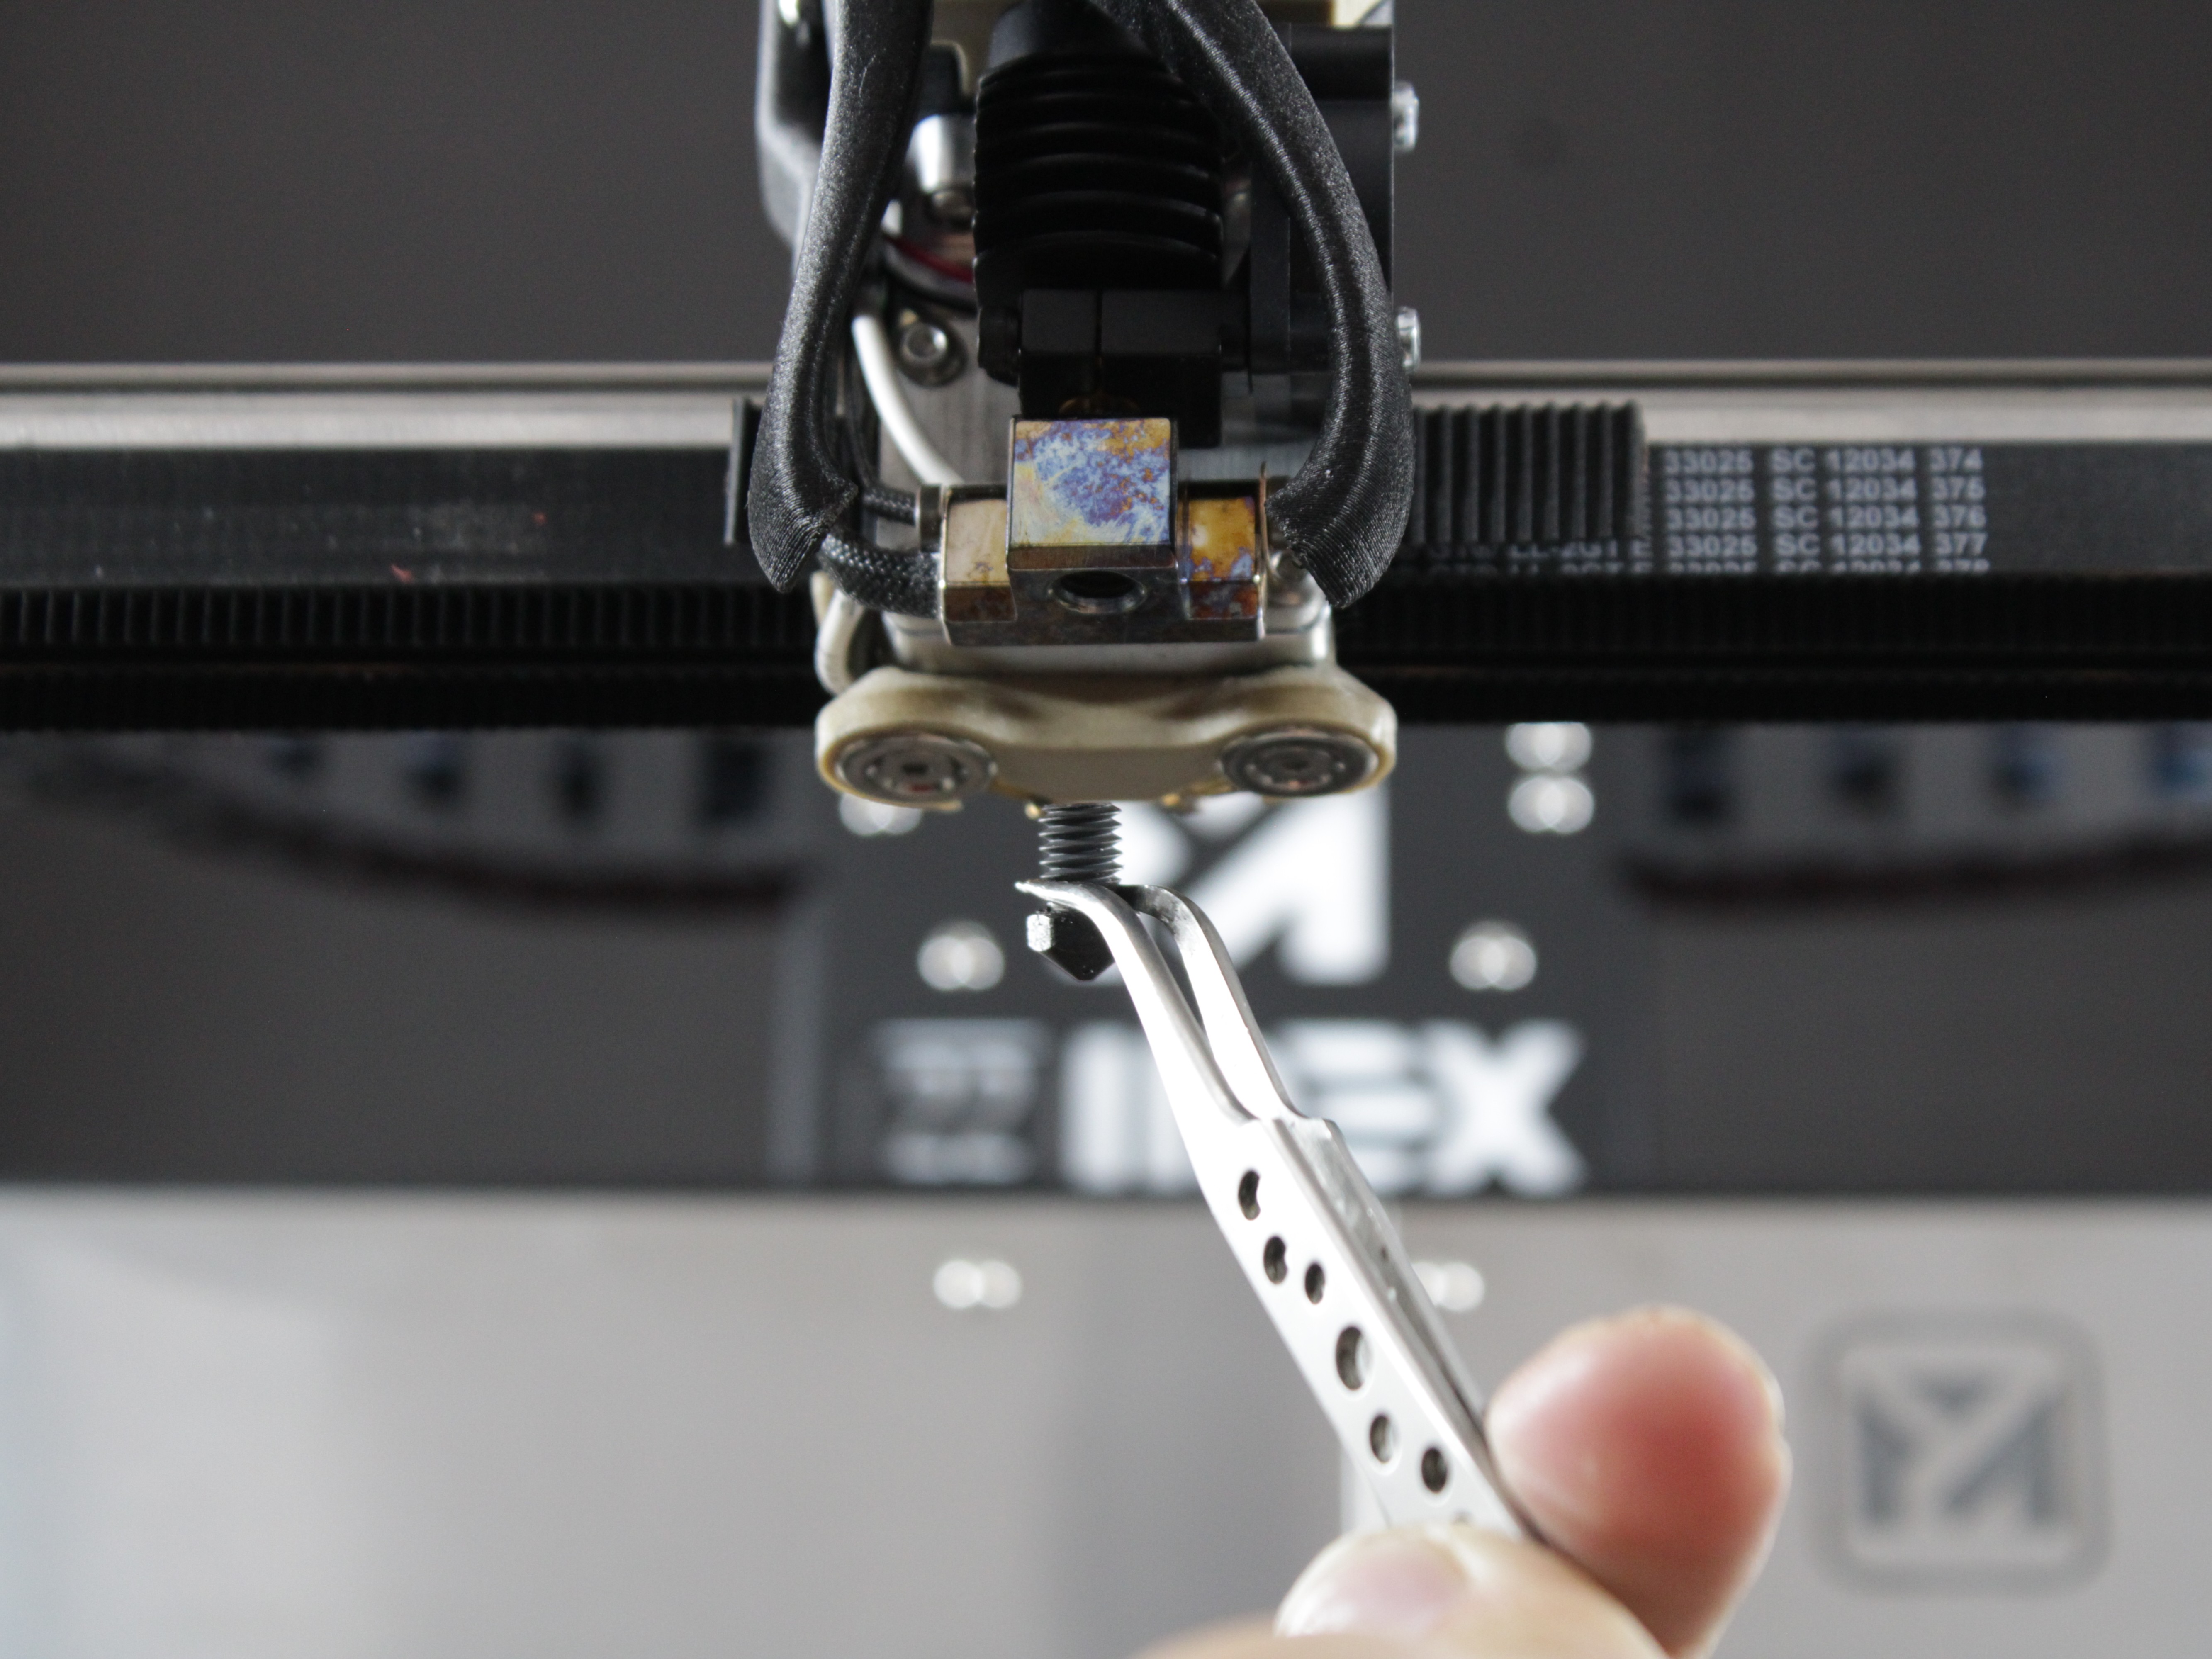
- If the clog is near the nozzle opening, clean the nozzle with the Nozzle Cleaning Needle Set from the intake (wider) end. Do not use drill bits - see the FAQ.
3. Clear the heat break with fresh filament
Even after a nozzle clog, some residue usually remains in the heat break - assume it is there and flush it out. Do not try to force a clog through by pushing hard on the filament or poking with rods: flushing with fresh filament is the reliable way.
- With the nozzle removed, heat the hotend to about 350°C (up to 400°C for stubborn residue) and try to extrude. If filament extrudes freely, the clog was in the nozzle.
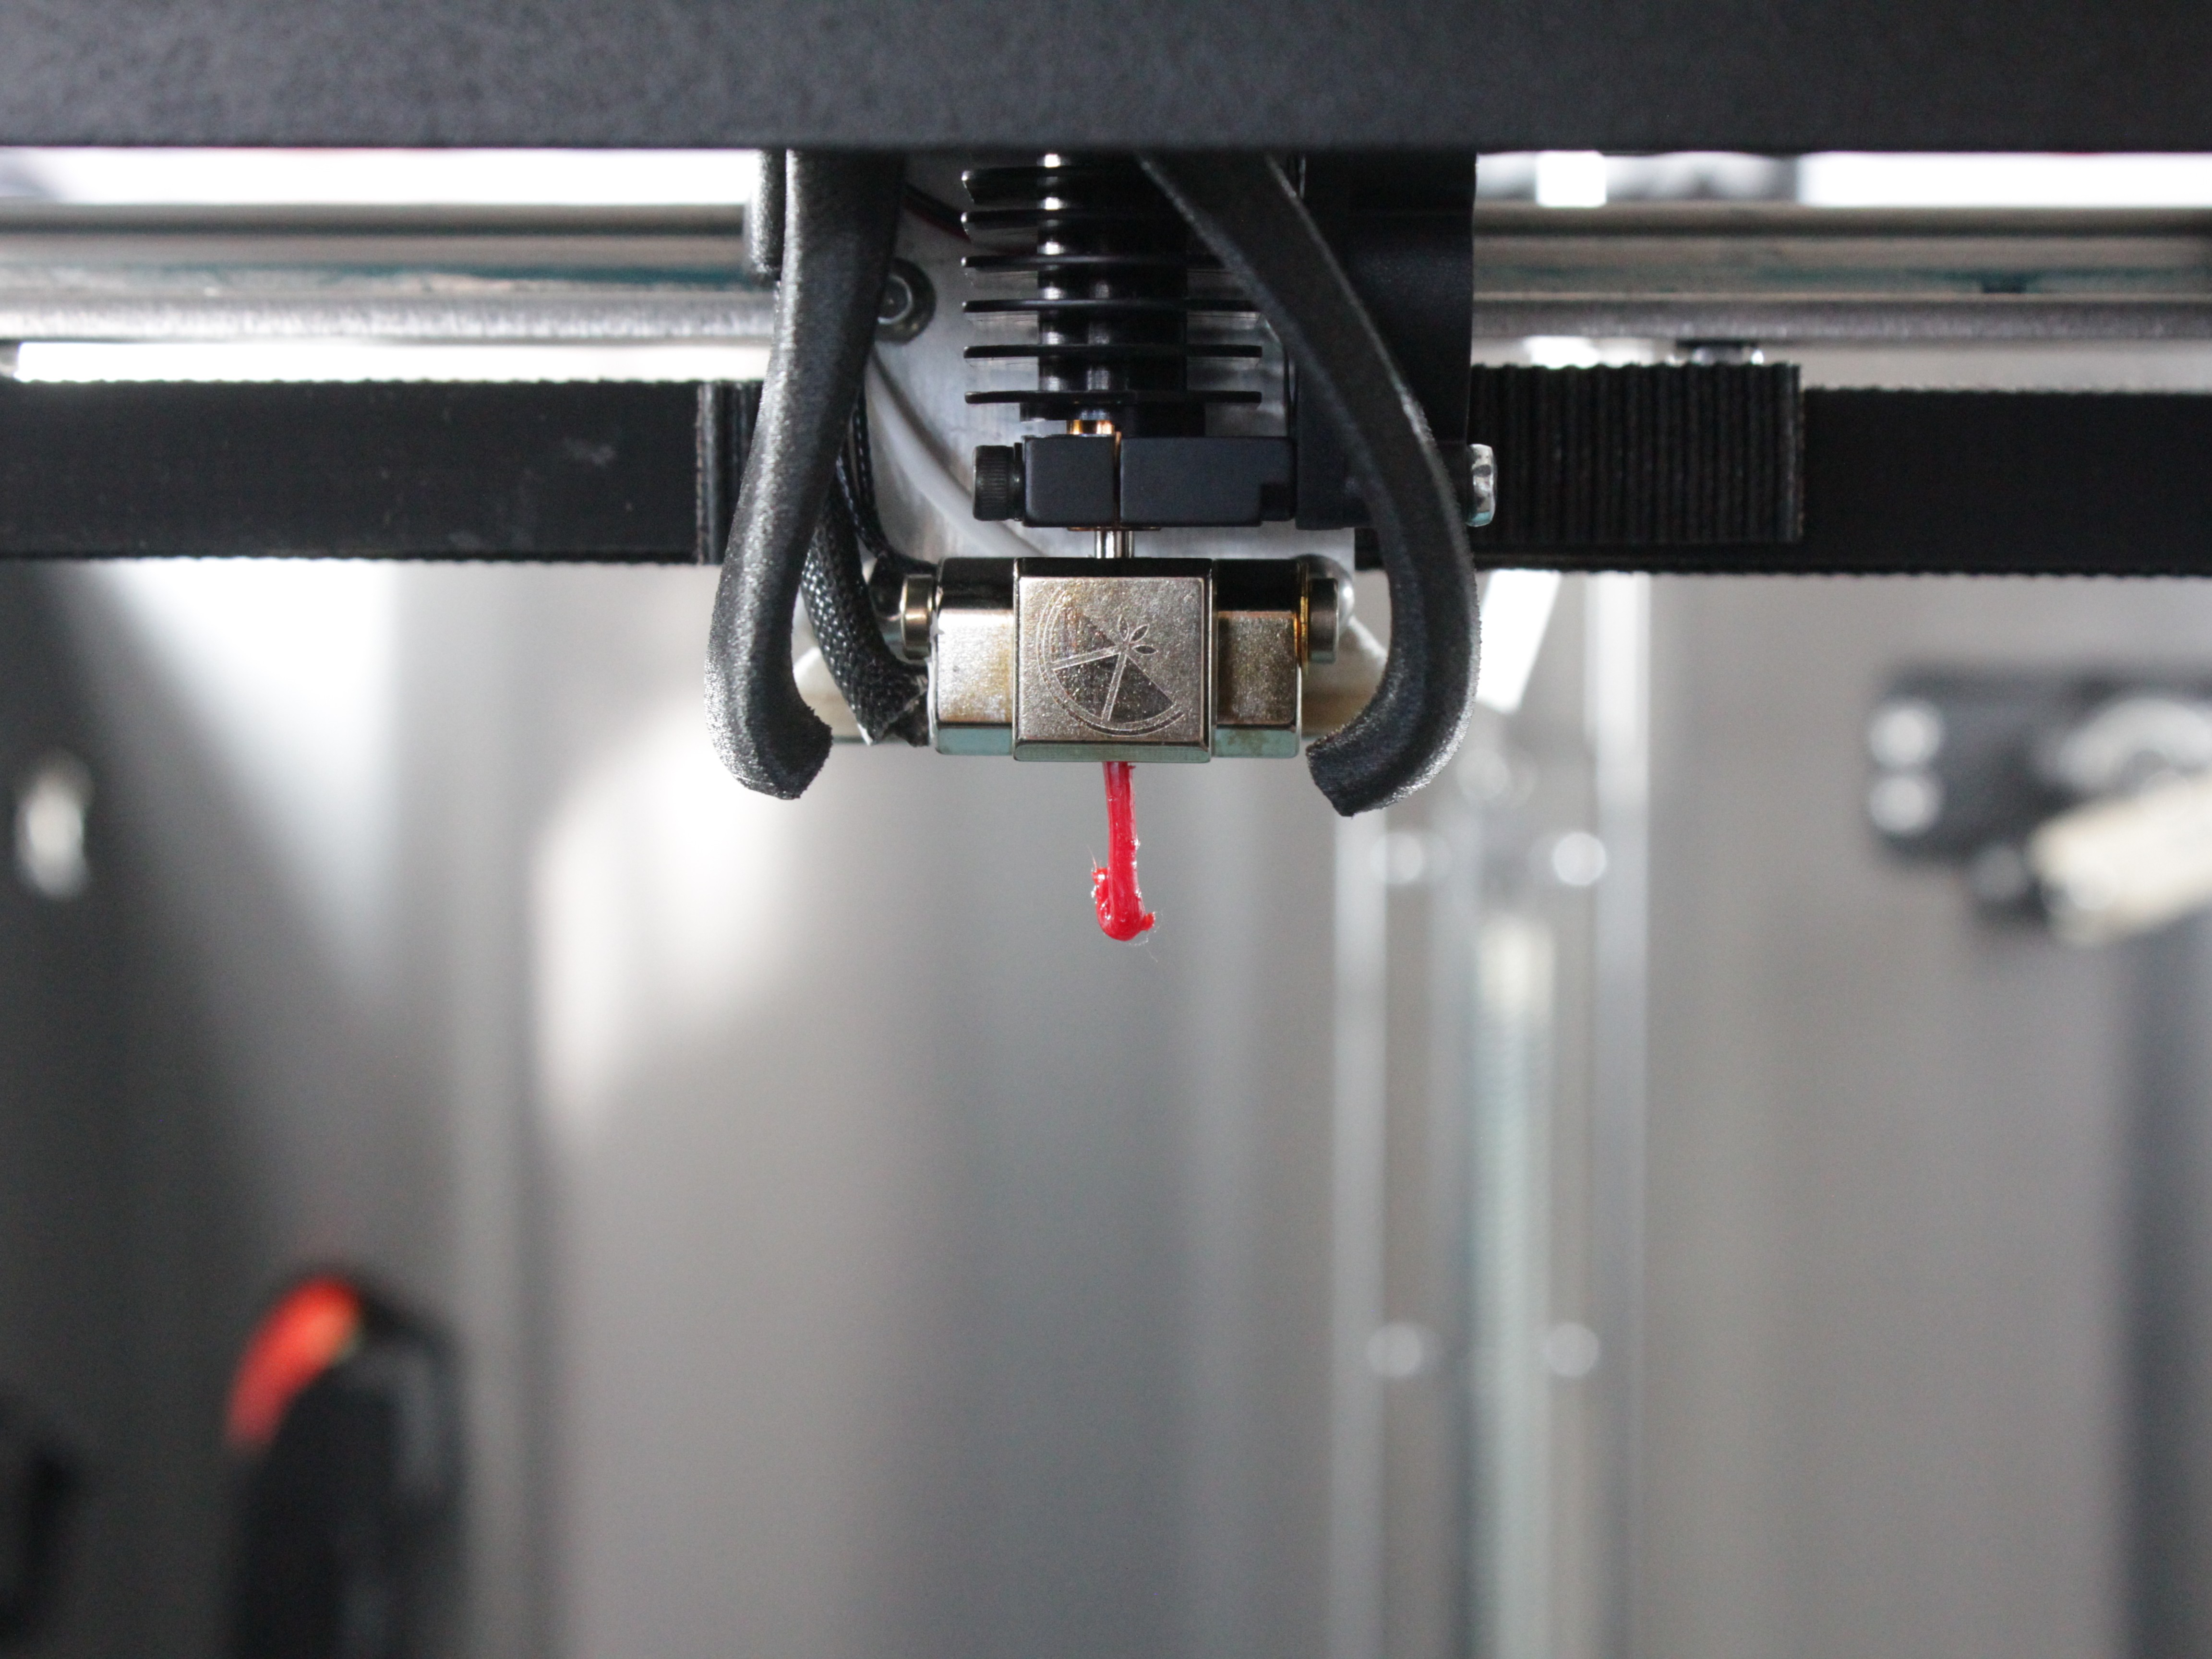
- Feed the straight piece of fresh, raw PEEK filament in from the top and gently pass it through the heat break until it comes out the bottom. Raw PEEK works best for this - composite and softer filaments tend to deform instead of pushing the residue out. Alternatively, with filament loaded, extrude about 500 mm through the open heat break, then cut off the extruded end.
- Once the filament has passed through, cool the hotend down to about 250°C before retracting or pulling the piece back out. Pulling it out at the lower temperature keeps it from leaving fresh residue behind on the way up.
- Reinstall the nozzle, load filament, and test extrusion. If it extrudes cleanly, you are done - if not, continue below.
4. Remove the heat break
Cool down before disassembly
Let the machine cool down and turn it off before removing the heat break. Working on hot components risks burns and component damage.
Nozzle off first
Always remove the nozzle before unscrewing the heat break. With both installed, the nozzle and heat break clamp against each other inside the heat block and become much harder to unscrew.
-
While the hotend is still hot, retract the filament out of the tool.
-
Allow the printer to cool down completely, then turn off the power.
-
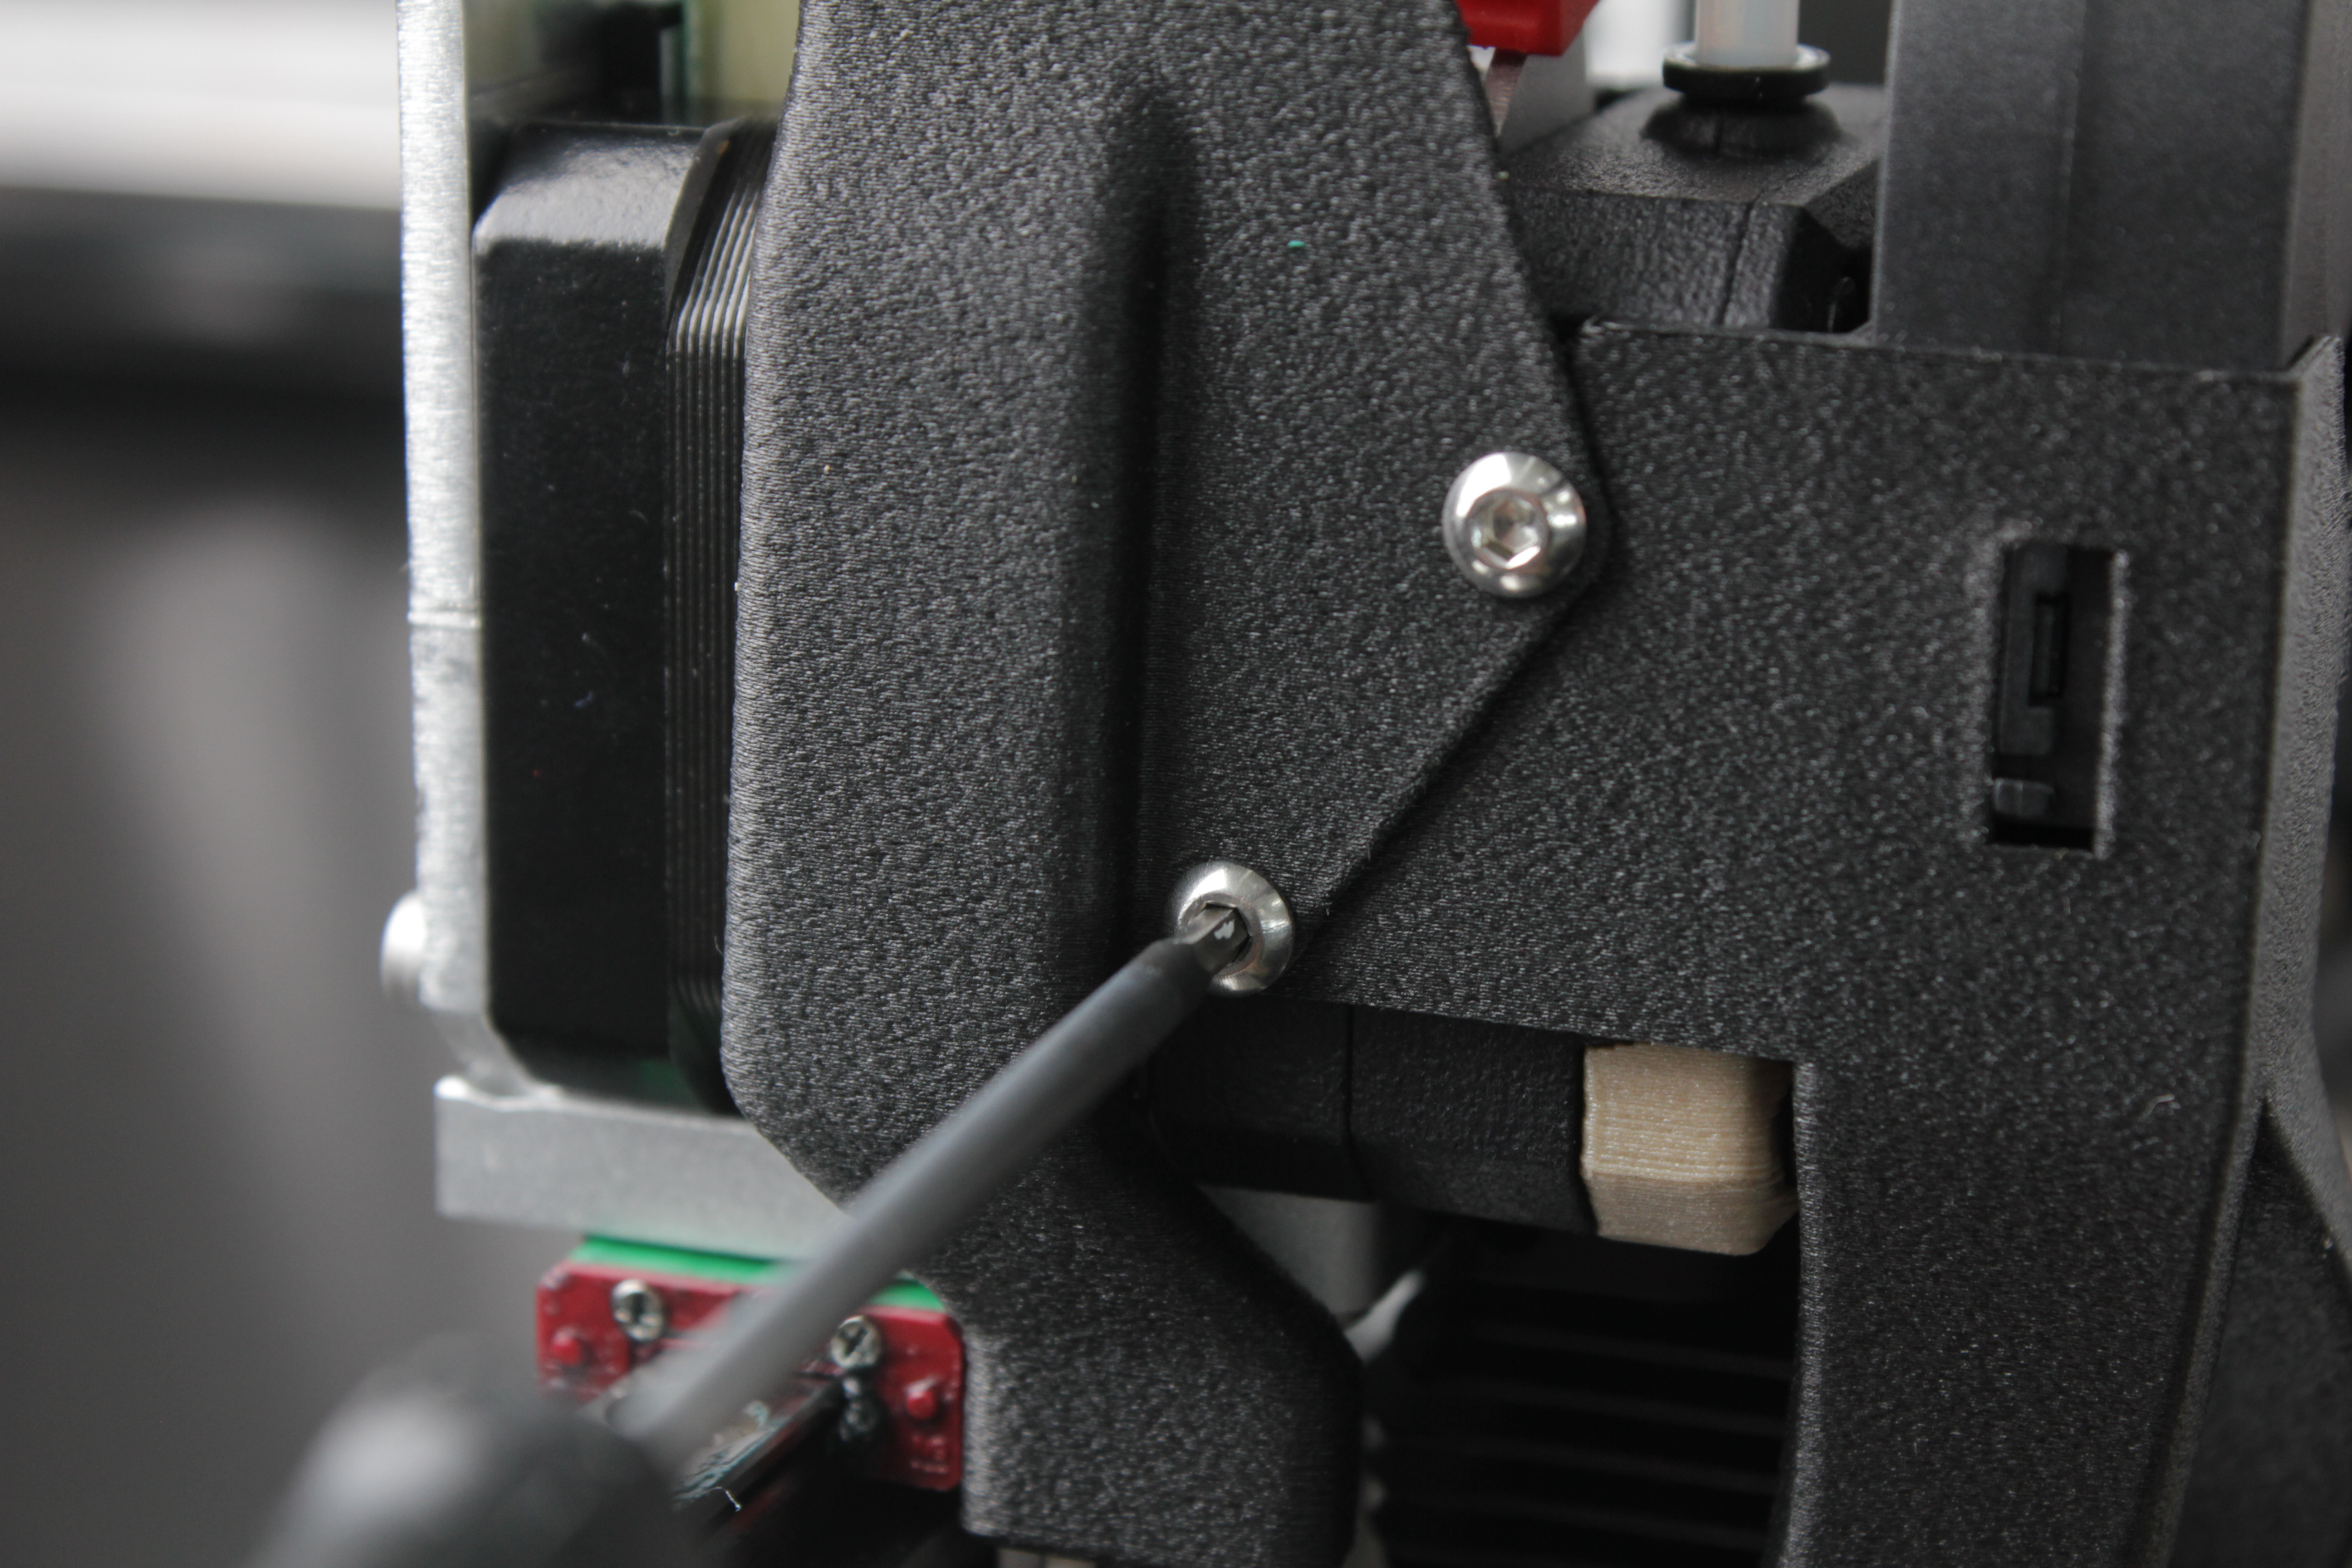
Remove the two fan shroud screws and the cable cover. The fan shroud must be off before the heat break can be removed.
-
Loosen the heat break holding screw and gently pull the hotend down.
-
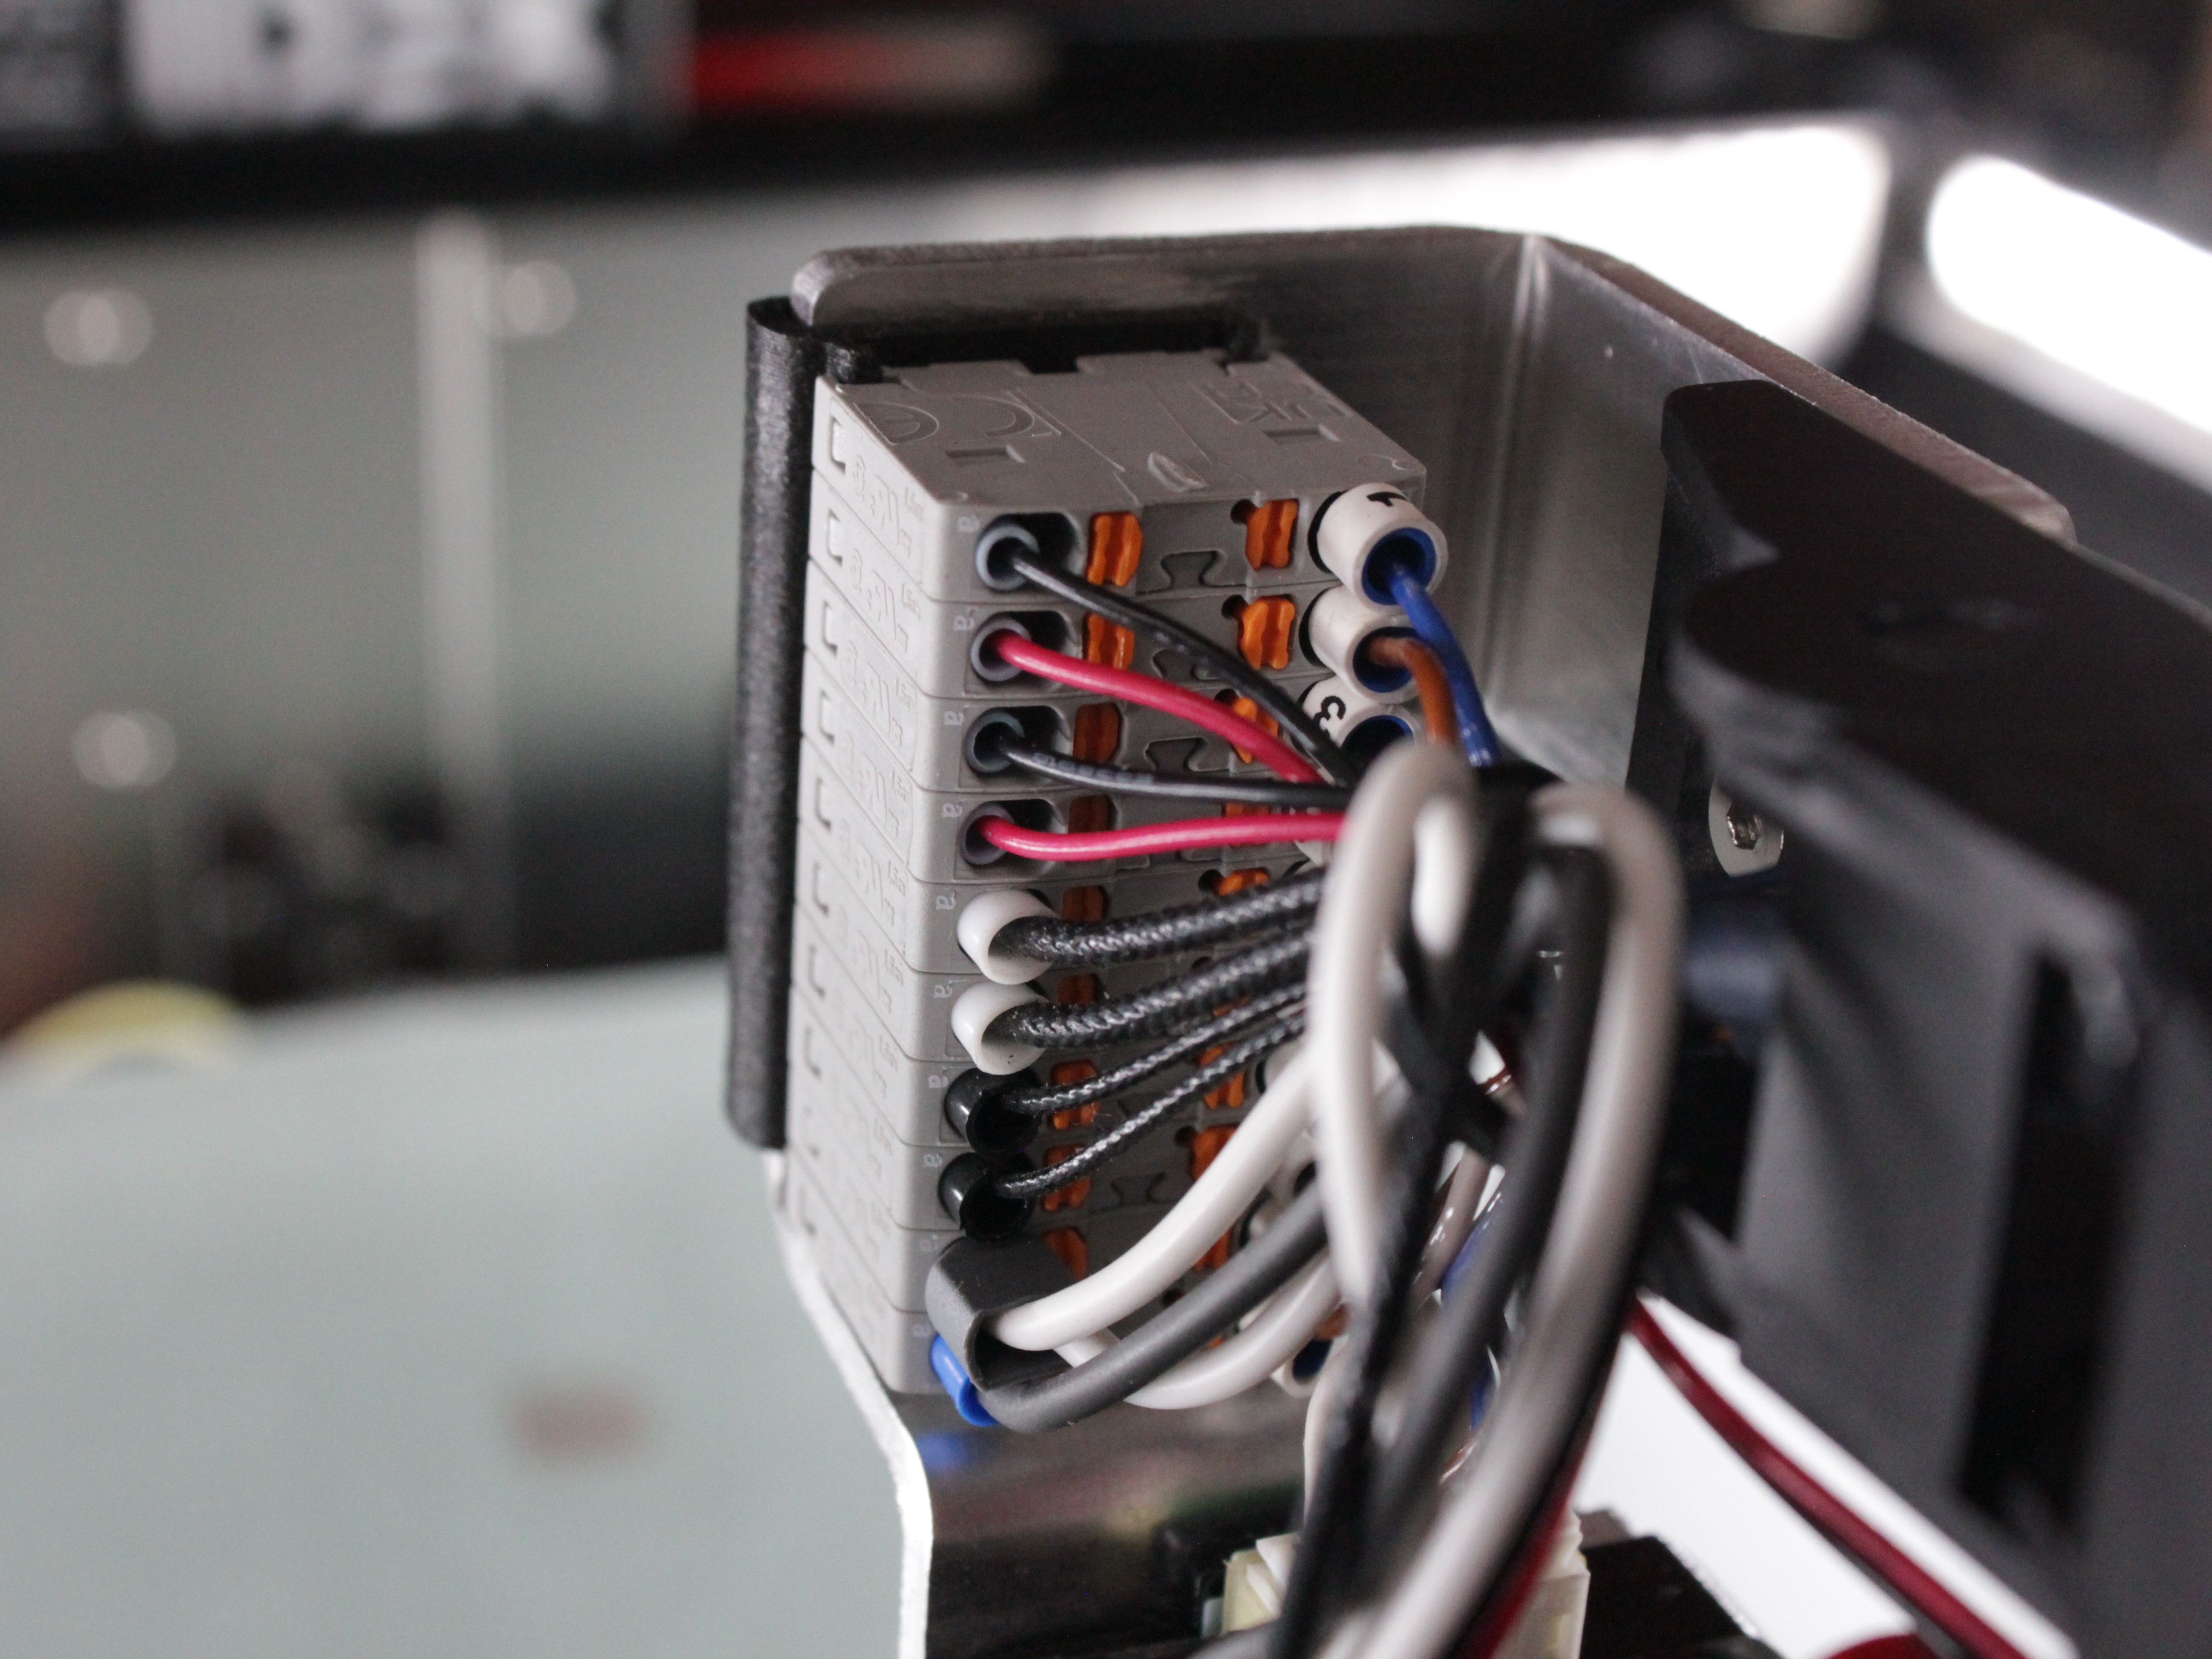
If wires obstruct removal, disconnect them from the distribution block. Take pictures to remember their positions before disconnecting.
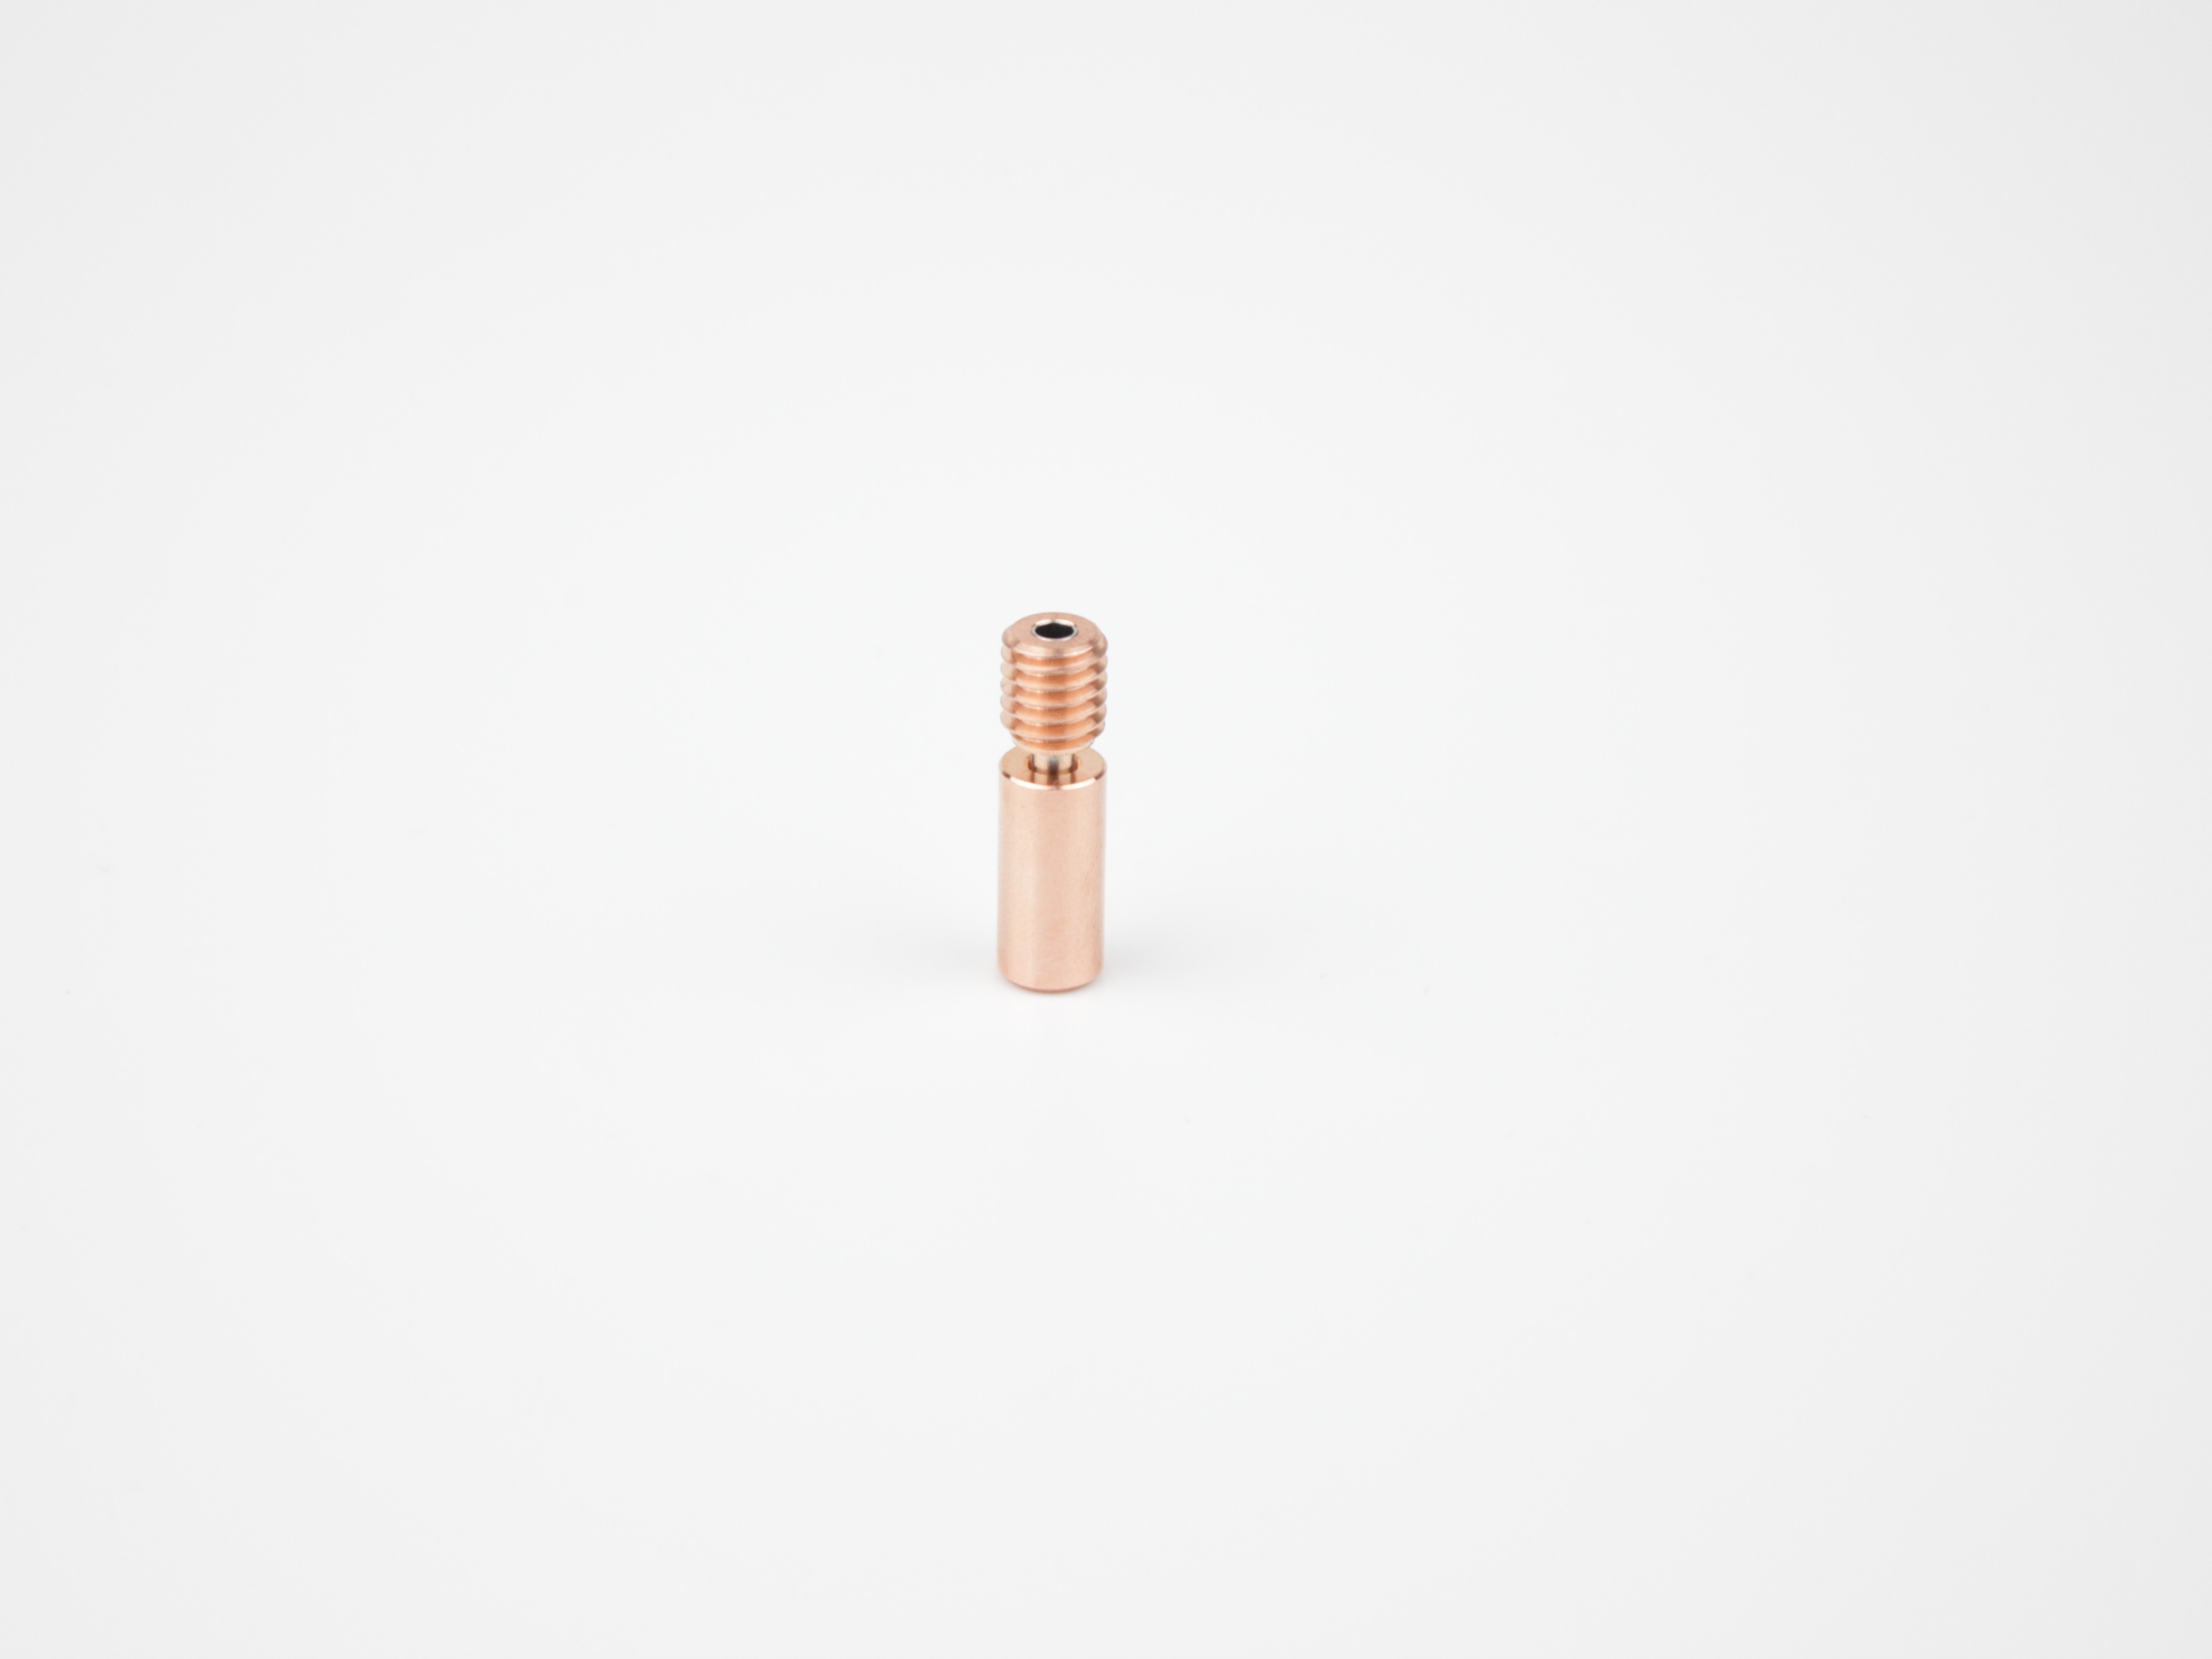
- Unscrew and remove the heat break. More details about disassembling the head are in the Hotend Disassembly article.
If the heat break won't come out cold
If the heat break cannot be removed while cold, preheat the hotend to help free it. Use appropriate tools to handle the hot components safely. If the heat break twists apart and part of it stays stuck in the heat block, see the FAQ below.
5. Disassemble the Extruder
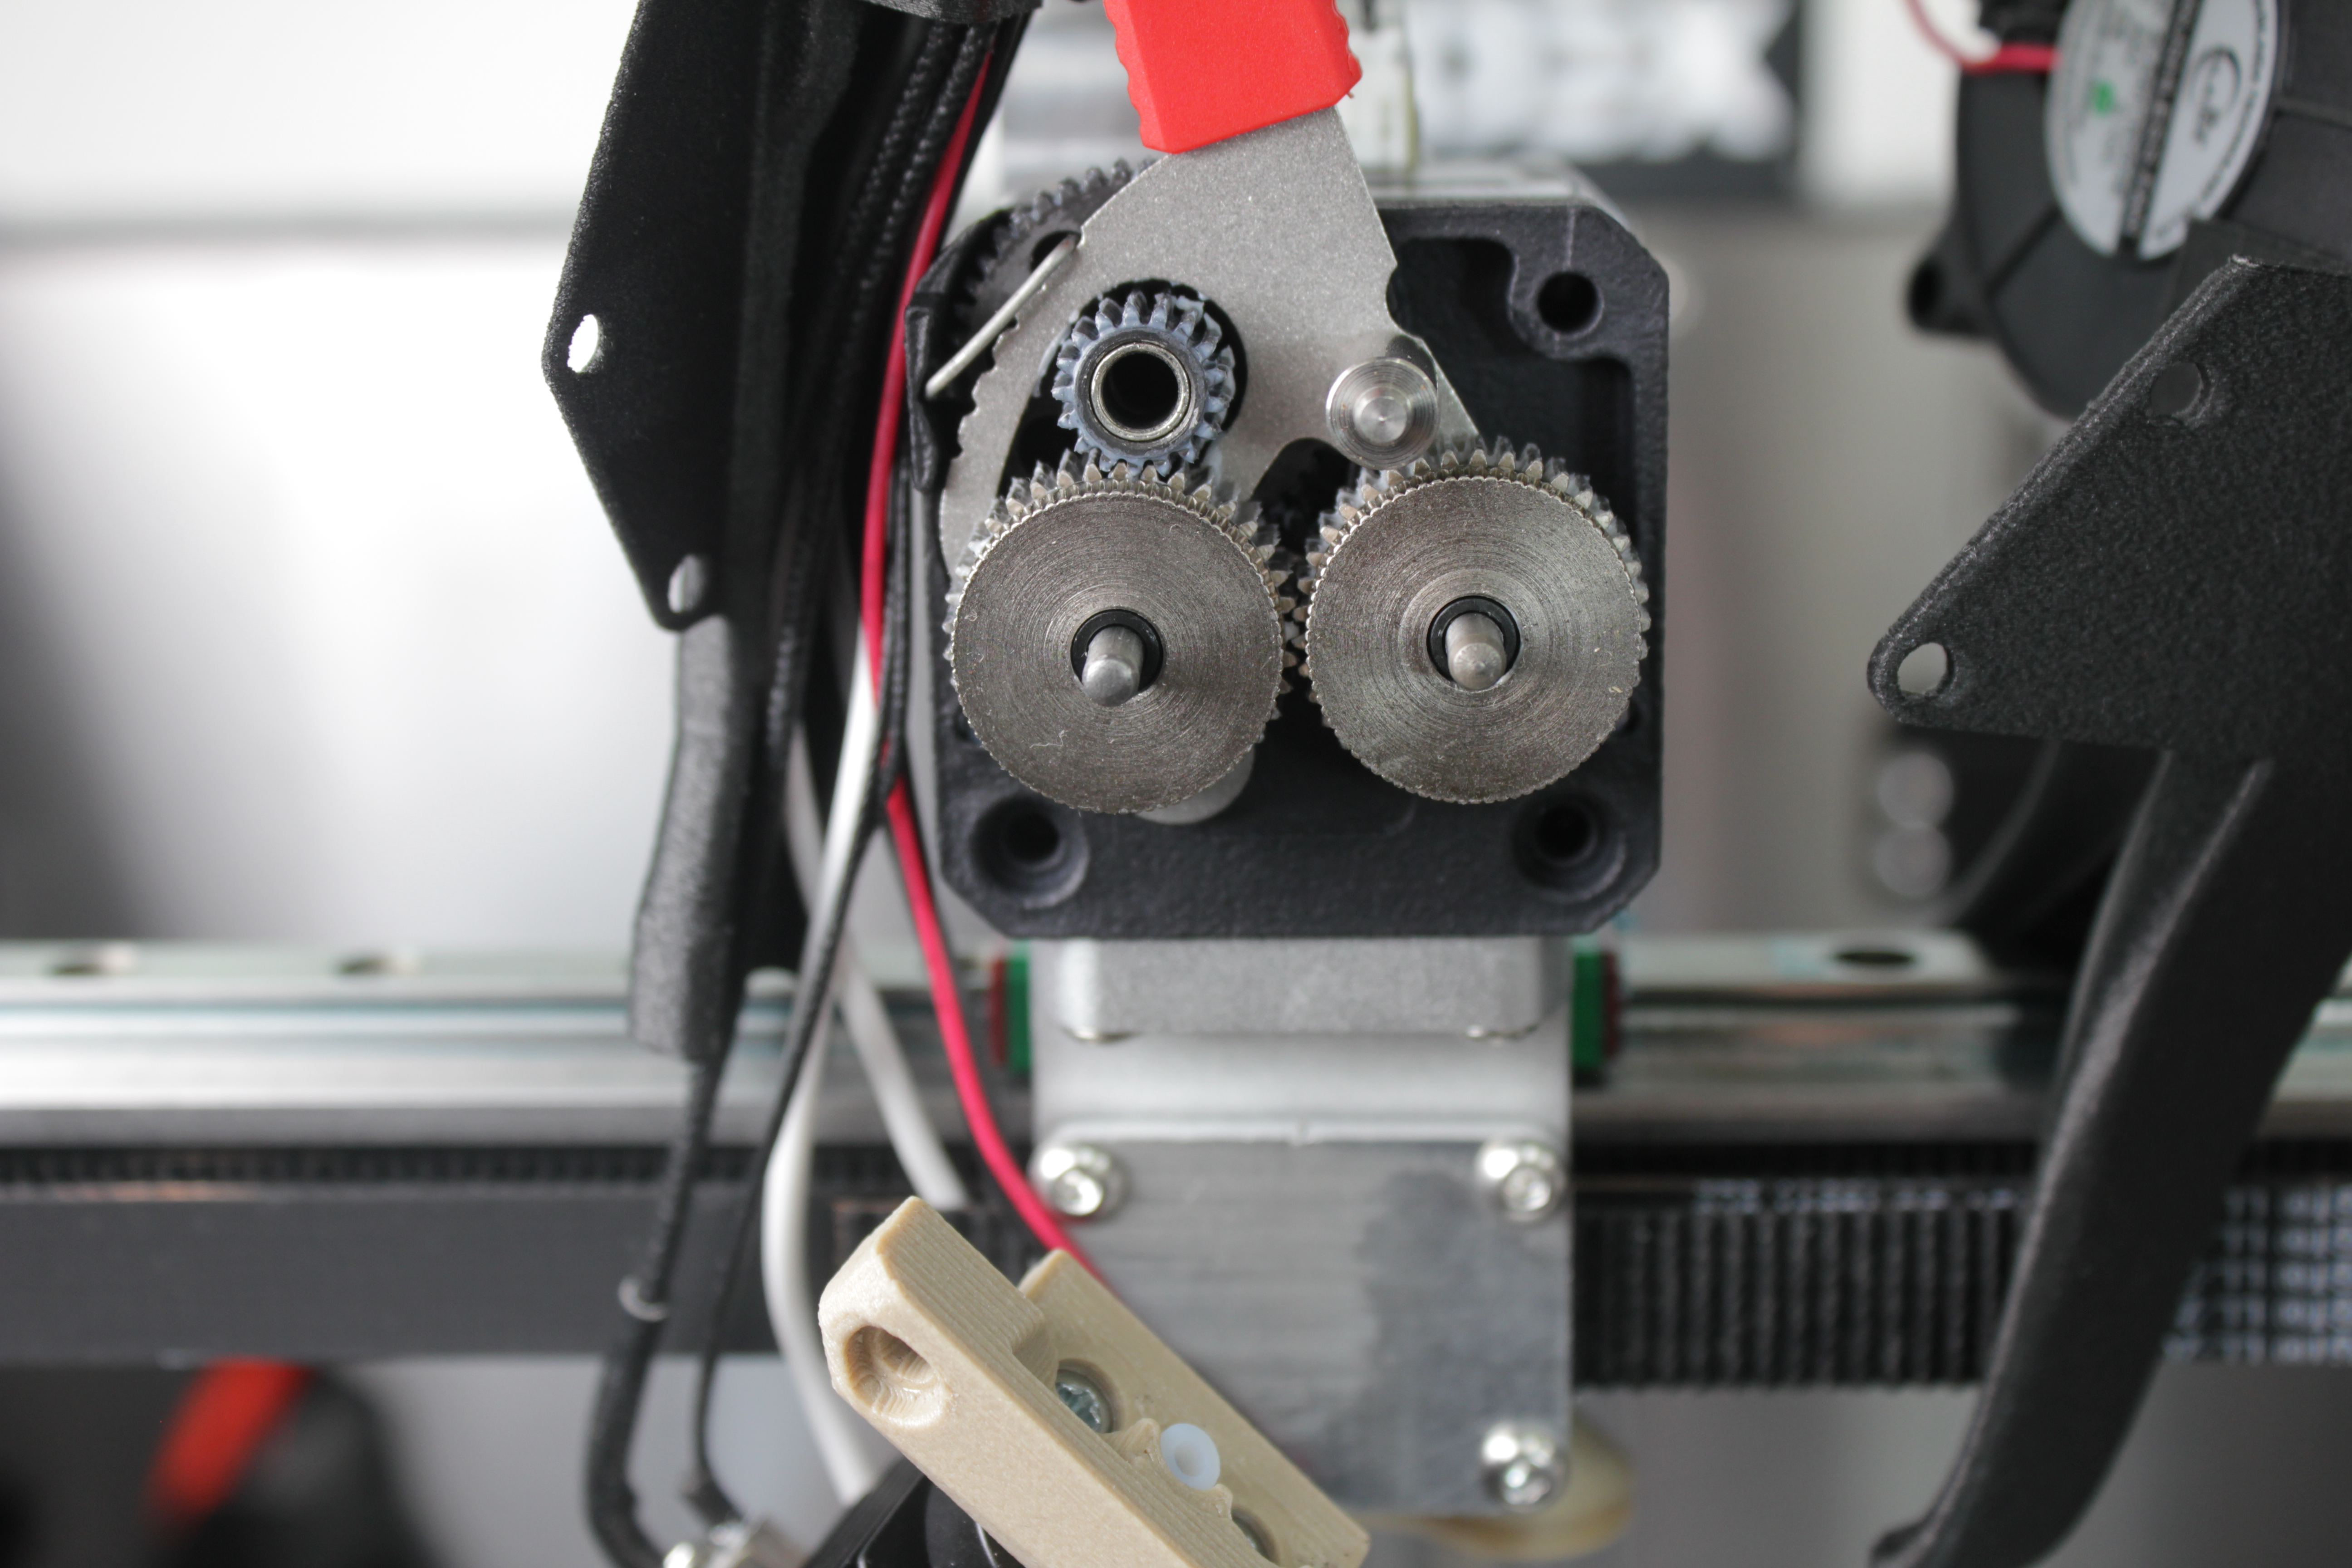
If you have completed all the steps above and the filament still will not extrude, remove the extruder front cover to inspect and clean the drive gears.
-
With extrusion still failing, retract the filament out of the extruder before disassembling it. If it will not pull out, preheat the tool head to soften it first.
-
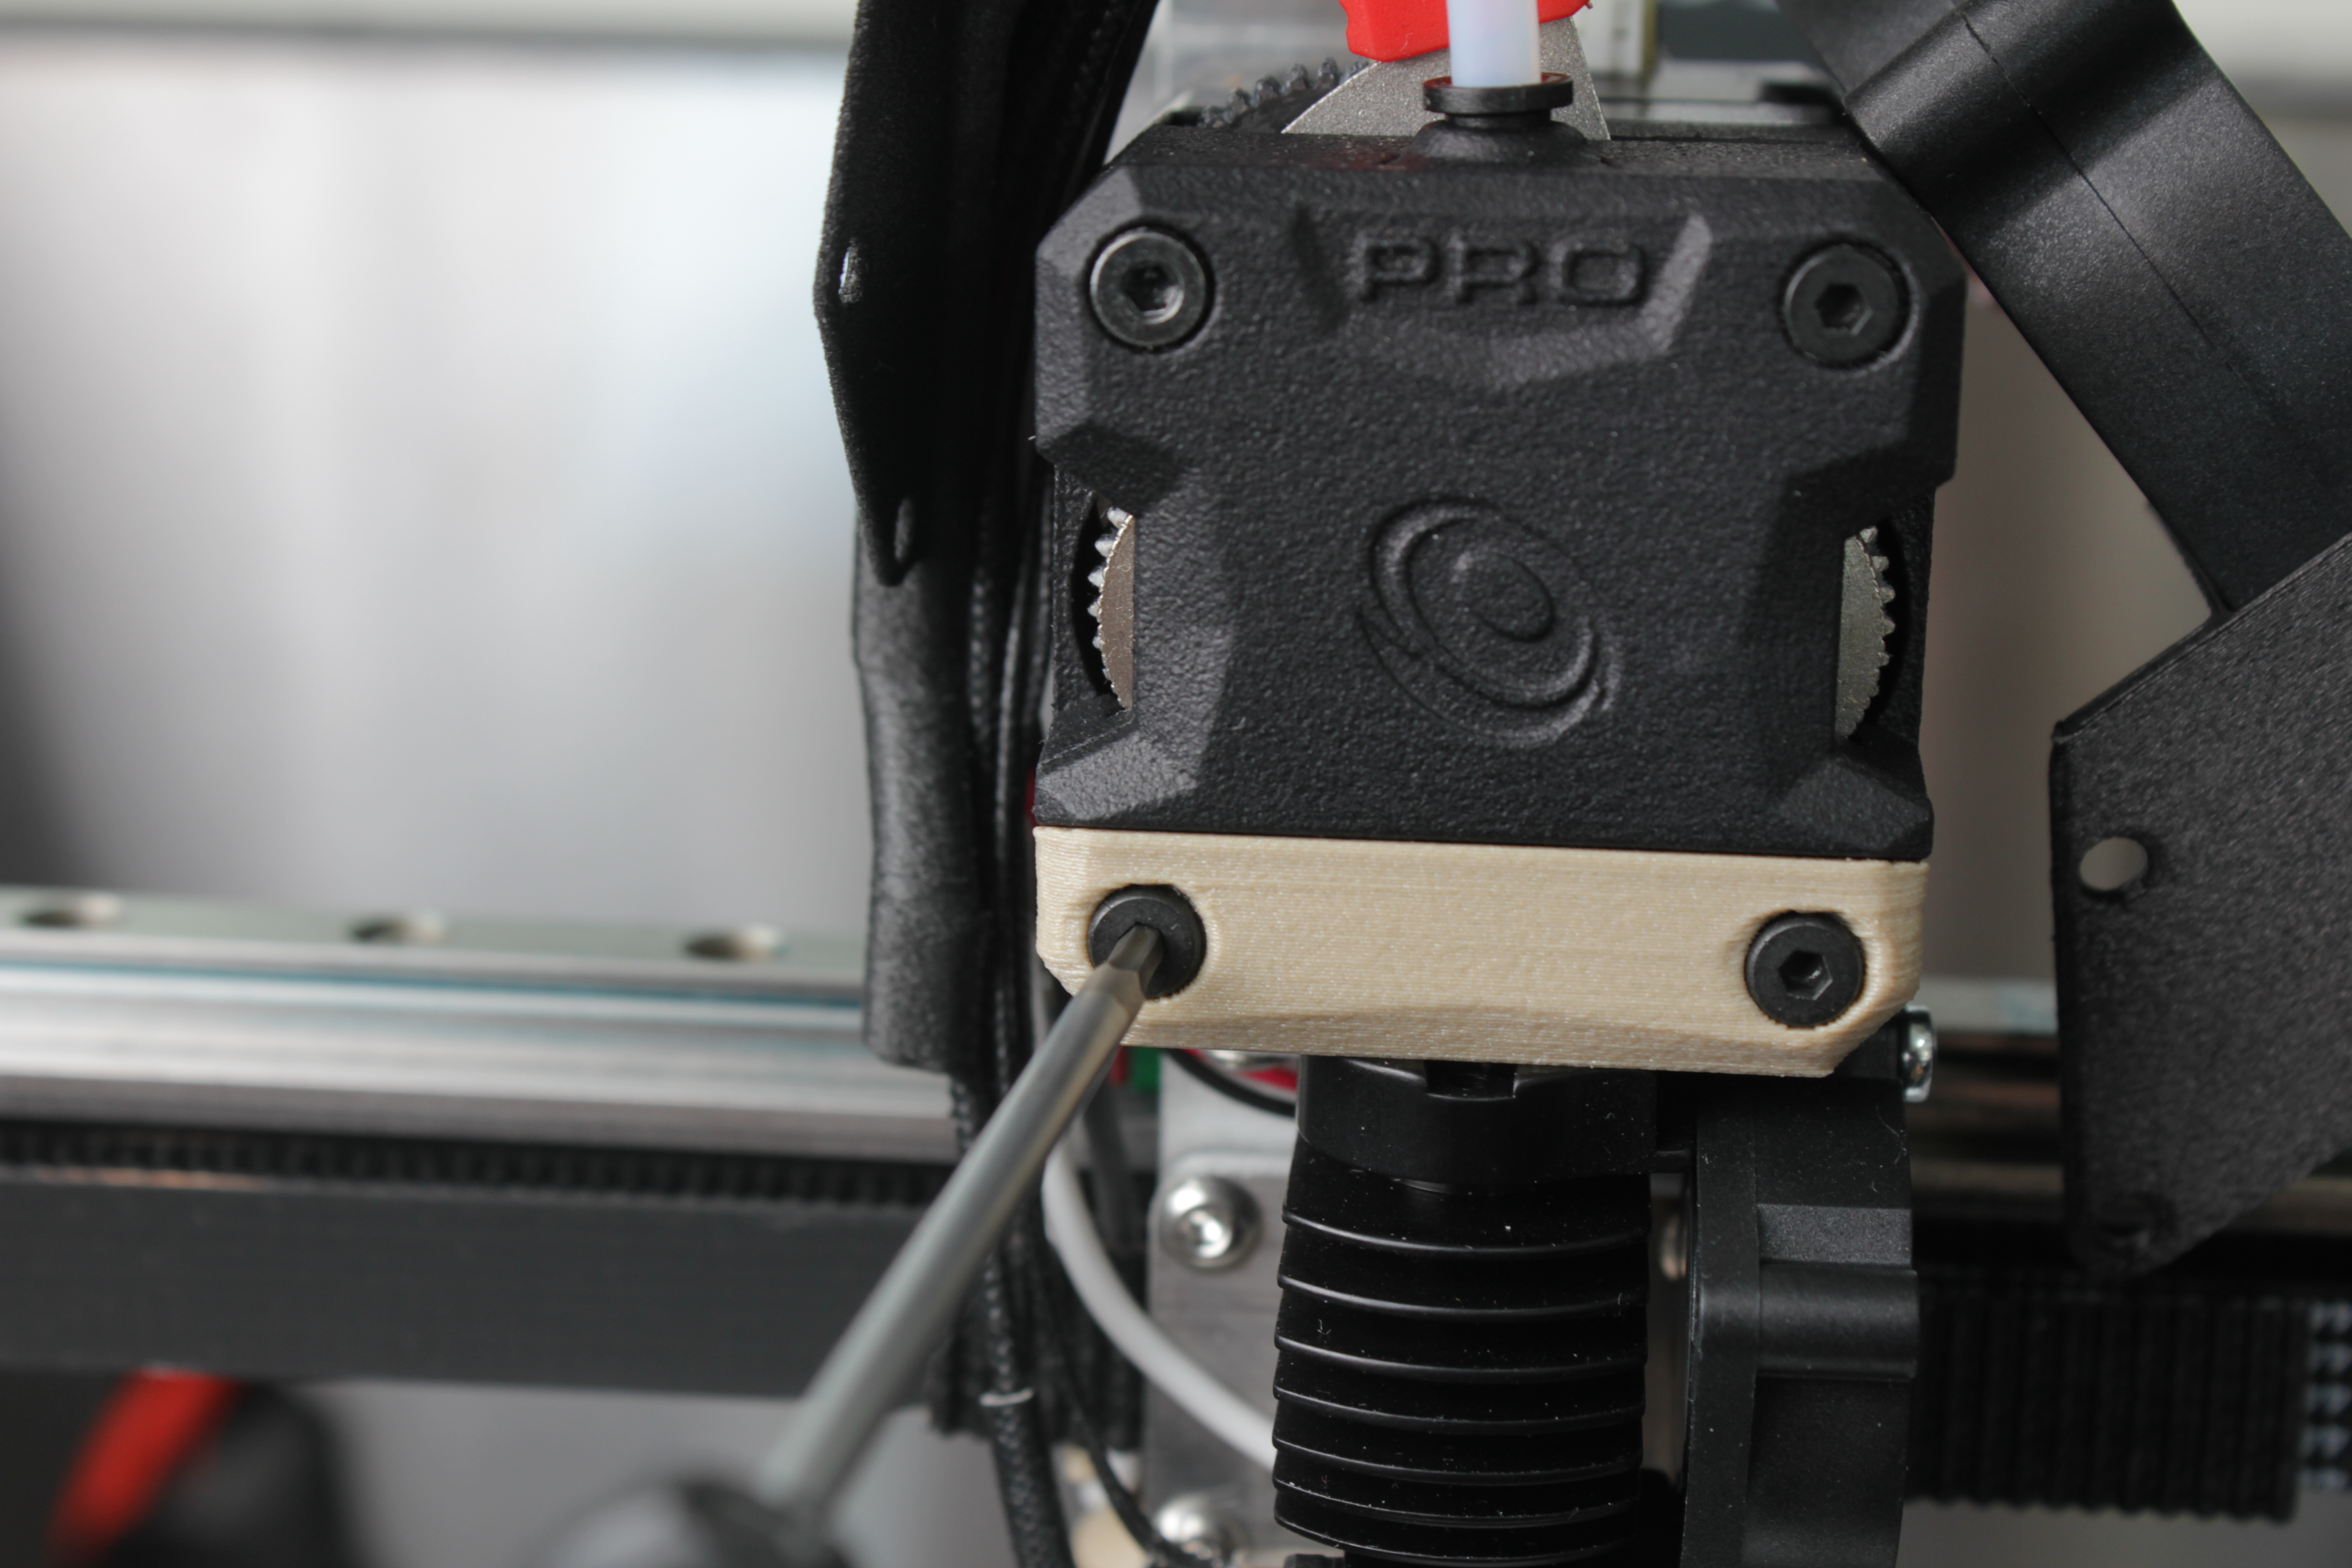
Remove the two bottom screws of the extruder front panel. These also release the 3D printed interface plate and the hotend.
-
Remove the two top screws of the extruder front panel.
-
Pull the front cover toward you to remove it and expose the drive gears.
-
Inspect the extruder gears for filament debris or shavings and clean off any buildup.
6. Reassemble and test
- After clearing the filament path, reassemble the components in reverse order.
Replace damaged components
Replace components if worn extruder gears or deformed PTFE tube are found. For heat break replacement criteria, see the FAQ below.
- Load filament and test extrusion. The filament should extrude smoothly without skipping or grinding.
FAQ
Support
If you could not find an answer here, reach out to our support team.