Mirror & Duplicate Mode
Print two parts at once with Mirror and Duplicate mode: why they need physically level nozzles, preset selection, part zones, raft layers and first-layer flow calibration.
Mirror and Duplicate modes use both toolheads at once to print two objects in a single job, roughly doubling your throughput. Mirror Mode prints a mirrored copy of your part; Duplicate Mode prints two identical copies. Both need a little extra care with part placement, bed adhesion, and calibration.
Before you begin
Make sure the printer is calibrated (especially Z-offset) and that both toolheads (T0 and T1) are clean, loaded, and extruding correctly in single-tool mode. Keep the bed clean and clear. Incorrect setup in these modes can cause failed prints or head collisions.
Why These Modes Are Harder Than Multi-Color
If your multi-color prints look perfect but in Mirror or Duplicate mode one nozzle prints too high or too low, the machine is usually fine. The difference comes from how the two modes handle the nozzle height offset, plus thermal expansion of the build plate.
Software compensation vs. physical alignment
In multi-color printing, only one tool prints at a time. Auto Calibration measures the height difference between the nozzles, and the printer compensates for it in software: when the other tool takes over, the build plate moves slightly to apply that tool's offset. Even if the right nozzle sits a little lower than the left one, both lay their layers at the correct height.
In Mirror and Duplicate mode, both nozzles print on the same build plate at the same time. The plate cannot be at two Z heights at once, so this software compensation cannot be applied. The modes rely entirely on the physical nozzle heights being identical: both heat breaks and nozzles must be mechanically leveled to the same height.
To get them level: push both heat breaks all the way up, then run Auto Calibration. If it detects a height difference, it will ask you to adjust one of them.
Thermal expansion and bed warping
Even with the nozzles perfectly leveled at room temperature, heat adds new variables. The aluminum build plate expands with temperature, and internal stresses in the material make it warp very slightly in Z as it does, usually bowing in the center. At layer heights like 200 microns, even a fraction of a millimeter of thermal warp makes a visible difference.
Two tools over a warped surface
Because the tools move together over that slightly warped surface, they see different gaps. In Duplicate mode, when both tools move left, one tool heads toward the outer edge of the bed (a lower spot), increasing its nozzle-to-plate distance, while the other tool heads toward the center (a higher spot), decreasing its distance. This creates the illusion that the printer is mechanically out of level, when the nozzles are simply traveling over different zones of a thermally expanded bed.
This is why the practices below matter: small centered parts cross less of the warp, and a raft absorbs the remaining micro-differences between the tools.
Tools & Materials
- Vision Miner 22IDEX 3D printer
- Filament (enough for two parts)
- Slicing software set up for the Vision Miner 22IDEX (IDEX profile)
Print Zones
The 22IDEX has two independent toolheads that share one build plate. Each tool reaches almost the whole bed, except the opposite side where the other tool docks.
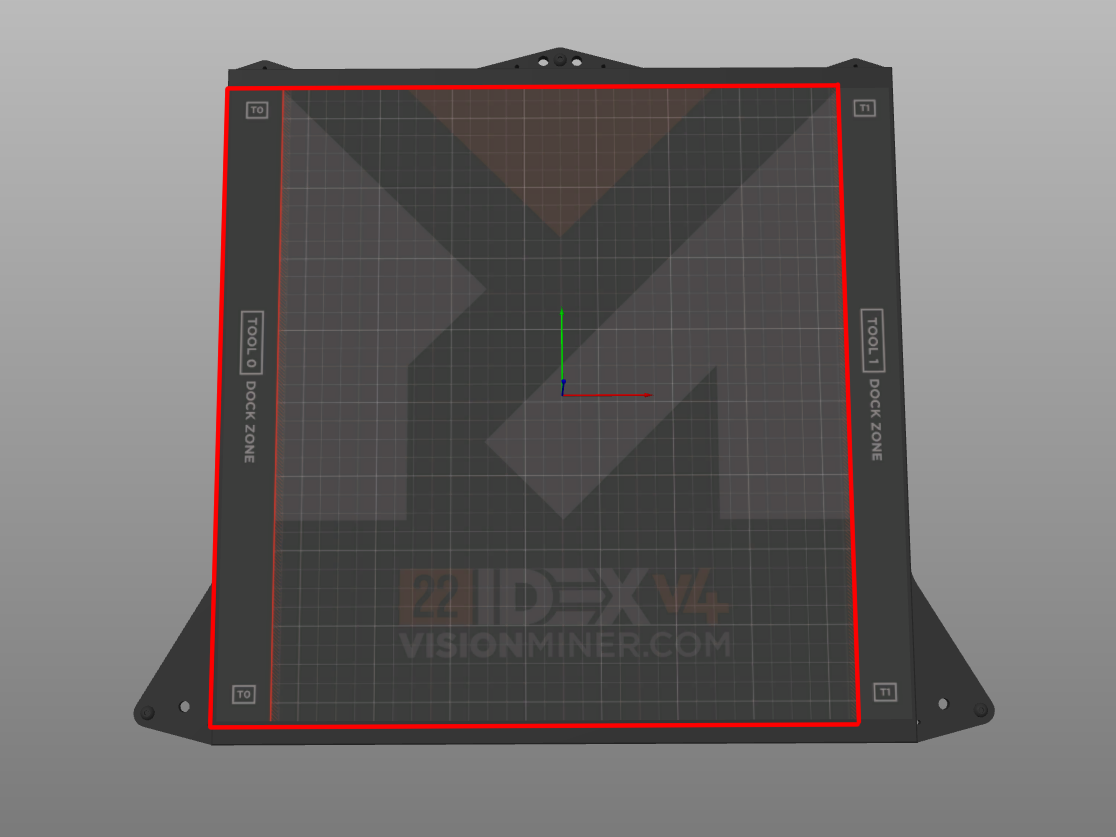
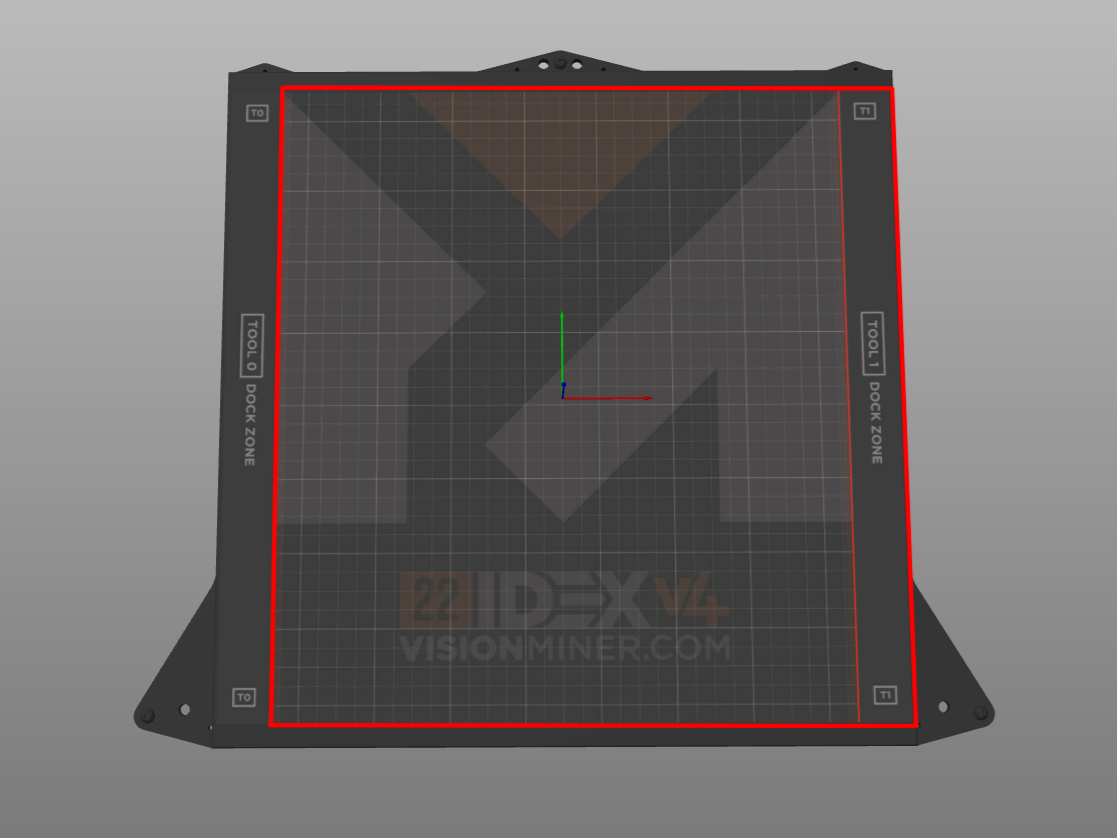
In both modes the two tools print at the same time, so your working area is the left half of the bed and the printer produces the second copy on the right. The highlighted zone in each screenshot is where we recommend placing parts. For every mode and exactly where to sit a part inside its zone, see Part Placement.
Start small and centered. Place parts relatively close to the center of their half of the plate, and begin with smaller prints: the less bed area the tools traverse, the less thermal warp they cross (see Two tools over a warped surface). Move on to large parts once small ones print cleanly.
Before You Print
These apply to both Mirror and Duplicate modes.
Calibrate the printer first, and level the nozzles physically
Both modes print with two toolheads at once, so print quality depends on the machine being calibrated far more than a single-tool job does. Run Auto Calibration before you rely on either mode.
In single-tool and multi-color jobs, the remaining height difference between the nozzles is compensated in software (Tool 1 Z Offset). In Mirror and Duplicate mode that compensation cannot be applied, because both nozzles print on the same plate at the same time - see Why These Modes Are Harder Than Multi-Color. The physical nozzle heights themselves must match: push both heat breaks all the way up before Auto Calibration, and if it asks you to raise or lower one of them, do it carefully.
If one side lays its layers too high or too low while the other looks correct, this physical alignment is the first thing to check.
Use a Raft
Use a raft by default in both modes. It gives a stable, even foundation across the large area both heads cover, smooths out minor bed-leveling variation, and greatly improves first-layer adhesion. In PrusaSlicer, turn one on under Print settings > Support material > Raft layers; use at least 3 layers in Duplicate Mode.
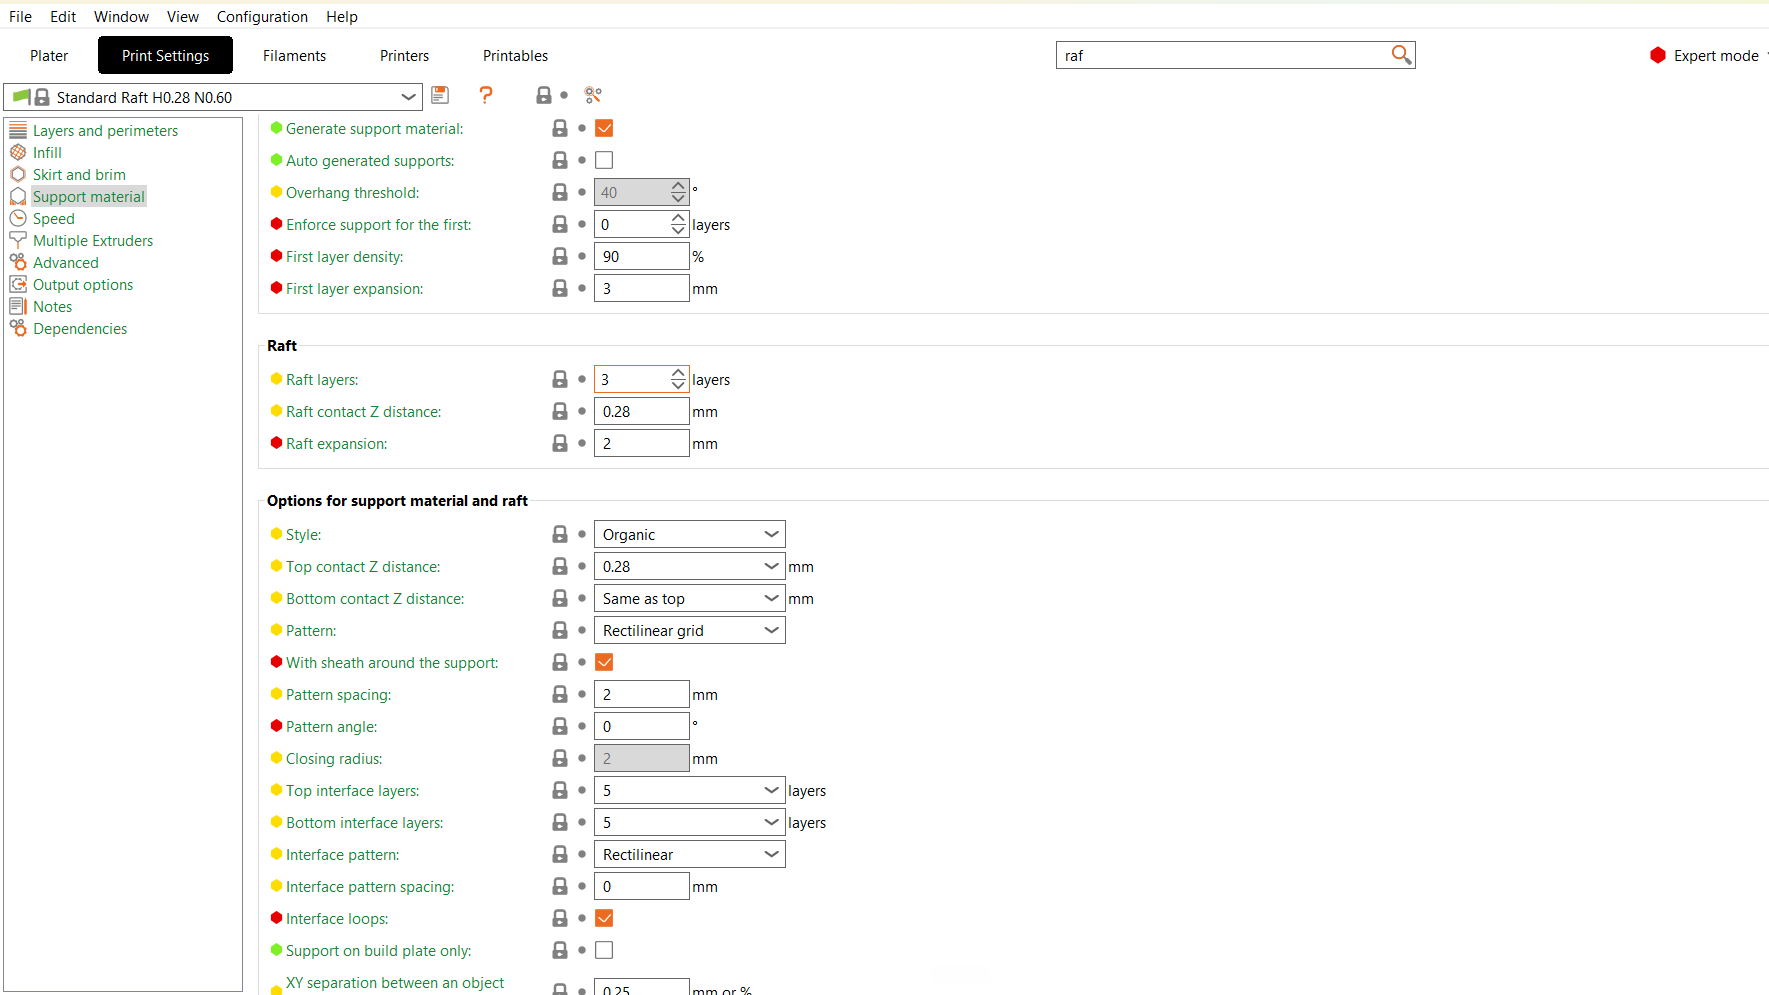
Turning the raft on and off, and changing its thickness, is the same single field. Raft layers at 0 means no raft at all. Any value above 0 switches it on and sets how many layers thick it is. Three or more in Duplicate Mode.
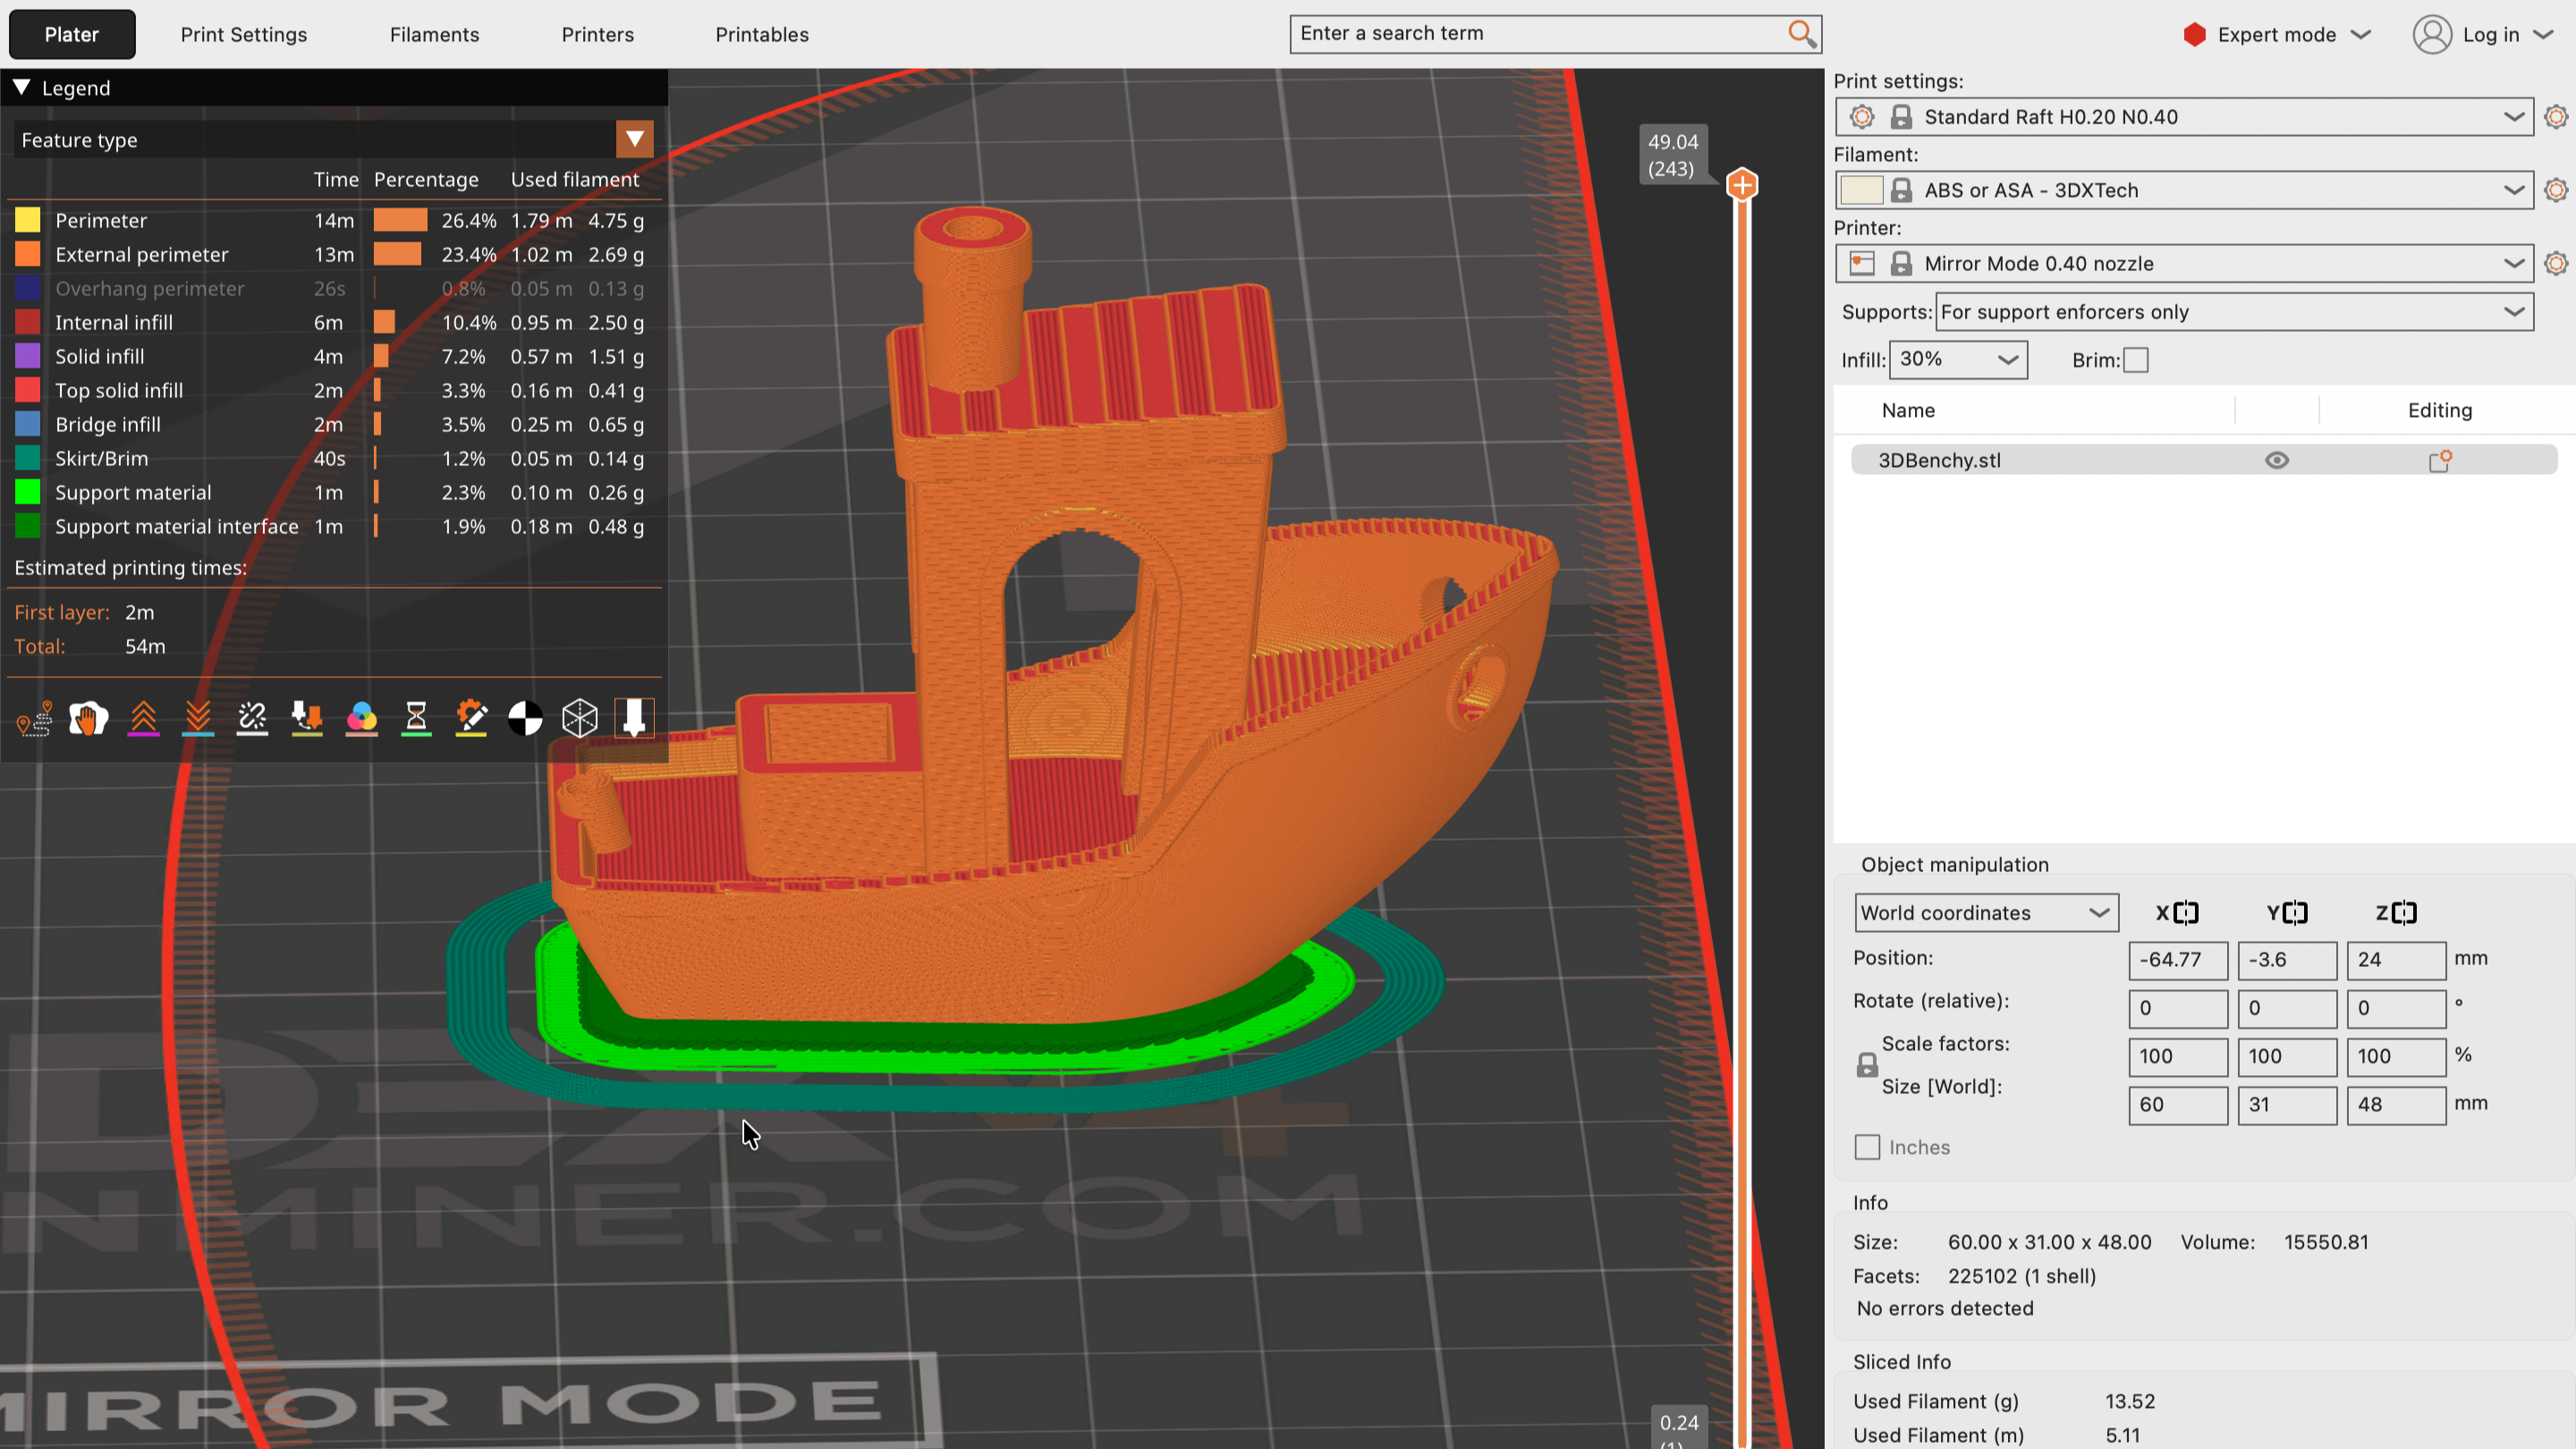
Leave the layer height alone
Change the number of raft layers, not the layer height. The height is set by the profile for a reason: it is tuned so the raft separates cleanly from the finished part. Raising or lowering it tends to either fuse the raft to the part or leave it too loose to hold the part down.
If you are experienced and want to experiment, do it on a test print first. It is not a setting to change on a job that matters.
You can try without one only for a single part with a large, flat footprint, and only if you are ready to watch the first layer closely and dial in First Layer Flow Calibration. For most prints, use a raft.
First Layer Flow Calibration
A good first layer needs the right amount of material: enough to squish the lines together with no gaps and no buildup. This matters most in Duplicate Mode, where automatic bed leveling is off.
Print a single-layer test and adjust the slicer's Initial Layer Flow until the lines fuse cleanly. You can also nudge extrusion live in the Web Interface under Status > Extrusion Factors, but that only affects the current layer and resets on the next one.
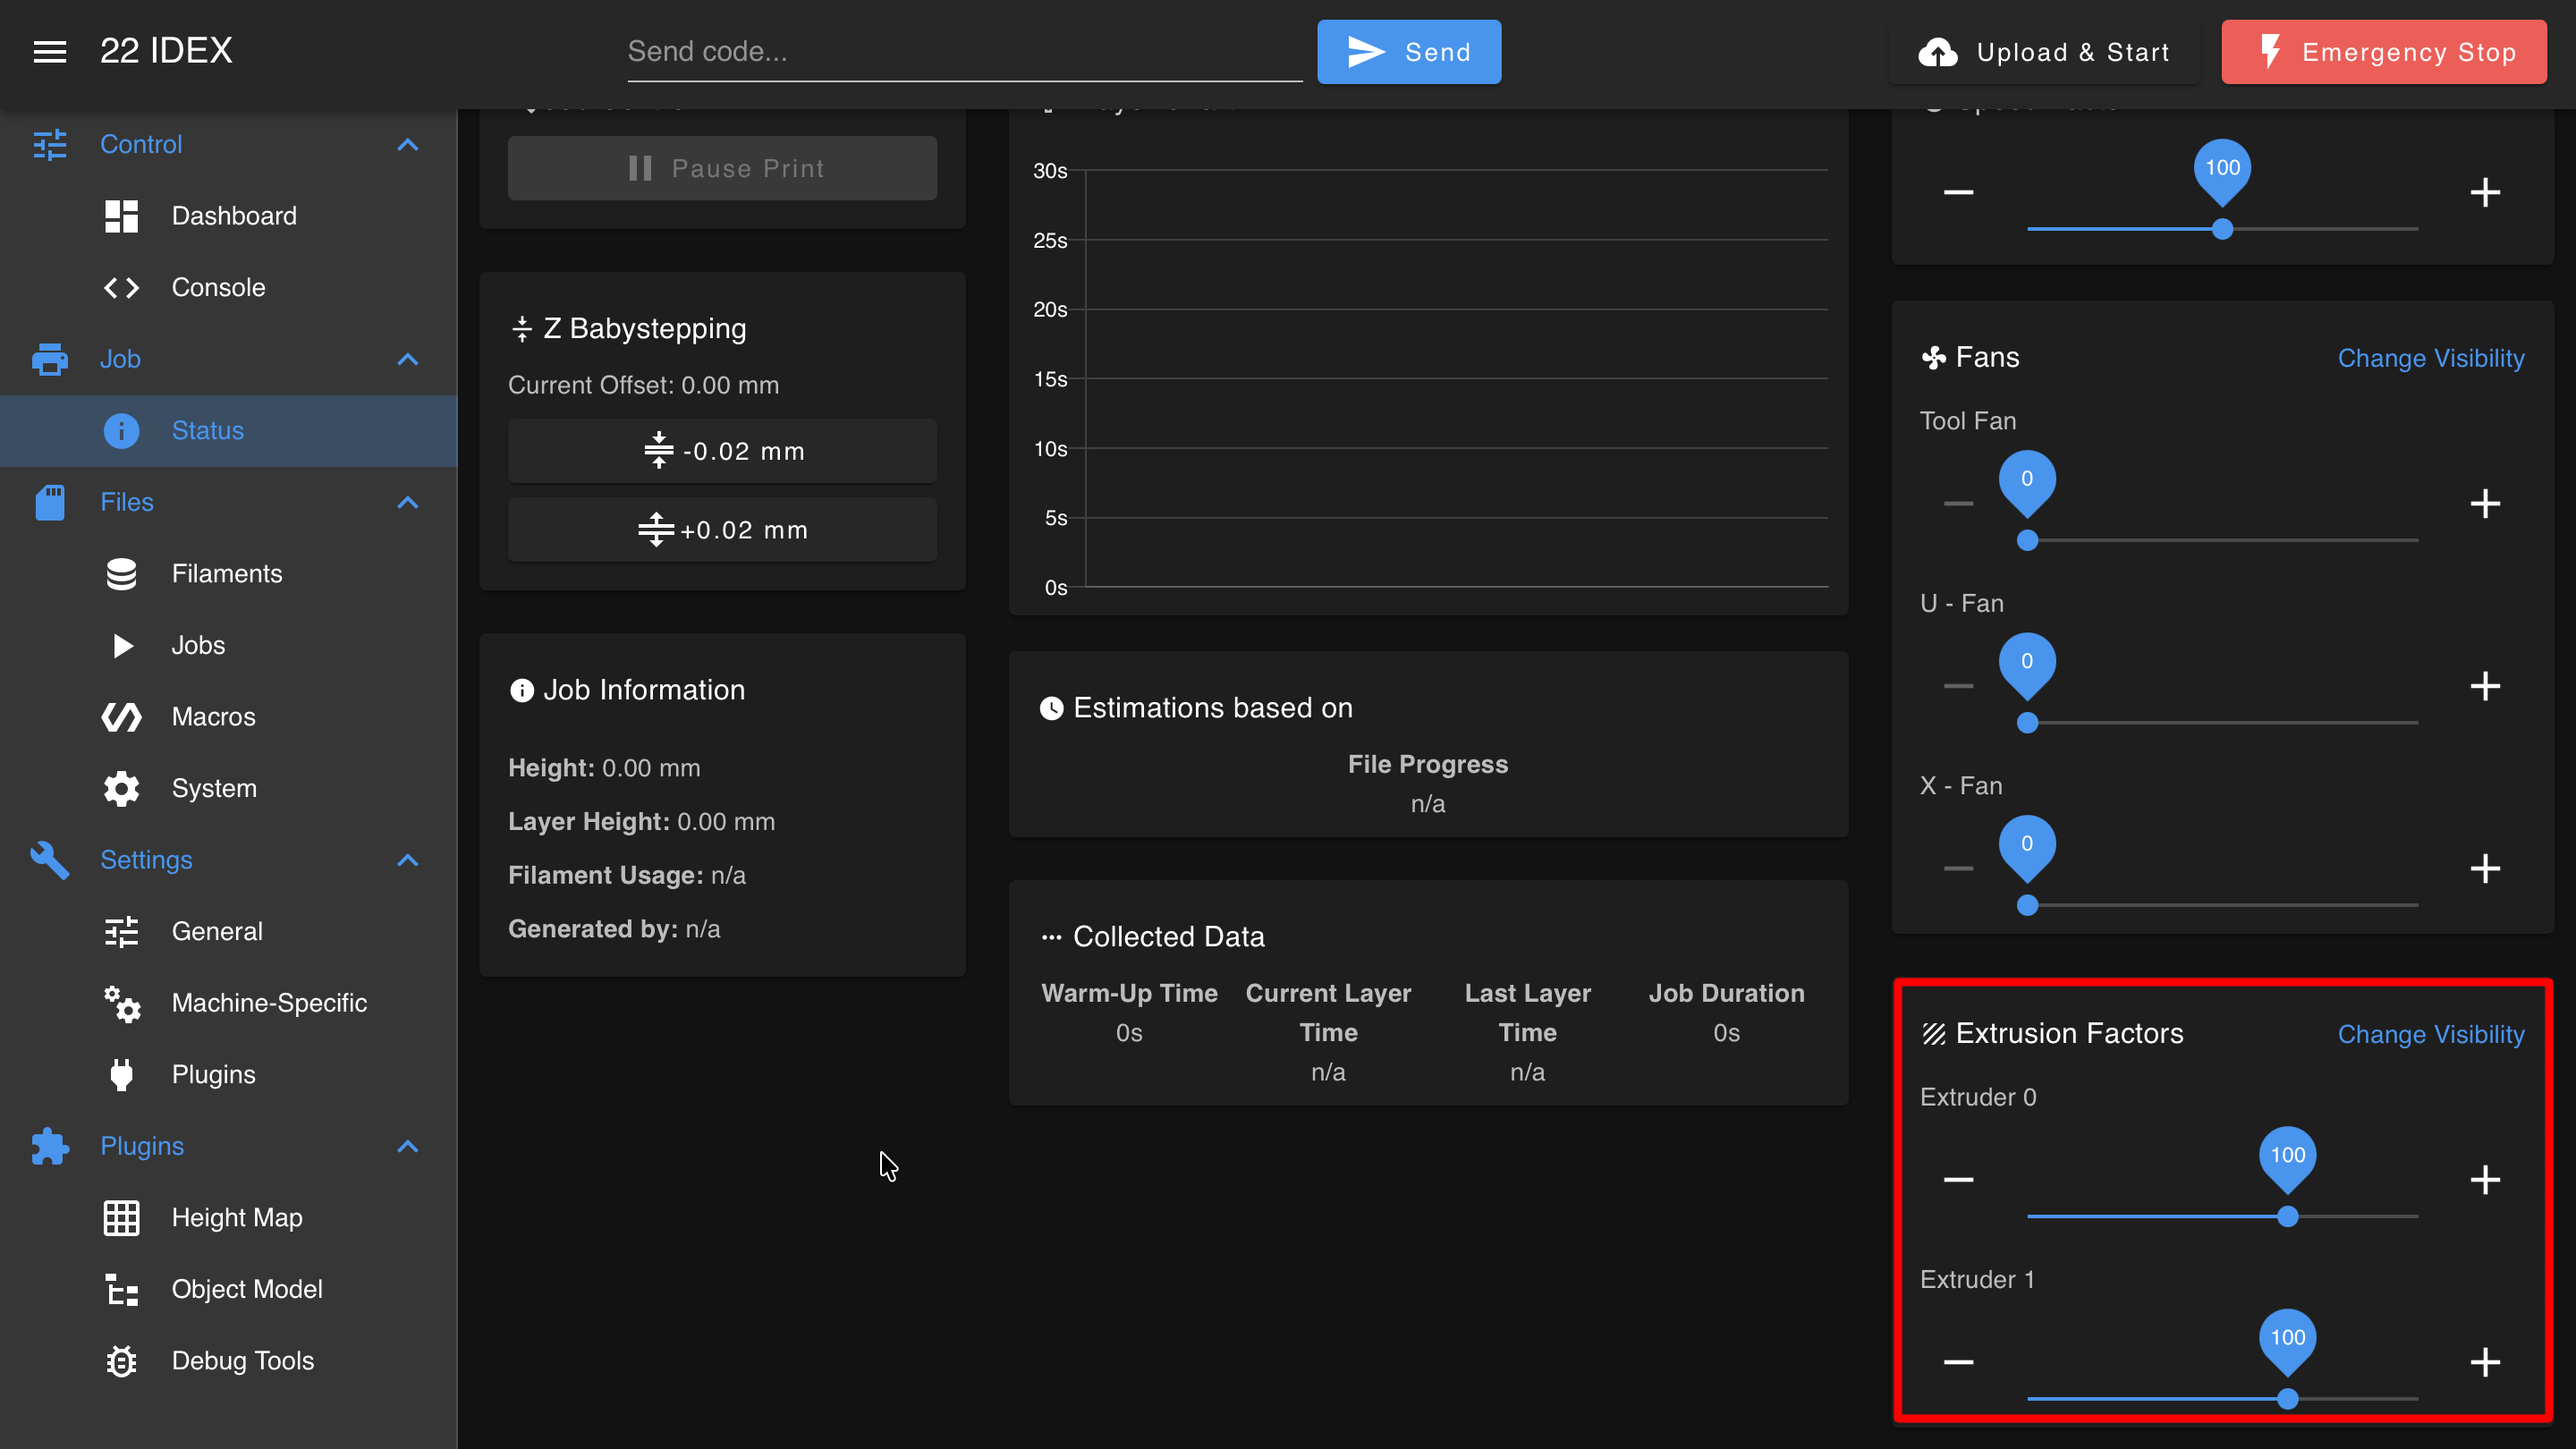
Don't skip this step for reliable IDEX prints. See the First Layer Flow Calibration Guide.
Mirror Mode
The two heads move as mirror images, reflected across the center line of the bed: one prints your part on the left, the other prints the reflected copy on the right. Automatic bed leveling (height map) stays active in this mode, so it helps level the first layer for both parts.
In the slicer's Printer preset dropdown, select the Mirror Mode preset for your nozzle size.
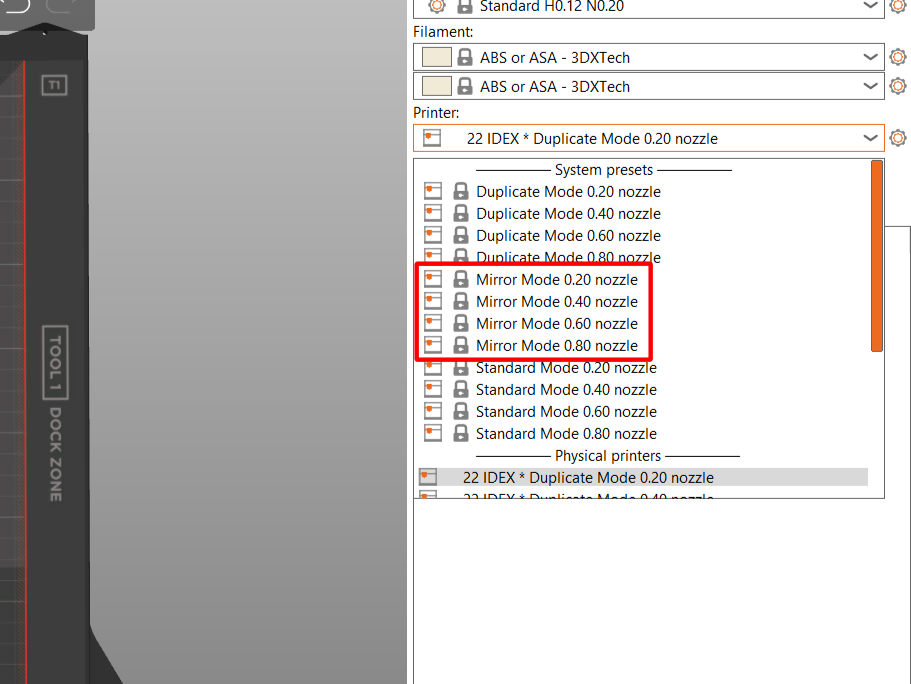
Place your part inside the highlighted zone below.
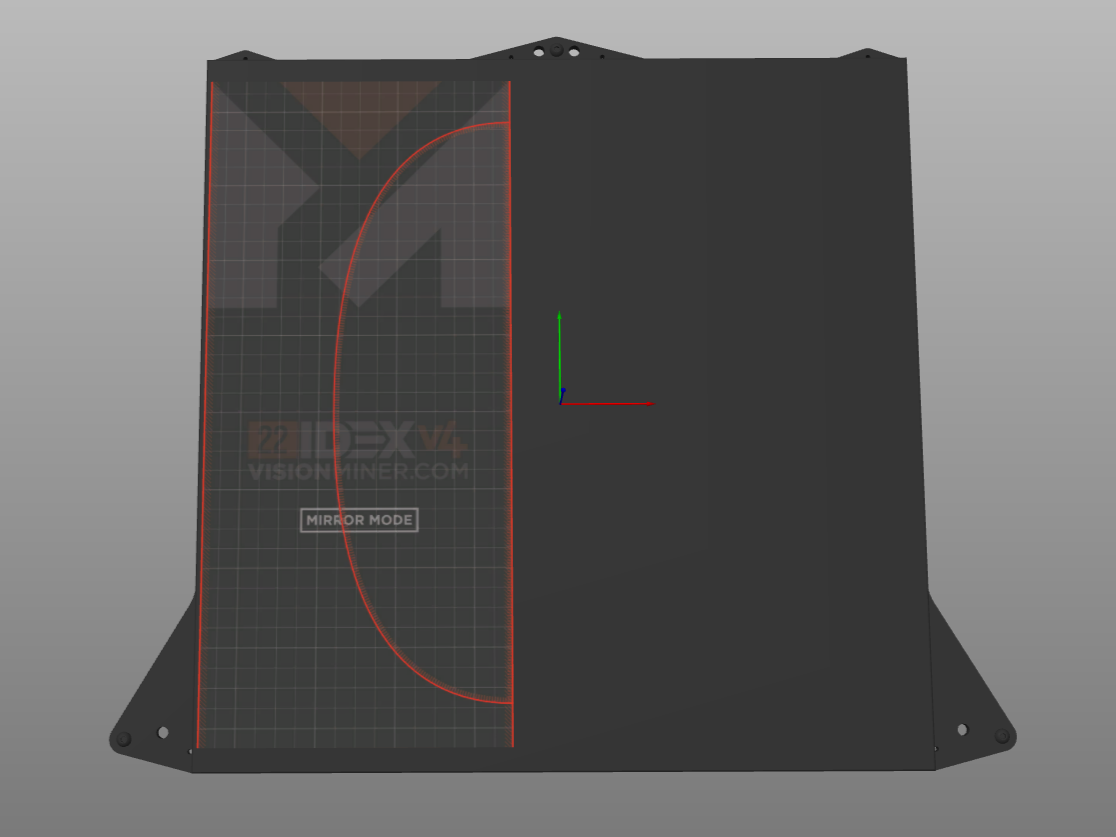
For where to position the part inside this zone, see Part Placement, Mirror Mode.
Duplicate Mode
Both heads move in tandem at a fixed spacing, printing two identical copies at the same time. This is the mode that needs the most care from you.
No auto-leveling in Duplicate Mode
Duplicate Mode turns off the height map, so the printer won't correct the bed for you. A clean first layer depends entirely on your manual setup: a level bed, an accurate Z-offset, good First Layer Flow Calibration, and a raft.
In the slicer's Printer preset dropdown, select the Duplicate Mode preset for your nozzle size.
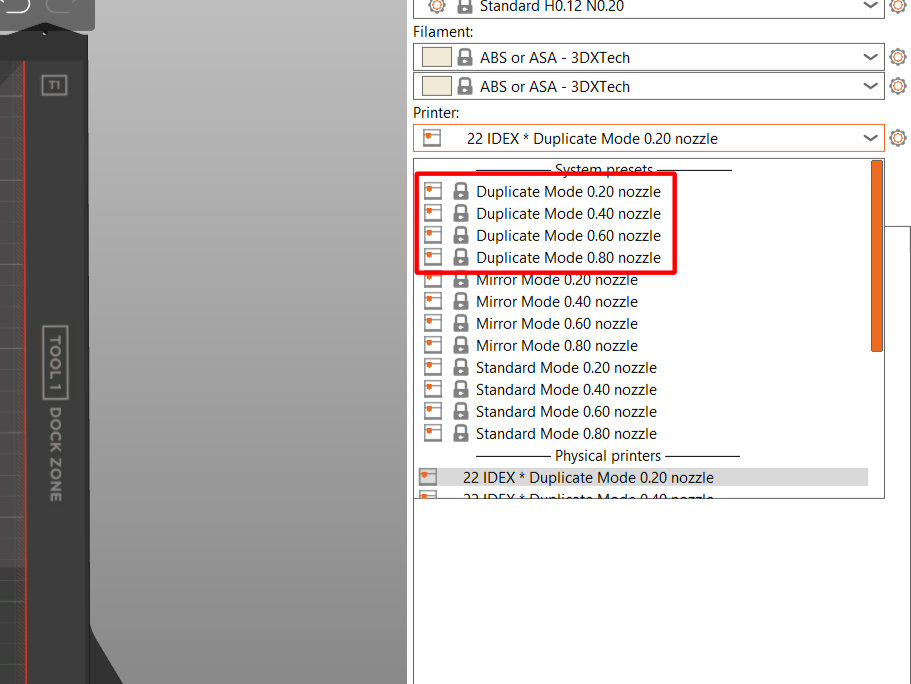
Place your part inside the highlighted zone below.
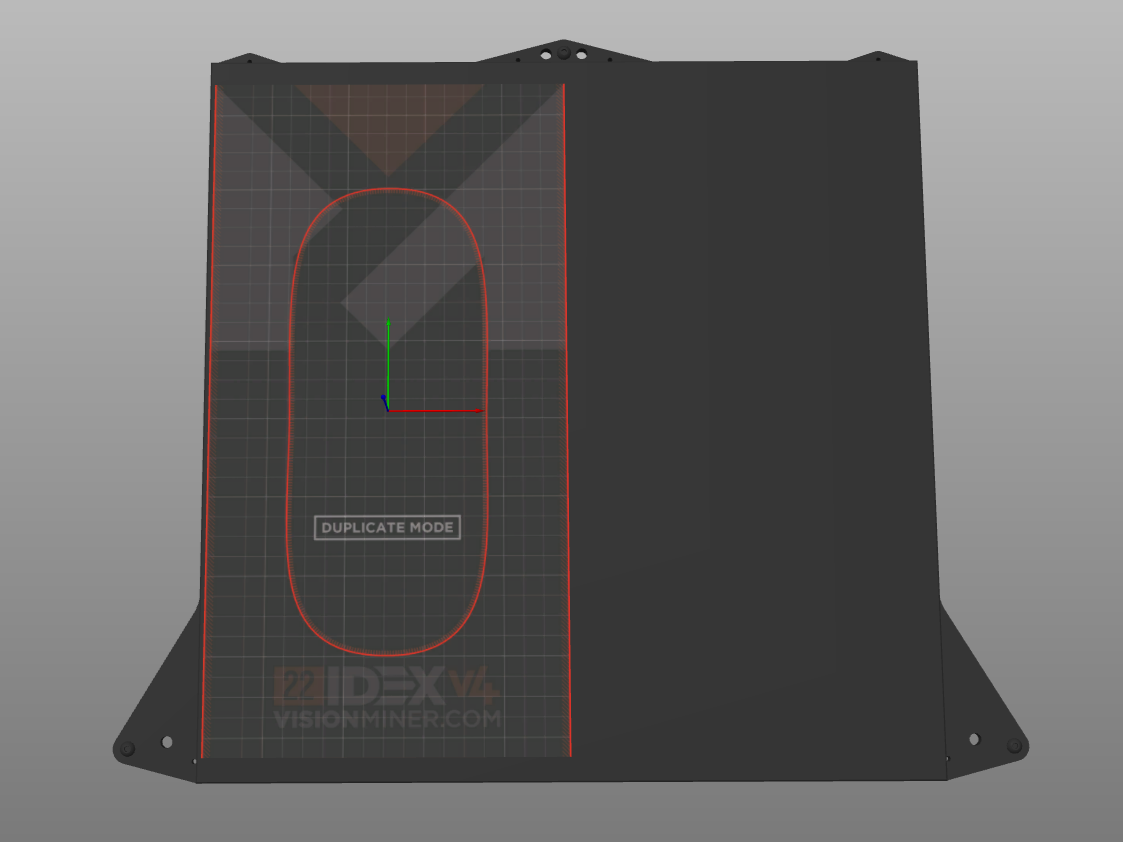
For where to position the part inside this zone, see Part Placement, Duplicate Mode.
Troubleshooting
Support
If you could not find an answer here, reach out to our support team.